xTool F2 Ultra UV Mirror Settings: Back Coating, Front Frost & Acrylic Mirror (2026)
Sourced xTool F2 Ultra UV mirror settings for removing the back coating, frosting the glass face, and engraving acrylic mirror sheet, plus a test grid and reflection safety.
17 min read
On this page
- Short answer
- Quick answer: the best starting settings
- xTool F2 Ultra UV mirror settings chart
- A test grid around the published bitmap
- Other machines (not F2 Ultra UV numbers)
- What do the settings mean?
- Which mirror are you engraving?
- Can the F2 Ultra UV engrave a mirror from the back?
- Can the F2 Ultra UV frost the front of a mirror?
- What about acrylic mirror sheet?
- How should I set up a mirror job?
- Step-by-step: engraving a mirror on the F2 Ultra UV
- 1. Name the job
- 2. Protect the bed
- 3. Place and focus
- 4. Mirror the artwork
- 5. Grid, then the real piece
- 6. Wipe both sides
- What should I do if the mark looks wrong?
- Safety
- What I couldn't confirm
- FAQ
- Can the xTool F2 Ultra UV engrave a mirror?
- What F2 Ultra UV settings remove the back coating?
- Should I engrave the front or the back of a mirror?
- Do I have to mirror the design?
- Why do lines appear on the mirror after the coating comes off?
- Can I frost the front of a mirror with the F2 Ultra UV?
- How do I engrave acrylic mirror sheet?
- Is a mirror dangerous for the F2 Ultra UV?
- Related guides
- Final thoughts
- Sources and further watching
Last updated: November 21, 2026
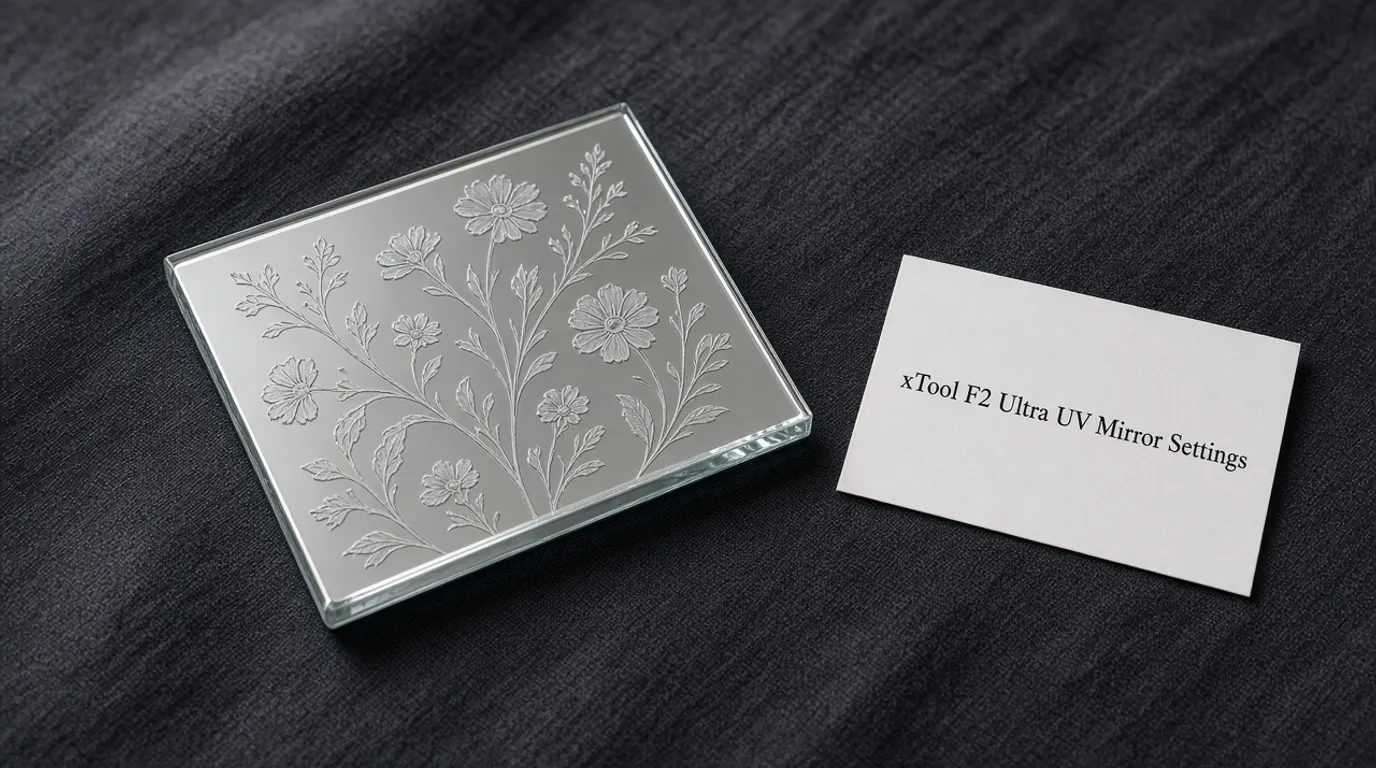 A craft mirror reads as a pale etch when the back coating is removed and you look through the glass. (AI-generated example.)
A mirror is not one material. A craft mirror is glass with a painted silver layer on the back. Acrylic mirror sheet is plastic with a reflective coating, and xTool treats that as its own job. The front of a glass mirror is ordinary glass until you decide to frost it.
I could not find an official F2 Ultra UV preset page that prints power and speed for "mirror." What is published is a maker's bitmap recipe for removing the back coating, one community Material Lab row that nobody has confirmed on that page, and xTool's note on which side of mirror acrylic to engrave. Front frosting belongs with the glass settings. Treat every row as a starting point.
Quick facts
- Machine: xTool F2 Ultra UV, enclosed 5W, 355 nm UV galvo
- Back-coating removal (published bitmap): 90% power, dot duration 650, 500 DPI, 1 pass, 40 kHz, Jarvis, mirror face down (Average But Inspired)
- Community 3 mm mirror row, unconfirmed: defocus 1.5 mm, dot duration 500, 85% power, 600 DPI, 1 pass, 40 kHz, Jarvis (Atomm Material Lab)
- Front frost: no published F2 Ultra UV mirror-face recipe. Start from the glass chart
- Acrylic mirror sheet: engrave the rough back and mirror the art. No F2 Ultra UV power or speed in xTool's note (article 2766)
- Bed protection: baseplate or riser, plus black cardstock, before the coating comes off
- Frequency window: 40–150 kHz (xTool Support 2699)
- Biggest risk: a reflective face sending the beam back, or the beam marking the bed through clear glass
- Safety: lid closed, extraction on, 355 nm goggles if the lid cannot close
Short answer
The xTool F2 Ultra UV can mark a mirror, but the back coating and the front glass are different jobs. The published F2 Ultra UV recipe removes the painted backing: 90 percent power, a dot duration of 650, 500 DPI, one pass, 40 kHz, and Jarvis, with the mirror face down on black cardstock over the baseplate. A community 3 mm row lists 85 percent power, 500 microseconds, 600 DPI, one pass, 40 kHz, Jarvis, and a 1.5 mm defocus, and that page has no confirmed result. Front frosting should start from the glass chart, not from the coating-removal row. Acrylic mirror sheet is a third setup: xTool says engrave the rough back and mirror the artwork, and it does not publish an F2 Ultra UV power and speed. Test a spare, and do not fire straight down through a reflective face onto the bare bed.
Quick answer: the best starting settings
To remove the back coating, use the bitmap row Bre published after testing craft mirrors on the F2 Ultra UV. Mode is Engrave. Power is 90%. Dot duration is 650. DPI is 500. Passes are 1. Frequency is 40. Bitmap mode is Jarvis. She laid the mirror face down on black cardstock on the baseplate, reflected the art horizontally when the design had to read correctly, and each mirror took about six minutes. xTool measures dot duration in microseconds (article 2699), so that panel value of 650 is 650 µs. Frequency on this machine is in kilohertz, so 40 is 40 kHz.
A second F2 Ultra UV row exists, and it is not confirmed. The Atomm Material Lab entry "Mirror," machine F2 Ultra UV, 3 mm, says: defocus 1.5 mm before processing, dot duration 500, power 85, DPI 600, pass 1, frequency 40, bitmap Jarvis. The page says nobody has shared a result yet. Use it as a neighbor on a grid, not as a finished preset.
To frost the front, I did not find a published F2 Ultra UV recipe for the glass face of a silvered mirror. Start from one row on the glass chart, such as the light frost at 35% power, 300 mm/s, 1 pass, 600 DPI, or the stronger frost at 90% power, 150 mm/s, 1 pass. Keep that row together. The silver behind the glass is still reflective.
Acrylic mirror sheet follows xTool's mirror-processing note: rough side up, artwork mirrored, sheet held off the metal bed, then flip so the smooth side faces out. That page does not give power, speed, lines per centimetre, or frequency.
xTool's own conversion is 100 lines/cm = 254 DPI (article 2699). A 500 DPI bitmap is about 197 lines/cm by that rule. That is a unit conversion, not a second tested recipe.
xTool F2 Ultra UV mirror settings chart
Keep each row's numbers together. Do not mix a bitmap dot duration with a vector speed from another material.
| Job | Power | Speed or dot duration | Lines or DPI | Passes | Frequency | Setup | Source |
|---|---|---|---|---|---|---|---|
| Craft mirror, remove back coating | 90% | 650 dot duration | 500 DPI | 1 | 40 kHz | Face down, Engrave, Jarvis | Average But Inspired, F2 Ultra UV |
| 3 mm mirror, community row | 85% | 500 dot duration | 600 DPI | 1 | 40 kHz | Defocus 1.5 mm, Jarvis | Atomm Material Lab, unconfirmed |
| Front glass, light frost | 35% | 300 mm/s | 600 DPI | 1 | not stated | Glass face, from the glass chart | Glass settings |
| Front glass, strong frost | 90% | 150 mm/s | not stated | 1 | not stated | Glass face, from the glass chart | Glass settings |
| Acrylic mirror sheet | not stated | not stated | not stated | not stated | not stated | Rough back up, art mirrored, sheet off the bed | xTool article 2766 |
| Legal frequency window | - | - | - | - | 40–150 kHz | - | xTool Support 2699 |
Note: The first two rows are bitmap jobs. They do not publish a millimetres-per-second speed. The glass rows are vector-style starts for the front face. Do not type 300 mm/s into a bitmap field, and do not type 650 into a speed field.
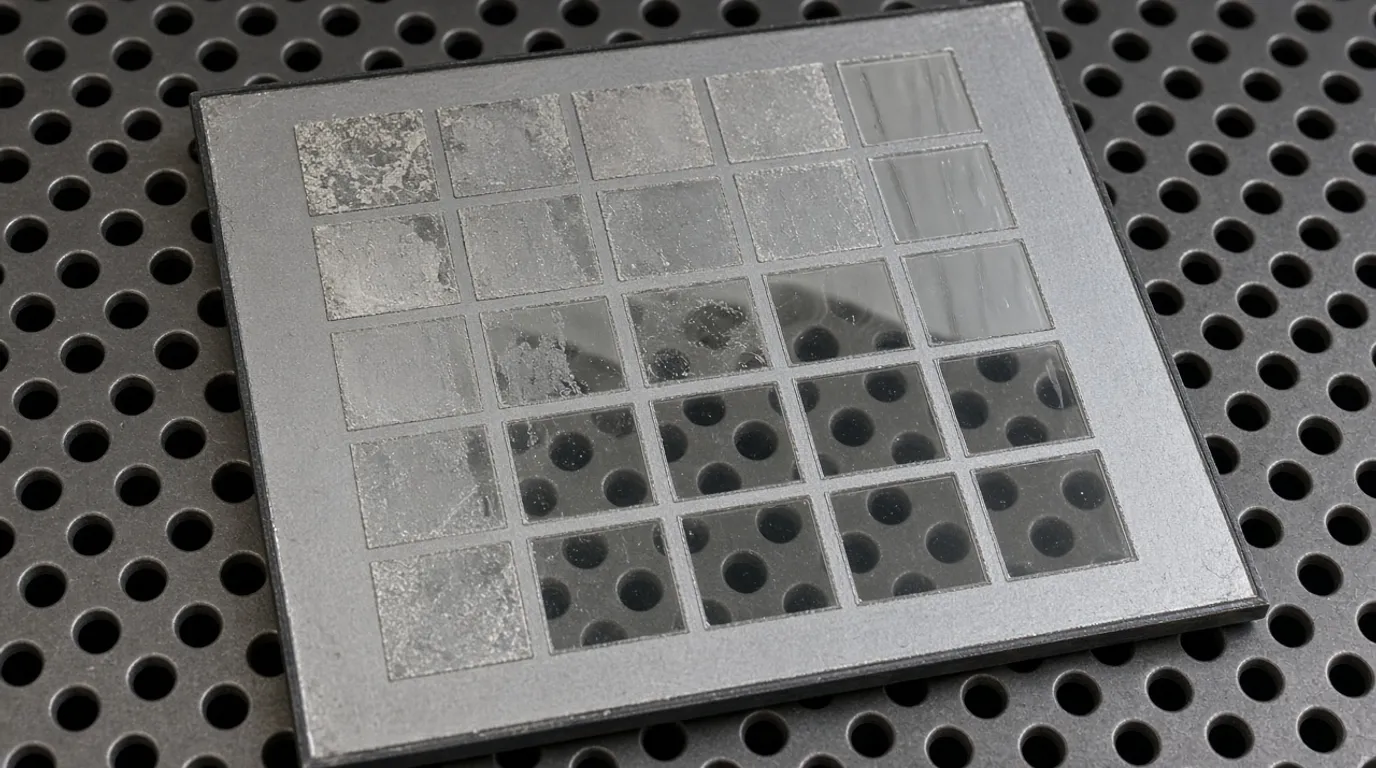 A small grid on a spare mirror shows when the coating is gone and when the glass is only scorched. (AI-generated example.)
A test grid around the published bitmap
This is a suggested grid built from the two sourced bitmap rows. It is not a third published recipe.
- Power: 80%, 85%, 90%
- Dot duration: 500 and 650
- DPI: 500 and 600
- Fixed: 1 pass, 40 kHz, Jarvis
- Cells: one short word or a 10 mm square on a spare mirror from the same pack
- Optional neighbor: the 1.5 mm defocus from the Material Lab entry, changed by itself
xTool Studio's Material test array is the tool for vector power and speed (article 2698). For a bitmap, change one field at a time so you still know which cell won.
Other machines (not F2 Ultra UV numbers)
| Machine | What the source says | Why it does not transfer |
|---|---|---|
| FSL 5W 355 nm | Glass mark at 100% power, 100 mm/s, 45 kHz, focus 2–3 mm into the glass | Different galvo and lens. Useful only as a reminder that focus sits in a short window |
| ComMarker Omni, mirror acrylic | A blog tip of about 60–70% power and 1 pass so the coating is not cut away | Different UV source and software |
| xTool F1 Ultra UV, 2W | A community page lists mirrored acrylic in millimetres per minute | 2W, and the speed unit is not the F2 Ultra UV's mm/s |
What do the settings mean?
- Power (%): 1–100 on this machine. The published coating-removal row sits at 90%. The unconfirmed 3 mm row sits at 85%.
- Dot duration (µs): time on each bitmap dot. The coating-removal row uses 650. The Material Lab row uses 500. xTool says too much dot duration can blow a mark out white (article 2699).
- Speed (mm/s): used on the glass-face rows, not on those two bitmap rows.
- DPI and lines per cm: 500 DPI and 600 DPI are the published bitmap densities. 100 lines/cm equals 254 DPI.
- Passes: both mirror bitmap rows are one pass. A second pass can cut into the glass after the paint is already gone.
- Frequency (kHz): 40–150. Both published mirror rows use 40 kHz.
- Jarvis: the bitmap mode both mirror rows name. It is a dither, not a power setting.
- Defocus: the Material Lab note says 1.5 mm before processing. Average But Inspired used auto-measure on the back instead. Do not stack both until a scrap tells you which one clears the paint.
Which mirror are you engraving?
| Piece | What the laser hits | Where to start |
|---|---|---|
| Craft or décor mirror, back coating | Paint and silver on the back of the glass | Average But Inspired row, face down |
| Same mirror, front glass | The glass face, coating still behind it | Glass chart, and keep the reflection off the module |
| Beveled mirror | Thick edges and a flat center | Auto-measure the face you will mark, not the bevel |
| Acrylic mirror sheet | Rough back coating on plastic | xTool article 2766. No F2 number |
| Unknown or tempered glass | You cannot see the temper from the silver | Do not run it. The glass guide says to avoid tempered glass |
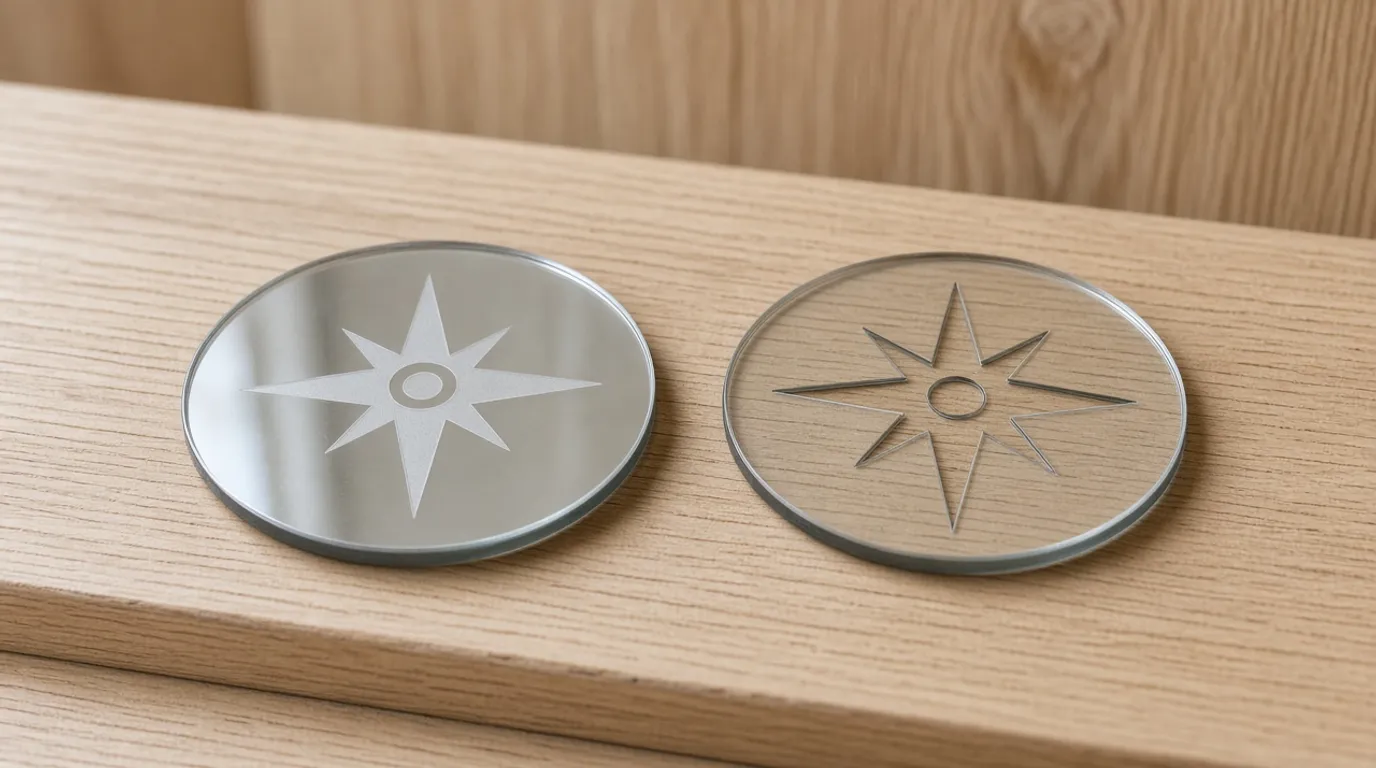 Front frost stays on the glass. Back-coating removal opens a window through the silver. (AI-generated example.)
Can the F2 Ultra UV engrave a mirror from the back?
Yes. That is the job with a published F2 Ultra UV recipe.
Bre's steps, in order: put the baseplate or riser in, or the beam marks the inside of the machine once it breaks through the colored coating. Lay black cardstock on that plate. Put the mirror face down. Refresh the camera background. Auto-measure the thickness. Enter the bitmap row above. Reflect the design horizontally if it has to read from the front. Process, then wipe both sides.
She wrote that without the black paper, laser lines showed up on the mirror because light reflected through the glass after the backing was gone. Aurora Tech saw the same kind of bed lines on clear glass that sat on the slats, and soap and water did not remove them (review video).
The Atomm 3 mm entry is the other F2 Ultra UV number set. It adds a 1.5 mm defocus and drops power and dot duration a step. Nobody has marked that entry as confirmed. Grid it beside Bre's row on a spare.
Can the F2 Ultra UV frost the front of a mirror?
The front is glass. The glass guide is the chart for that face: a light frost around 35% power, 300 mm/s, 1 pass, 600 DPI, and a stronger frost around 90% power, 150 mm/s, 1 pass. Clear glass can fool autofocus. The usual fix on this site is paper or tape on the spot, then account for that thickness. Focal depth on glass is only about 2–3 mm.
I am not going to pretend those glass rows were run on a silvered mirror. The coating behind the face still reflects. Keep the job off the dead center of the field. xTool support, answering a question about reflective surfaces on the F2 Ultra UV, said placing the material off center can help prevent lens damage. A maker in the same kind of thread warned that firing straight down on a mirror sent the beam back at the machine.
If the mark you want is a window in the silver, you are on the back-coating row, not this one.
What about acrylic mirror sheet?
xTool article 2766 is about mirror acrylic, not household glass.
Put the rough side up. That is the side the laser engraves. Mirror the artwork first. If you skip the flip, the pattern reads backward when you turn the smooth colored side out. Suspend the sheet so it barely touches the metal bed. xTool says that cuts heat buildup and internal cracking. After the job, flip the sheet so the smooth side faces out.
The article does not publish power, speed, passes, or frequency for the F2 Ultra UV. Clear and colored acrylic numbers live on the acrylic settings page. They are for acrylic, not for a mirrored coating. Use them only as the first square of a grid on scrap mirror sheet, and stop if the coating bubbles.
How should I set up a mirror job?
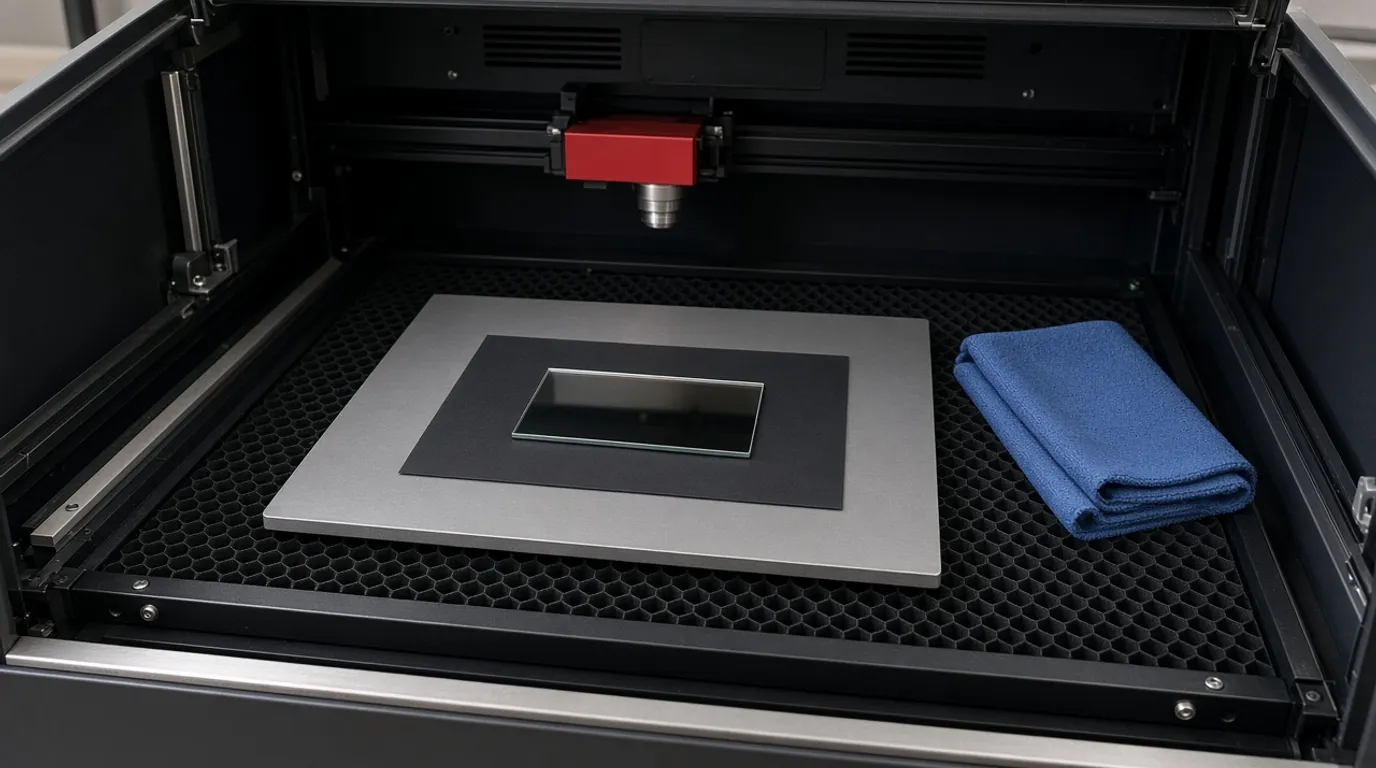 Black card on a riser is the setup the published coating-removal job used, so the beam does not print the bed through the glass. (AI-generated example.)
Step-by-step: engraving a mirror on the F2 Ultra UV
1. Name the job
- Back coating, front frost, or acrylic mirror sheet. Write it down before you open the file.
2. Protect the bed
- For a glass mirror, install the baseplate or riser, then black cardstock. Average But Inspired treated a missing riser as a way to damage the machine.
3. Place and focus
- Coating removal: face down, auto-measure the back.
- Front frost: tape or paper on the glass, measure, then account for that thickness. The method is in How to Focus a UV Laser Correctly.
- Keep the piece off the center of the field.
4. Mirror the artwork
- Reflect horizontally when the reader looks through the front. xTool Studio's Reflect control is the same idea as the screen note in article 3025.
5. Grid, then the real piece
- One published row, then neighbors, on a spare from the same pack. How to calibrate the F2 Ultra UV is the grid method. Close the lid and leave extraction on.
6. Wipe both sides
- Let it cool. Wipe dust. Check that text reads correctly from the side you will display.
What should I do if the mark looks wrong?
| Problem | Likely cause | Fix |
|---|---|---|
| Paint still there | Too little energy, or focus on the wrong face | Stay on the bitmap row and move one step toward 90% and 650 µs. Confirm you marked the back |
| Lines across the glass | Bed or honeycomb printing through after the coating opened | Black cardstock on the riser, then a new spare |
| Design reads backward | Artwork was not reflected | Reflect horizontally and run a scrap word |
| Front frost is faint | Glass row too fast, or focus on the silver instead of the glass | Refocus the face you meant to mark. Try the stronger glass row on a spare |
| Coating bubbles on acrylic mirror | Too much heat in the plastic | Stop. xTool's note is a light removal of the rough side, with the sheet off the metal bed |
| Mark fades mid-job | Reflection heating the module | Pause, let it cool, and move the piece off center |
| Autofocus misses | Clear glass or a bevel | Tape the measuring spot, or measure the flat, not the bevel |
| A second pass cuts the glass | The paint was already gone | Stay at one pass until a scrap needs more |
Safety
- Keep the lid closed. If it cannot close, the F2 Ultra UV safety page calls for goggles rated for 355 nm.
- A mirror is a reflector. Off center is the placement xTool support described for reflective work. Do not aim the beam straight back at the module.
- The baseplate is there so a job that breaks through the coating does not engrave the machine.
- Run extraction. Coating and paint make fumes. Atomm's general processing note says to wait until the smoke has cleared before you open the lid.
- If the mirror is tempered, laminated, or you cannot say what the glass is, do not run it.
- Fabric, acrylic, and crystal are different charts. A mirror row does not transfer to them.
What I couldn't confirm
- An official F2 Ultra UV preset that prints power and speed for household mirrors. I did not find one.
- A published front-frost recipe run on a silvered mirror. The glass chart is the stand-in.
- Power and speed for acrylic mirror sheet on this machine. Article 2766 describes the side and the flip only.
- Whether the Atomm 3 mm row clears the coating. The page itself has no confirmed result.
- A vector millimetres-per-second speed for the back-coating job. Both F2 Ultra UV mirror rows are bitmap settings.
FAQ
Can the xTool F2 Ultra UV engrave a mirror?
Yes, in more than one way. The published F2 Ultra UV recipe removes the painted backing from the back of a craft mirror. Frosting the front glass is a separate glass job. Acrylic mirror sheet is a third material.
What F2 Ultra UV settings remove the back coating?
Bre at Average But Inspired published Engrave mode at 90% power, dot duration 650, 500 DPI, 1 pass, 40 kHz, and Jarvis, with the mirror face down. A community Material Lab entry lists 85% power, 500 microseconds, 600 DPI, 1 pass, 40 kHz, and Jarvis with a 1.5 mm defocus, and that page has no confirmed result.
Should I engrave the front or the back of a mirror?
Engrave the back when you want to remove the silver or paint so the design reads through the glass. Engrave the front when you want a frosted mark on the glass and the coating left in place. Do not mix those setups.
Do I have to mirror the design?
Yes, if you will read it through the front. Average But Inspired and xTool's mirror-acrylic note both say to reflect the artwork horizontally. Skip the flip only when you are marking the face you will look at directly.
Why do lines appear on the mirror after the coating comes off?
Once the backing is gone, the beam and the bed can print through the glass. Average But Inspired fixed that by putting black cardstock on the baseplate under the mirror. Aurora Tech saw the same bed lines on clear glass that sat on the slats.
Can I frost the front of a mirror with the F2 Ultra UV?
The front is glass, so start from the glass chart, not from the coating-removal row. I did not find a published F2 Ultra UV recipe that frosts the face of a silvered mirror. Test a spare, and keep the reflective face from firing straight back into the module.
How do I engrave acrylic mirror sheet?
xTool says to put the rough back side up, mirror the artwork, and keep the sheet off the metal bed. After engraving, flip it so the smooth colored side faces out. That article does not publish power, speed, or frequency for the F2 Ultra UV.
Is a mirror dangerous for the F2 Ultra UV?
A reflective face can send the beam back at the module. xTool support says placing the material off center helps, and makers warn against firing straight down on a mirror. Use the enclosure closed, put a riser and black card under a glass mirror, and stop if the mark fades mid-job.
Related guides
- xTool F2 Ultra UV glass settings
- xTool F2 Ultra UV acrylic settings
- xTool F2 Ultra UV crystal settings
- xTool F2 Ultra UV fabric settings
- How to focus a UV laser
- How to calibrate the xTool F2 Ultra UV
Final thoughts
Pick the side before you pick the number. Back-coating removal on a craft mirror has a published F2 Ultra UV bitmap row: 90% power, dot duration 650, 500 DPI, one pass, 40 kHz, Jarvis, face down on black card over the riser. Front frost starts on the glass chart. Acrylic mirror sheet starts with the rough side and a mirrored file, and it still needs a scrap grid because xTool did not print a power. One spare mirror is cheaper than a marked bed.
Sources and further watching
- Average But Inspired – DIY Laser Engraved Mirrors with the xTool F2 Ultra UV: https://averageinspired.com/2026/07/diy-laser-engraved-mirrors-with-the-xtool-f2-ultra-uv-laser.html
- Atomm Material Lab – Mirror, F2 Ultra UV community entry: https://www.atomm.com/materials-lab/community/3711-mirror
- xTool Support – Material mirror processing effects (article 2766): https://support.xtool.com/article/2766
- xTool Support – Processing parameters for the F2 Ultra UV (article 2699): https://support.xtool.com/article/2699
- xTool Support – Processing parameter settings and the material test array (article 2698): https://support.xtool.com/article/2698
- xTool Support – Safety first for the F2 Ultra UV (article 2737): https://support.xtool.com/article/2737
- xTool Support – Engrave a screen on F1 Ultra and F2 Ultra, including Reflect Horizontally (article 3025): https://support.xtool.com/article/3025
- r/xToolOfficial – F2 Ultra UV questions on reflective surfaces, with a reply from xTool support: https://www.reddit.com/r/xToolOfficial/comments/1quf6g6/f2_ultra_uv_questions_round_2/
Further watching (embeds)
- Aurora Tech – "xTool F2 Ultra UV Laser In-Depth Review: Wood, Metal, Glass, Clear Acrylic, 3D Crystal & more": https://www.youtube.com/watch?v=zitSTxV1cJA
- JT Makes It – "xTool F2 Ultra UV: Is This the Easiest UV Laser Engraver to Use? REVIEW And TEST": https://www.youtube.com/watch?v=CfbYbGjU86U
- Chris from L3D – "xTool F2 Ultra UV: Rotary Glass Engraving Tutorial": https://www.youtube.com/watch?v=KfDqz01BBTo
Clear glass on the slats picked up bed lines that washing did not remove, and tape was used so autofocus could see the glass. (Video: Aurora Tech on YouTube.)
A glass engraving from the material library, with tape on the surface before focus. This is a glass test, not a silvered-mirror recipe. (Video: JT Makes It on YouTube.)
Vector text and a Jarvis bitmap are different panels on glass. Use it for the front-frost idea, not for removing mirror backing. (Video: Chris from L3D on YouTube.)
Related settings
- xTool F2 Ultra UV Fabric Settings: Denim, Jeans, Cotton, Canvas & Felt (2026)
- xTool F2 Ultra UV Bamboo Settings: Cutting Boards, Coasters & Plywood (2026)
- xTool F2 Ultra UV Granite Settings: Black Granite, Memorials & Rocks (2026)
- xTool F2 Ultra UV Polycarbonate Settings: PC Sheet, Cases & Cards (2026)
- xTool F2 Ultra UV Cork Settings: Coasters, Sheets & Photo Chart (2026)
- xTool F2 Ultra UV Marble Settings: Black, White & Green Marble Chart (2026)
- xTool F2 Ultra UV Gold Settings: Solid, Gold-Filled & Gold-Plated Jewelry (2026)
- xTool F2 Ultra UV Silver Settings: Sterling Silver Jewelry, Tags & Pendants (2026)
- xTool F2 Ultra UV Copper Settings: Sheet, Tags & Copper-Clad PCB Blanks (2026)
- xTool F2 Ultra UV Aluminum Settings: Bare Sheet, Cards, Tags & ID Plates (2026)
- xTool F2 Ultra UV Silicone Settings: Wristbands, Watch Bands & Phone Cases (2026)
- xTool F2 Ultra UV Titanium Settings: Color Mark, Dark Mark & Jewelry Chart (2026)
- xTool F2 Ultra UV Paper & Cardstock Settings (2026 Guide)
- xTool F2 Ultra UV ABS Settings: Presets, Test Grid & Safety Guide (2026)
- xTool F2 Ultra UV Brass Settings: Tags, Sheet & Coin Emboss Chart (2026)
- xTool F2 Ultra UV Crystal Settings: 3D Inner Engraving Guide (2026)
- xTool F2 Ultra UV Anodized Aluminum Settings: Business Cards & More (2026)
- xTool F2 Ultra UV Leather Settings: Genuine, Faux & Leatherette Chart (2026)
- xTool F2 Ultra UV Stainless Steel Settings: Dark, White, Color & Photo Chart (2026)
- xTool F2 Ultra UV Wood Settings: Basswood, Plywood, Pine & MDF Chart (2026)
- xTool F2 Ultra UV Acrylic Settings: Clear, Black & White Chart (2026)
- xTool F2 Ultra UV Ceramic Settings: Tiles & Mugs Chart (2026)
- xTool F2 Ultra UV Glass Settings: Flat Glass & Rotary Chart (2026)
- xTool F2 Ultra UV PLA Settings: 3D Print Colour Chart (2026)
- xTool F2 Ultra UV Slate Settings: Power, Speed & Frequency Chart (2026)
- xTool F2 Ultra UV Tumbler Settings: Powder-Coated & Stainless (2026)
- Can a UV Laser Engrave Slate?
- Can a UV Laser Engrave Glass?
Keep reading
xTool F2 Ultra UV Fabric Settings: Denim, Jeans, Cotton, Canvas & Felt (2026)
Sourced xTool F2 Ultra UV fabric settings for denim, jeans, cotton tees, canvas and felt, with the Studio denim preset, a starting test grid and safety tips.
Read more20 min read
xTool F2 Ultra UV Bamboo Settings: Cutting Boards, Coasters & Plywood (2026)
Sourced xTool F2 Ultra UV bamboo settings for cutting boards, coasters and plywood, with a starting test grid, glue-line tips and food-safe finishing.
Read more19 min read
xTool F2 Ultra UV Granite Settings: Black Granite, Memorials & Rocks (2026)
Sourced xTool F2 Ultra UV granite settings for polished black and light granite, with a starting test grid, deep relief, paint fill and silica safety.
Read more20 min read