xTool F2 Ultra UV Marble Settings: Black, White & Green Marble Chart (2026)
Sourced xTool F2 Ultra UV marble settings for black, white and green marble coasters and tiles, with xTool's presets, a test grid, fill and emboss tips.
20 min read
On this page
- Short answer
- Quick answer: the best starting settings
- xTool F2 Ultra UV marble settings chart
- A test grid for any marble
- Other UV machines (cross-reference only, not F2 Ultra UV numbers)
- CO2 numbers you should not copy
- What do the settings mean?
- Can the xTool F2 Ultra UV engrave marble?
- Which marble are you engraving?
- How do I get more contrast on white marble?
- Can the F2 Ultra UV emboss or deep-engrave marble?
- How should I set up a marble job?
- What I saw in the videos
- Step-by-step: engraving a marble coaster on the F2 Ultra UV
- 1. Know your marble
- 2. Clean and level
- 3. Focus
- 4. Prepare the art
- 5. Grid, then engrave
- 6. Finish
- What should I do if the mark looks wrong?
- Safety and aftercare
- What I couldn't confirm
- FAQ
- Can the xTool F2 Ultra UV engrave marble?
- What are the best F2 Ultra UV settings for marble?
- Why is my engraving grey on white marble?
- Does black marble or white marble engrave better?
- Should I run two passes on marble?
- Can the F2 Ultra UV do 3D relief on marble?
- Do I need to invert photos for marble?
- How do I clean and seal an engraved marble coaster?
- Related guides
- Final thoughts
- Sources and further watching
Last updated: November 14, 2026
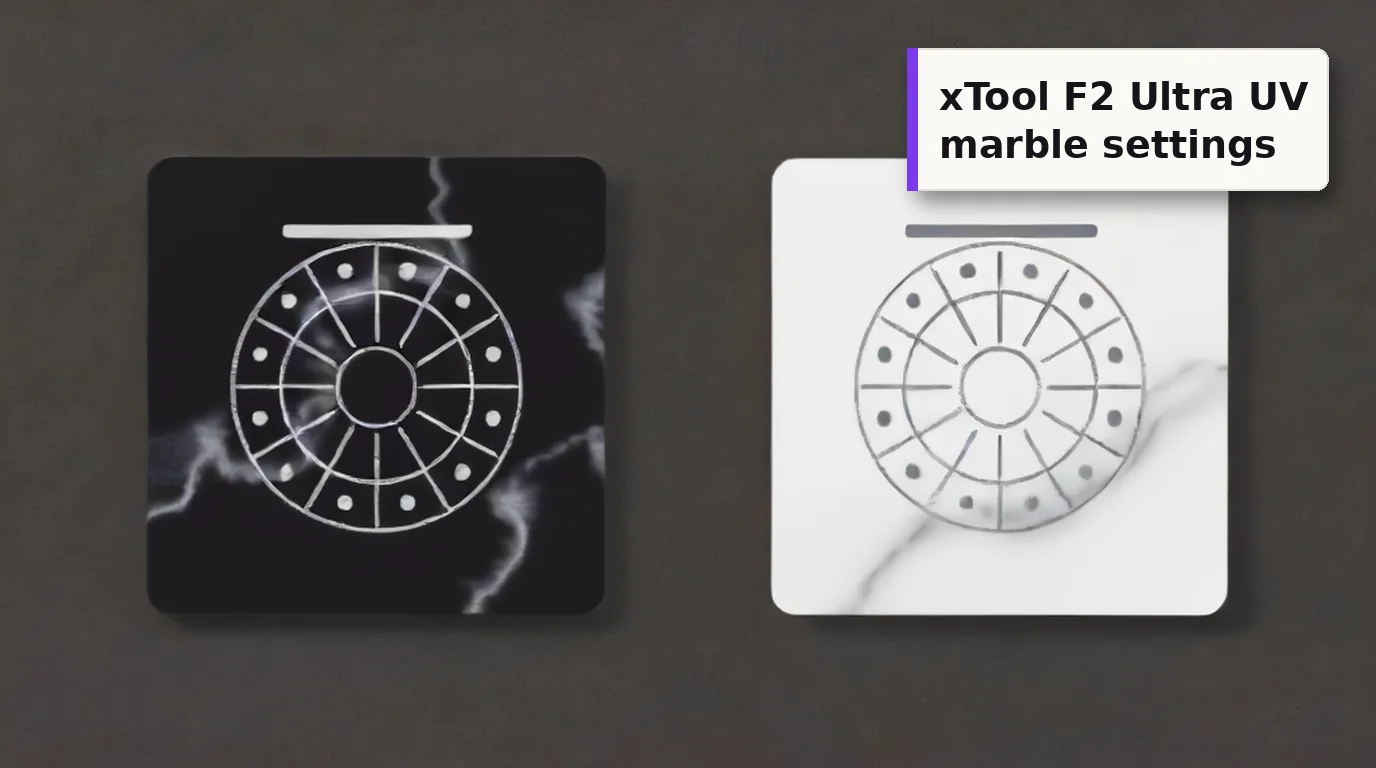 The same design reads pale on black marble and grey on white marble. Pick the stone for the contrast you want before you touch the settings. (AI-generated example.)
Marble is one of the easiest stones to sell and one of the trickiest to get right. Black marble coasters look premium with almost any design. White marble valet trays and coasters are everywhere, but the mark on them can come out so soft that customers think the engraving failed.
Good news first: stone is on xTool's list of intended materials for the F2 Ultra UV, and xTool has published official F2 Ultra UV presets for black, white and dark green marble. The catch is that those presets load inside xTool Studio, and the numbers aren't printed on the web page. So I pulled together what is public: the one F2 Ultra UV marble job I found with its settings panel on screen, the community numbers, xTool's own sample photos, and the UV rows from other machines, kept in their own table.
Every number below is a starting point drawn from those sources, not a result I'm promising. Marble is a natural stone, and two tiles from the same box can behave differently.
Quick facts
- Machine: xTool F2 Ultra UV, enclosed 5W, 355 nm UV galvo
- Is marble supported? Yes. Stone is on xTool's intended-materials list for the UV, and xTool publishes black, white and dark green marble presets
- Official presets: load from the Material Lab with "Open in Studio". The numbers aren't shown on the page
- On-screen F2 Ultra UV marble job: 90% power, 500 mm/s, 1 pass, 200 lines/cm, 40 kHz, bi-directional (Chipped Builds, white marble tray)
- Lighter community start: 45% power, 200 mm/s, 1 pass (Bonny Creations, marble tile)
- Suggested grid (mine, not tested): 45-100% power × 800-200 mm/s at 200 lines/cm, 40 kHz, 1 pass
- What the mark looks like: pale grey to white on black and green marble; soft grey on white marble
- Best contrast: polished black marble. White marble usually needs a color fill
- Relief: xTool's marble presets include an Embossment mode for the F2 Ultra UV
- Aftercare: wipe with water, not vinegar or acidic cleaners, and seal coasters
Short answer
The xTool F2 Ultra UV engraves marble well, and stone is one of its intended materials. For xTool's own black, white or dark green marble, load the official F2 Ultra UV preset from the Material Lab. For other marble, the clearest on-screen F2 Ultra UV recipe is 90% power, 500 mm/s, 1 pass, 200 lines/cm and 40 kHz, which gave a grey mark on white marble in about seven seconds for a small logo. Bonny Creations lists a lighter 45% power at 200 mm/s. Grid between those on a spare tile. Expect a pale mark on black marble and a soft grey on white, and color-fill white marble if it needs to read from across a room.
Quick answer: the best starting settings
xTool marble: use the preset. Open the Black Marble page in xTool's Material Lab, pick the F2 Ultra UV tab, and choose "Open in Studio" or "Save to Studio". The black marble page lists only the F2 Ultra UV, with a parameter update on November 4, 2026. The White Marble and Dark Green Marble pages have F2 Ultra UV tabs too, updated November 10, 2026. The pages show 5W, Engrave and the processing mode, but not power, speed or line density.
Other marble: start at 90% power, 500 mm/s, 200 lines/cm, 40 kHz, 1 pass. That's what Chipped Builds used on the marble half of a wood-and-marble valet tray on the F2 Ultra UV, saying it was xTool's recommended setting "for a similar type of material". The job ran in Process on flat surface mode with Unknown Material selected, so the numbers were typed in by hand.
If that's too heavy for your stone, go lighter. Bonny Creations lists 45% power at 200 mm/s and 1 pass for marble tile on the F2 Ultra UV. Its F2 Ultra UV marble-tile page calls that a community setting, and its general marble-tile page labels it estimated, so treat it as a soft first square, not a proven recipe.
Photos and logos on dark marble: invert the artwork first. The laser makes a pale mark on dark stone, so a photo engraved as-is comes out as a negative.
xTool F2 Ultra UV marble settings chart
Every row here is for an F2 Ultra UV. Keep each row's numbers together. Mixing power from one row with speed from another is a new, untested combination.
| Item / goal | Power | Speed | Lines/cm | Passes | Frequency | Mode | Source |
|---|---|---|---|---|---|---|---|
| Black marble, engrave | in Studio | in Studio | in Studio | in Studio | in Studio | Flat surface, conveyor or Embossment | xTool Material Lab official preset |
| White marble, engrave | in Studio | in Studio | in Studio | in Studio | in Studio | Flat surface, conveyor or Embossment | xTool Material Lab official preset |
| Dark green marble, engrave | in Studio | in Studio | in Studio | in Studio | in Studio | Conveyor (large) shown | xTool Material Lab official preset |
| White marble tray, small logo (about 7 s) | 90% | 500 mm/s | 200 | 1 | 40 kHz | Flat surface, Engrave, bi-directional | Chipped Builds video (settings panel on screen) |
| Marble tile, detailed engrave | 45% | 200 mm/s | not stated | 1 | not stated | Engrave | Bonny Creations (community/estimated) |
| 4.5 mm round rock coaster (stone, not marble) | 100% | 400 mm/s | not stated | 1 | not stated | Flat surface, Engrave | Atomm stone hub, maker record |
| River rock, deep relief (about 1 h 5 min) | 100% | 300 mm/s | 450 lines/cm | 100 layers | not stated | Embossment, Z descends 0.01 mm every 10 layers | Stephen Micalizzi video (on-screen text) |
Why a rock coaster and a river rock are in a marble chart: they're the closest F2 Ultra UV stone numbers with every value visible. They aren't marble, so use them to bracket your grid, not as a marble recipe.
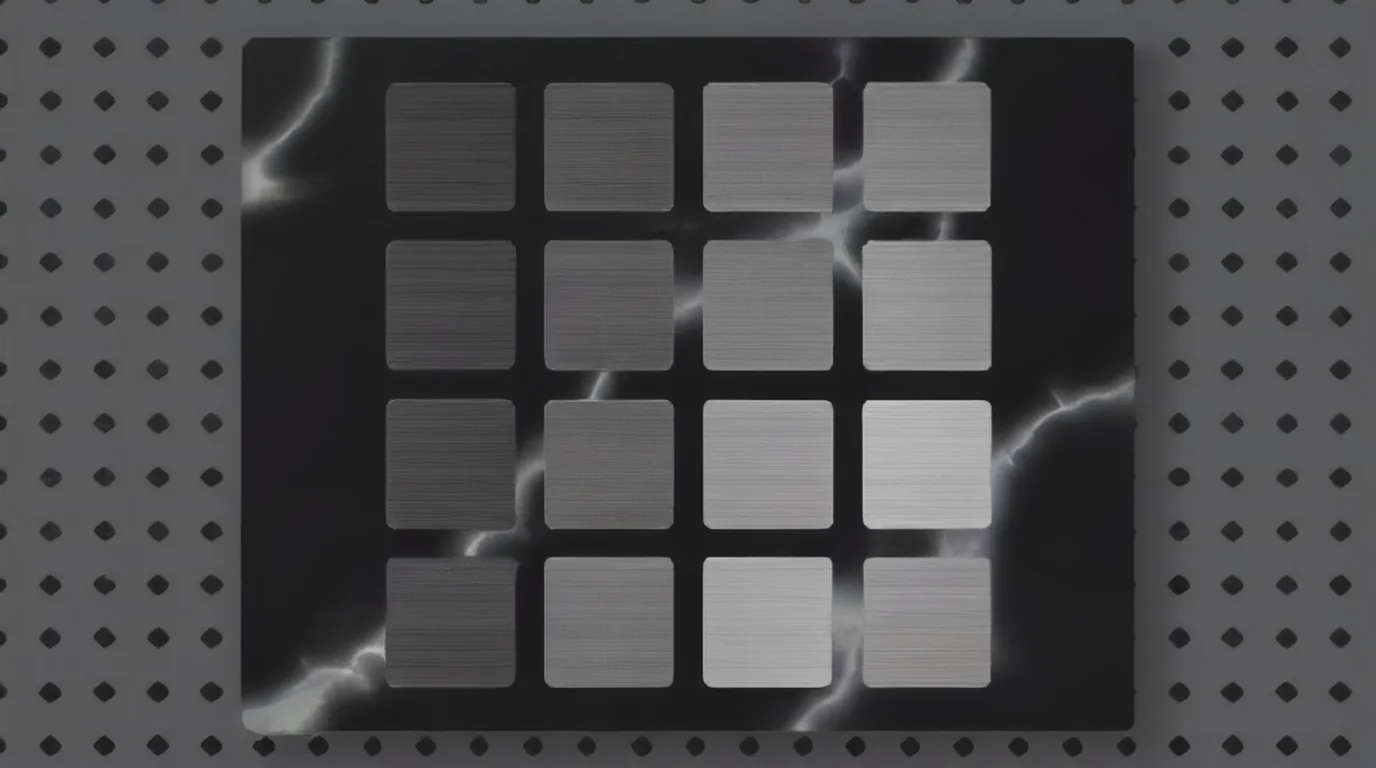 A small grid on an offcut tells you more than any chart. On black marble, look for the brightest square that still has crisp edges. (AI-generated example.)
A test grid for any marble
This is my suggested grid, built to cover the three F2 Ultra UV stone rows above. It isn't a tested marble recipe.
| Setting | Value |
|---|---|
| Grid | 4 × 4, about 10 mm squares |
| Power (columns) | 45%, 65%, 80%, 100% |
| Speed (rows) | 800, 500, 300, 200 mm/s |
| Lines/cm | 200 |
| Frequency | 40 kHz |
| Passes | 1 |
| Mode | Process on flat surface, Engrave, bi-directional |
Use xTool Studio's Material test array (or the "Click to start grid test" button in the layer panel) to build it, as xTool describes in its parameter settings guide. Run it on an offcut or the back of a tile from the same batch. Then pick the square with the cleanest, most even mark, not just the brightest one.
Other UV machines (cross-reference only, not F2 Ultra UV numbers)
| Machine | Power | Speed | Frequency | Passes | Notes | Source |
|---|---|---|---|---|---|---|
| ComMarker Omni X UV | 90-100% | 200-400 mm/s | 30-40 kHz | 1-2 | Pulse width 4-6 ns; avoid extra passes on polished marble | ComMarker blog |
| ComMarker Omni X UV | 40% | 300 mm/s | not stated | 1 | "Detailed mark on marble" | Bonny Creations (community) |
Different UV sources have different peak power, spot size and pulse controls. These rows only show that other UV makers land in the same high-power, moderate-speed, single-pass area.
CO2 numbers you should not copy
Trotec lists marble on a 100W CO2 Speedy 360 at 50% power, 20% speed, 1000 DPI and focus 0.5 mm below the surface. Boss Laser publishes no marble row at all and tells you to grid an offcut instead. CO2 percentages mean nothing on a 5W UV galvo, so don't type them in.
What do the settings mean?
- Power (%): laser output. On marble, more power gives a brighter, deeper mark up to a point, then the surface turns powdery and grey.
- Speed (mm/s): slower puts more energy into each spot. On the F2 Ultra UV, speed is your main depth control.
- Lines per cm: how tightly the fill lines are packed. 200 lines/cm is the on-screen marble value. Higher fills more evenly but takes longer. 100 lines/cm equals 254 DPI, per xTool's parameter guide.
- Frequency (kHz): pulse rate. The F2 Ultra UV runs 40-150 kHz, and 40 kHz is what the marble job used.
- Passes: each pass removes more stone. A second pass on polished marble can dull the shine and grey the white, according to ComMarker and LaserSettings.
- Layers (Embossment only): xTool allows 1-256 layers. More layers carve deeper.
Can the xTool F2 Ultra UV engrave marble?
Yes. xTool's safety page for the F2 Ultra UV lists stone among the materials the UV laser can process, and its FAQ lists stone under engraving. xTool also sells and publishes F2 Ultra UV presets for its own black, white and dark green marble.
What the UV does on marble is a surface mark. The beam breaks up the polish and the top grains, so the mark looks lighter and more matte than the stone around it. ComMarker describes it as the UV "lightly fracturing" the surface. Boss Laser puts it more simply: stone engraving lightens the surface it touches.
That one fact explains most marble results:
- On black marble, a pale mark against a dark, polished field is the strongest contrast you can get. xTool's own black marble sample photos show light grey line art, a lion portrait and a logo badge that read clearly from a distance.
- On white marble, a pale mark on pale stone has very little contrast. Chipped Builds called the result "a gray engraving", and xTool's white marble samples show soft grey line work that you have to look at closely.
- On dark green marble, the mark is pale too, but the Atomm stone hub notes it reads softer than black because the mark is closer to the base color.
Some guides, written for CO2, say the laser darkens white marble. That's a CO2 effect. What I saw in the F2 Ultra UV footage and xTool's UV sample photos was a light to mid-grey mark, never a dark brown burn.
Which marble are you engraving?
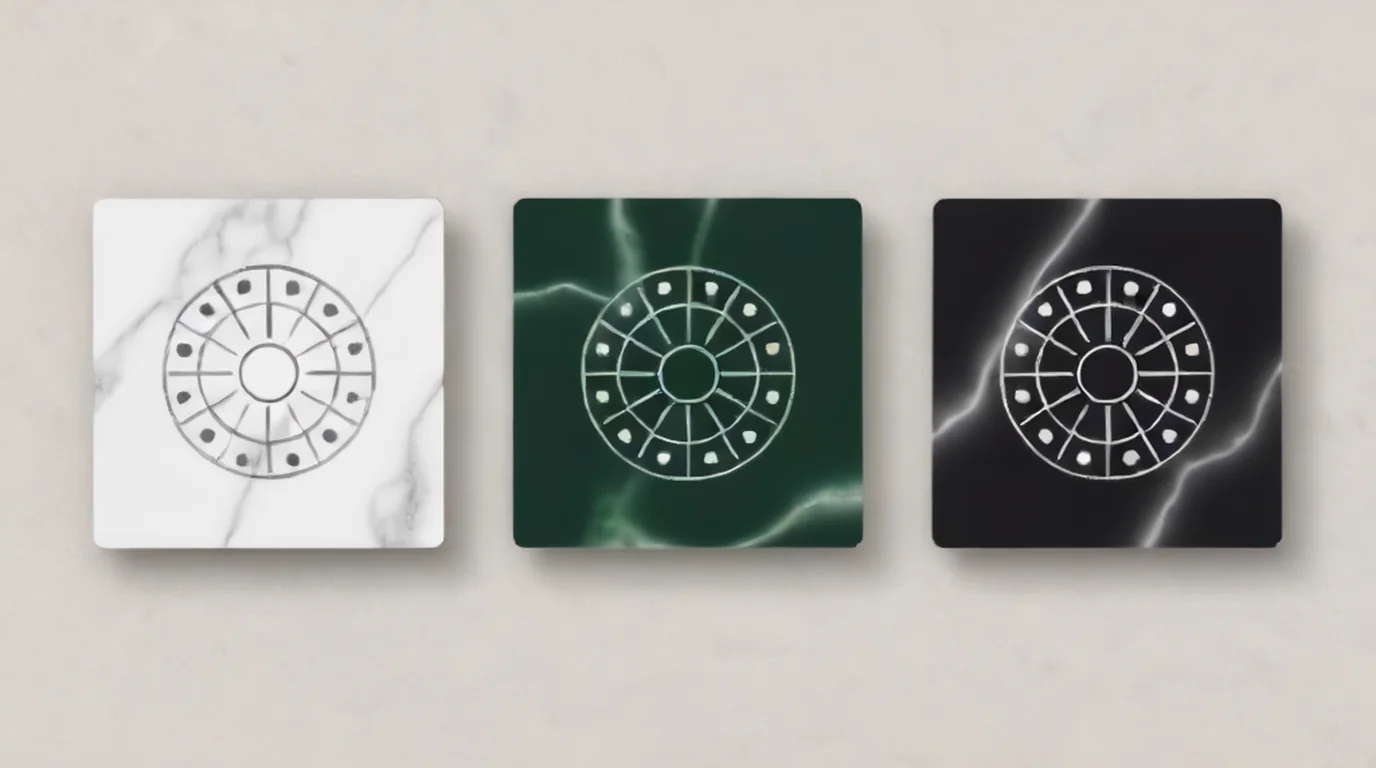 Same design, three stones. Black marble gives the boldest read, green is softer, and white needs help from a fill. (AI-generated example.)
Polished black marble is the easy win. Use it for photos, small text and detailed line art. Invert photos so the stone's dark becomes the image's shadow.
White and Carrara-style marble is for subtle, elegant marks or for designs you plan to color-fill. Fine line art and monograms work. Photos usually look washed out.
Dark green and other colored marble sits in between. Bold designs read well. Very fine detail can get lost in the veins.
Heavily veined slabs are the hardest. Marble is a metamorphic rock made mostly of calcite or dolomite, per Wikipedia's marble entry, and the veins can mark differently from the stone around them. LaserBeamForge's marble guide recommends running your test grid across a vein on purpose and placing fine lettering in the calmest part of the slab.
Faux and cultured marble isn't stone. Atomm lists "marble" acrylic and faux marble MDF, and cultured marble vanity tops are usually resin-based. Treat those as the base material, for example with my acrylic settings, not this chart.
Marble-and-wood coasters and trays are two jobs. xTool sells marble-and-wood coasters in white, black and dark green with their own presets. Chipped Builds engraved the wood half on a different laser and the marble half on the F2 Ultra UV. For the wood side on the UV, see my wood settings.
How do I get more contrast on white marble?
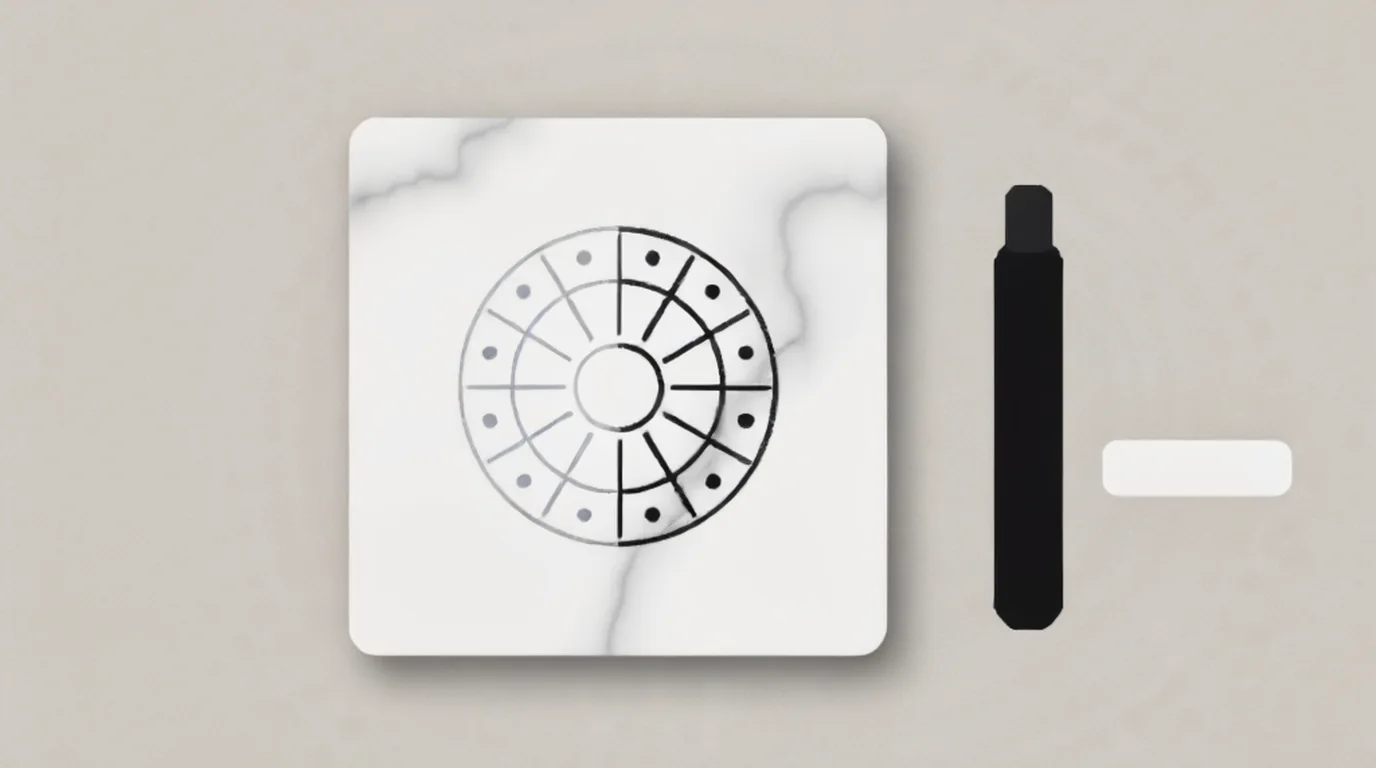 A paint-marker fill turns a soft grey mark into a crisp black one. Wipe the excess off the polished surface before it dries. (AI-generated example.)
xTool's own stone guide says marble engraves clean and fine but the contrast may be light, so it suggests adding color afterward. You have three options, and they stack:
- Color fill. Chipped Builds suggests a porcelain marker or paint marker over the engraving. LaserSettings recommends black wax or paint applied, then wiped flat. LaserBeamForge has a full paint-fill method if you want colors other than black.
- Choose a design that suits a light mark. Bold shapes and thicker lines hold up better than hairline detail on white stone.
- Seal it. A penetrating stone sealer protects the mark and the stone. LaserBeamForge notes the sealer can deepen the mark's apparent contrast, so test it on a scrap first.
What doesn't help is a second laser pass. LaserSettings says a second pass re-burns the dust and greys the white you already have, and ComMarker warns that extra passes can dull polished marble.
Can the F2 Ultra UV emboss or deep-engrave marble?
xTool's official black and white marble entries list Embossment as an F2 Ultra UV processing mode, alongside flat surface and conveyor. Embossment uses a depth map: dark pixels carve deep, light pixels stay shallow, and you can set 1-256 layers, according to xTool's embossing guide. For deep jobs, xTool's "Descend at the z-axis" option lowers the laser head as the cut deepens so the beam stays in focus.
The closest stone example I found is Stephen Micalizzi's river rock relief on the F2 Ultra UV: Embossment, 100% power, 300 mm/s, 450 lines/cm, 100 layers, with the Z-axis descending 0.01 mm every 10 layers. It took about an hour and five minutes for one small rock. Steve Makes Everything also shows a relief mandala on a river stone and says the relief settings "don't really change a whole lot except for the speed" between materials.
River rock isn't marble, so treat those numbers as a guide to scale and run time. Start with a small relief on an offcut before you commit an hour to a finished piece.
How should I set up a marble job?
- Clean the surface. ComMarker recommends wiping marble with alcohol to remove dust and wax. Trotec says cleaning before and after gives the best contrast.
- Check it's flat. Tiles and coasters can bow slightly, and Boss Laser points out that an out-of-focus mark on stone looks weak, not blurred. Shim it level.
- Focus on the marble. Use the F2 Ultra UV's auto-focus or line the red and blue dots up by hand, as xTool shows in its flat-surface guide. xTool's FAQ says auto-focus may not work on mirrored or highly reflective surfaces, so if a high polish throws it off, focus manually. My focusing guide covers both.
- Hold it still. A coaster jig keeps blanks in the same spot for batches. See my jig guide.
- Frame by hand. Stephen Micalizzi's rule is "never trust the camera". It gets you close, but manual framing is better.
What I saw in the videos
I watched the marble and stone sections frame by frame instead of only reading transcripts.
- Chipped Builds, "xTool F2 Ultra UV + F1 Ultra: Marble & Wood Engraving Tutorial": At 2:46, the xTool Studio panel shows Process on flat surface, Unknown Material, a measured thickness of about 0.40 in, and a user-defined Engrave at Power 90, Speed 500, Pass 1, 200 lines per cm, 40 kHz and bi-directional. The estimated time for the small logo was seven seconds. The finished mark on the white marble half is a light grey logo that you can see clearly up close but that stays subtle from a distance, which is why she suggests a color fill.
- Stephen Micalizzi, "Deep Rock Engraving using xTool F2 Ultra UV Engraver": The on-screen text reads "Emboss, 100 power, 300 speed, 450 dpi, descend z-axis every 10 layers". The rock sits in a bowl of sand to keep it level. The close-ups show real depth with crisp edges. He notes the first rock had some grain and came out less smooth than the second.
- Steve Makes Everything, "INSANE Relief Engravings with the xTool F2 Ultra UV": The stone segment near the end shows a mandala relief sunk into a grey river stone. The stone settings aren't shown on screen.
Step-by-step: engraving a marble coaster on the F2 Ultra UV
1. Know your marble
Check whether it's real stone and which color it is. If it's xTool's black, white or dark green marble, pick it from the material list so the preset loads.
2. Clean and level
Wipe the face with isopropyl alcohol, let it dry, and check the coaster sits flat on the bed.
3. Focus
Focus on the top surface with auto-focus, or by hand if the polish confuses the rangefinder.
4. Prepare the art
Invert photos and logos for dark marble. Keep fine detail out of heavy veins. Use bolder lines on white marble.
5. Grid, then engrave
Run the grid above on an offcut. Pick the cleanest square, then engrave the real piece with the lid closed and extraction on.
6. Finish
Wipe off the stone dust with a damp cloth. Color-fill white marble if needed, let it cure, then seal.
What should I do if the mark looks wrong?
| Problem | Likely cause | What to try |
|---|---|---|
| Mark is barely visible on white marble | Pale mark on pale stone | Color-fill it, or switch to black marble for that design |
| Mark is grey and dusty instead of bright | Too much energy or a second pass | Go back one or two grid squares and use a single pass |
| One side is crisp, the other weak | The tile isn't flat, so focus drifts | Shim it level and refocus at the center |
| Contrast changes across the piece | Veins have different hardness | Move fine detail away from veins, or use a less-veined tile |
| Photo looks like a negative | Art not inverted for dark stone | Invert it before engraving |
| Polish looks dull around the mark | Multiple passes or too slow | Use one pass at a faster speed |
| Auto-focus misses on glossy stone | Reflection confuses the rangefinder | Focus manually |
Safety and aftercare
- Engrave with the lid closed and extraction running. Stone engraving makes fine mineral dust that you shouldn't breathe, as LaserSettings and LaserBeamForge both warn.
- If you run the F2 Ultra UV with the lid open for any reason, wear goggles rated for 355 nm, per xTool's safety guidance.
- Clean finished marble with water or a pH-neutral stone cleaner. Boss Laser warns that acids etch marble, so skip vinegar and bathroom cleaners.
- Seal coasters. Marble is porous and stains easily.
What I couldn't confirm
- The numbers inside xTool's official marble presets. They load in xTool Studio only.
- Whether the Chipped Builds marble was natural stone or a coated or engineered tray surface. The maker calls it marble.
- An F2 Ultra UV recipe for photo engraving on marble with every value visible.
- F2 Ultra UV emboss settings on marble itself. The relief examples I found were on river rock.
FAQ
Can the xTool F2 Ultra UV engrave marble?
Yes. Stone is on xTool's intended-materials list for the F2 Ultra UV, and xTool publishes official F2 Ultra UV presets for black, white and dark green marble.
What are the best F2 Ultra UV settings for marble?
For xTool's own marble, load the official preset in xTool Studio. For other marble, a published on-screen starting point is 90% power, 500 mm/s, 1 pass, 200 lines/cm and 40 kHz. A lighter community start is 45% power at 200 mm/s. Grid between them on an offcut.
Why is my engraving grey on white marble?
The UV lightens the surface it marks, so on white marble you get a soft grey mark with low contrast. Fill it with a paint or porcelain marker, or choose black marble for designs that need to stand out.
Does black marble or white marble engrave better?
Black marble gives far more contrast, because the pale mark stands out against the dark polish. White marble works for subtle marks and color-filled designs.
Should I run two passes on marble?
Usually not. ComMarker and LaserSettings both warn that a second pass can dull polished marble and grey the mark. Slow down or raise power on a single pass instead.
Can the F2 Ultra UV do 3D relief on marble?
xTool's black and white marble presets include an Embossment mode for the F2 Ultra UV. The public stone relief example, on river rock, used 100% power, 300 mm/s, 450 lines/cm and 100 layers with the Z-axis descending 0.01 mm every 10 layers, and took about an hour.
Do I need to invert photos for marble?
On black and dark green marble, yes. The laser makes a pale mark, so the image has to be a negative to look right. On white marble, engrave the photo normally, but expect soft contrast.
How do I clean and seal an engraved marble coaster?
Wipe off the dust with a damp cloth, then use water or a pH-neutral stone cleaner, never vinegar. A penetrating stone sealer protects the mark and stops stains.
Related guides
- xTool F2 Ultra UV granite settings
- xTool F2 Ultra UV cork settings
- xTool F2 Ultra UV slate settings
- Can a UV laser engrave slate?
- xTool F2 Ultra UV ceramic settings
- xTool F2 Ultra UV glass settings
- How to focus a UV laser
- Best self-centering jigs for the F2 Ultra UV
- Best UV laser blanks to buy and sell
- UV laser project ideas
Final thoughts
Marble on the F2 Ultra UV comes down to choosing the stone first and the settings second. Black marble gives you bright, detailed marks with almost no fuss. White marble gives you a quiet grey mark that usually needs a fill. Load xTool's preset when you're using xTool's marble. Otherwise, start from the 90% and 500 mm/s on-screen job, grid down toward 45% and 200 mm/s on an offcut, and keep it to one pass.
Sources and further watching
- xTool Support - Safety First for xTool F2 Ultra UV (article 2751): https://support.xtool.com/article/2751
- xTool Support - FAQs on xTool F2 Ultra UV (article 2870): https://support.xtool.com/article/2870
- xTool Support - Processing Parameter Settings / Material test array (article 2698): https://support.xtool.com/article/2698
- xTool Support - Processing Parameters for xTool F2 Ultra UV (article 2699): https://support.xtool.com/article/2699
- xTool Support - Start Laser Embossing with xTool F2 Ultra UV (article 2707): https://support.xtool.com/article/2707
- xTool Support - Process on Flat Surface with xTool F2 Ultra UV (article 3840): https://support.xtool.com/article/3840
- xTool Material Lab (Atomm) - Black Marble, official settings: https://www.atomm.com/materials-lab/official/3867-black-marble
- xTool Material Lab (Atomm) - White Marble, official settings: https://www.atomm.com/materials-lab/official/3865-white-marble
- xTool Material Lab (Atomm) - Dark Green Marble, official settings: https://www.atomm.com/materials-lab/official/3866-dark-green-marble
- xTool Material Lab (Atomm) - Round Dark Green Marble and Wood Coasters: https://www.atomm.com/materials-lab/official/3833-round-dark-green-marble-and-wood-coasters
- Atomm - Slate and stone for laser engraving: https://www.atomm.com/c/laser-stone
- Bonny Creations - xTool F2 Ultra UV marble tile settings: https://www.bonnycreations.com/settings/machines/xtool-f2-ultra-uv/marble-tile
- Bonny Creations - Marble tile laser settings: https://www.bonnycreations.com/settings/materials/marble-tile
- ComMarker - How to engrave stone with the Omni X UV laser engraver: https://blog.commarker.com/archives/55299
- Trotec - Stone laser engraving tips: https://www.troteclaser.com/en-us/helpcenter/materials/material-usage-hints/stone-laser-engraving
- Boss Laser - Laser engraving stone, slate and tile: https://team.bosslaser.com/applications/glass-stone/stone-slate-and-tile/
- LaserBeamForge - Laser engraving marble: https://laserbeamforge.com/laser-engraving-marble-guide/
- LaserBeamForge - Stone engraving paint-fill technique: https://laserbeamforge.com/stone-engraving-paint-fill-technique/
- LaserSettings - Marble and granite laser engraving: https://lasersettings.fr/en/material/marbre
- xTool Academy - Stone engraving with a laser: https://www.xtool.com/blogs/xtool-academy/laser-stone-engraving
- Wikipedia - Marble: https://en.wikipedia.org/wiki/Marble
Further watching (embeds)
- Chipped Builds - "xTool F2 Ultra UV + F1 Ultra: Marble & Wood Engraving Tutorial": https://www.youtube.com/watch?v=7SHagJtphFs
- Stephen Micalizzi - "Deep Rock Engraving using xTool F2 Ultra UV Engraver": https://www.youtube.com/watch?v=5L5p241WHAs
- Steve Makes Everything - "INSANE Relief Engravings with the xTool F2 Ultra UV": https://www.youtube.com/watch?v=9itiSeds1S4
A wood-and-marble valet tray engraved on two xTool lasers, with the F2 Ultra UV marble settings shown in xTool Studio and a grey mark on white marble. (Video: Chipped Builds on YouTube.)
Deep relief engraving on river rocks with the F2 Ultra UV in Embossment mode, with the settings shown on screen. (Video: Stephen Micalizzi on YouTube.)
Relief (embossment) engraving with the F2 Ultra UV on wood, glass and a river stone. (Video: Steve Makes Everything on YouTube.)
Related settings
- xTool F2 Ultra UV Bamboo Settings: Cutting Boards, Coasters & Plywood (2026)
- xTool F2 Ultra UV Granite Settings: Black Granite, Memorials & Rocks (2026)
- xTool F2 Ultra UV Polycarbonate Settings: PC Sheet, Cases & Cards (2026)
- xTool F2 Ultra UV Cork Settings: Coasters, Sheets & Photo Chart (2026)
- xTool F2 Ultra UV Gold Settings: Solid, Gold-Filled & Gold-Plated Jewelry (2026)
- xTool F2 Ultra UV Silver Settings: Sterling Silver Jewelry, Tags & Pendants (2026)
- xTool F2 Ultra UV Copper Settings: Sheet, Tags & Copper-Clad PCB Blanks (2026)
- xTool F2 Ultra UV Aluminum Settings: Bare Sheet, Cards, Tags & ID Plates (2026)
- xTool F2 Ultra UV Silicone Settings: Wristbands, Watch Bands & Phone Cases (2026)
- xTool F2 Ultra UV Titanium Settings: Color Mark, Dark Mark & Jewelry Chart (2026)
- xTool F2 Ultra UV Paper & Cardstock Settings (2026 Guide)
- xTool F2 Ultra UV ABS Settings: Presets, Test Grid & Safety Guide (2026)
- xTool F2 Ultra UV Brass Settings: Tags, Sheet & Coin Emboss Chart (2026)
- xTool F2 Ultra UV Crystal Settings: 3D Inner Engraving Guide (2026)
- xTool F2 Ultra UV Anodized Aluminum Settings: Business Cards & More (2026)
- xTool F2 Ultra UV Leather Settings: Genuine, Faux & Leatherette Chart (2026)
- xTool F2 Ultra UV Stainless Steel Settings: Dark, White, Color & Photo Chart (2026)
- xTool F2 Ultra UV Wood Settings: Basswood, Plywood, Pine & MDF Chart (2026)
- xTool F2 Ultra UV Acrylic Settings: Clear, Black & White Chart (2026)
- xTool F2 Ultra UV Ceramic Settings: Tiles & Mugs Chart (2026)
- xTool F2 Ultra UV Glass Settings: Flat Glass & Rotary Chart (2026)
- xTool F2 Ultra UV PLA Settings: 3D Print Colour Chart (2026)
- xTool F2 Ultra UV Slate Settings: Power, Speed & Frequency Chart (2026)
- xTool F2 Ultra UV Tumbler Settings: Powder-Coated & Stainless (2026)
- Can a UV Laser Engrave Slate?
- Can a UV Laser Engrave Glass?
Keep reading
xTool F2 Ultra UV Bamboo Settings: Cutting Boards, Coasters & Plywood (2026)
Sourced xTool F2 Ultra UV bamboo settings for cutting boards, coasters and plywood, with a starting test grid, glue-line tips and food-safe finishing.
Read more19 min read
xTool F2 Ultra UV Granite Settings: Black Granite, Memorials & Rocks (2026)
Sourced xTool F2 Ultra UV granite settings for polished black and light granite, with a starting test grid, deep relief, paint fill and silica safety.
Read more20 min read
xTool F2 Ultra UV Polycarbonate Settings: PC Sheet, Cases & Cards (2026)
Sourced xTool F2 Ultra UV polycarbonate settings for clear, white and black PC, with a starting test grid, mark colors, fume safety and fixes.
Read more18 min read