xTool F2 Ultra UV Cork Settings: Coasters, Sheets & Photo Chart (2026)
Sourced xTool F2 Ultra UV cork settings for coasters, thin sheet and photos, with xTool's presets, a test grid, cutting notes and cleanup tips.
20 min read
On this page
- Short answer
- Quick answer: the best starting settings
- xTool F2 Ultra UV cork settings chart
- A test grid for any cork
- Other UV machines (cross-reference only, not F2 Ultra UV numbers)
- Diode and CO2 numbers you should not copy
- What do the settings mean?
- Can the xTool F2 Ultra UV engrave cork?
- Which cork are you engraving?
- How do I get a darker mark on cork?
- How should I engrave photos on cork?
- How do I cut cork on the F2 Ultra UV?
- How should I set up a cork job?
- What I saw in the videos
- Step-by-step: engraving a cork coaster on the F2 Ultra UV
- 1. Know your cork
- 2. Flatten and secure
- 3. Focus
- 4. Prepare the art
- 5. Grid, then engrave
- 6. Finish
- What should I do if the mark looks wrong?
- Safety and aftercare
- What I couldn't confirm
- FAQ
- Can the xTool F2 Ultra UV engrave cork?
- What are the best F2 Ultra UV settings for cork?
- Why is my UV engraving on cork lighter than a diode's?
- What settings should I use for photos on cork?
- Can the F2 Ultra UV cut cork?
- Should I seal engraved cork coasters?
- How do I clean soot off engraved cork?
- Is it safe to laser cork?
- Related guides
- Final thoughts
- Sources and further watching
Last updated: November 15, 2026
 On cork, the UV leaves a fine brown line rather than a deep black burn. That's the look to plan your designs around. (AI-generated example.)
Cork coasters are about the cheapest blank you can put under a laser, and they sell. Bars, wineries, wedding favors, corporate gifts: a stack of round cork coasters and a logo file is a business in a box.
On a diode or CO2 laser, cork is easy. On the F2 Ultra UV it's still easy, but the result looks different. The UV draws very fine, clean detail, and the mark tends to be a lighter brown than people expect. So the right settings depend on what you want: crisp line art, a darker logo, or a photo.
xTool has published official F2 Ultra UV presets for three of its own cork products, but the numbers only load inside xTool Studio. So I gathered what is public: a community F2 Ultra UV cork row, one maker's F2 Ultra UV photo coaster with both settings panels shown, and on-screen numbers from other 5W UV machines, kept in their own table.
Every number below is a starting point from those sources, not a result I'm promising. Cork is a natural, granular material, and two packs of coasters can behave differently.
Quick facts
- Machine: xTool F2 Ultra UV, enclosed 5W, 355 nm UV galvo
- Is cork supported? Yes. xTool's Material Lab has F2 Ultra UV tabs for its Round Cork Coasters, 0.53 mm cork sheet and Portuguese Oak Bark Eco Cork
- Official presets: load with "Open in Studio". The numbers aren't shown on the page
- Community engrave start: 35% power, 500 mm/s, 1 pass (Bonny Creations)
- Community cut start (thin cork): 95% power, 50 mm/s, 1 pass (Bonny Creations)
- Photo example on screen: dot duration 500-600 µs, 95% power, 400-500 DPI, 40 kHz, Jarvis. The maker said both came out too dark and crushed
- Suggested grid (mine, not tested): 25-70% power × 1,000-300 mm/s at 150 lines/cm, 40 kHz, 1 pass
- What the mark looks like: light to mid brown, very fine detail, less contrast than a diode
- Main risks: over-burning photos, soot in the cork cells, and fire on slow cuts
- Aftercare: dry brush or rinse and air-dry. Leave drink coasters unsealed or use a thin water-based sealer
Short answer
The xTool F2 Ultra UV engraves cork cleanly, and xTool has official presets for its own cork coasters, cork sheet and eco cork. For other cork, start at 35% power, 500 mm/s and 1 pass, the community row for the F2 Ultra UV, and grid toward 70% and 300 mm/s if you want a darker brown. For photos, the one F2 Ultra UV example on screen used dot duration mode at 95% power and still came out too dark, so use less energy and lower resolution. Cut thin cork at 95% and 50 mm/s, never unattended, and brush the soot off before you judge the result.
Quick answer: the best starting settings
xTool cork: use the preset. Open the Round Cork Coasters page in xTool's Material Lab, pick the F2 Ultra UV tab, and choose "Open in Studio" or "Save to Studio". The same goes for xTool's 0.53 mm cork sheet and its Portuguese Oak Bark Eco Cork. All three F2 Ultra UV tabs show 5W, Engrave and the conveyor-large processing mode, with parameter updates between October 24 and November 4, 2026, but no power, speed or line density.
Other cork coasters and sheet: start at 35% power, 500 mm/s, 1 pass. That's Bonny Creations' F2 Ultra UV cork row, described as a "clean UV engrave on cork coasters". The site calls it community-tested in the header but labels the setting card estimated, so treat it as a sensible first square, not a proven recipe.
Want a darker logo? Slow down before you add power. Cork reacts quickly, and the guides I read all agree that too much energy widens fine lines and fills in small text.
Photos: don't copy the on-screen photo settings below as a recipe. They're there to show you what was too much.
xTool F2 Ultra UV cork settings chart
Every row here is for an F2 Ultra UV. Keep each row's numbers together. Mixing power from one row with speed from another is a new, untested combination.
| Item / goal | Power | Speed | Lines/cm or DPI | Passes | Frequency | Mode | Source |
|---|---|---|---|---|---|---|---|
| xTool Round Cork Coasters (5 mm), engrave | in Studio | in Studio | in Studio | in Studio | in Studio | Conveyor-large, Engrave | xTool Material Lab official preset |
| xTool 0.53 mm cork sheet, engrave | in Studio | in Studio | in Studio | in Studio | in Studio | Conveyor-large, Engrave | xTool Material Lab official preset |
| xTool Portuguese Oak Bark Eco Cork, engrave | in Studio | in Studio | in Studio | in Studio | in Studio | Conveyor-large, Engrave | xTool Material Lab official preset |
| Cork coaster, line art / logo | 35% | 500 mm/s | not stated | 1 | not stated | Engrave | Bonny Creations (community/estimated) |
| Thin cork, cut | 95% | 50 mm/s | n/a | 1 | not stated | Cut | Bonny Creations (community/estimated) |
| 3 mm cork coaster, photo (too dark) | 95% | dot duration 600 µs | 500 DPI | 1 | 40 kHz | Engrave, bitmap, Jarvis | Atomm project by okuykuni, step 1 panel |
| 3 mm cork coaster, photo (better, still crushed) | 95% | dot duration 500 µs | 400 DPI | 1 | 40 kHz | Engrave, bitmap, Jarvis | Atomm project by okuykuni, step 2 panel |
About the photo rows: in dot duration mode the laser pulses on each dot instead of sweeping at a set speed, so the "speed" column holds the dwell time per dot. The maker's own notes say the first try "scorched black and the fine lines were crushed", and that shortening the dot time improved contrast but it was "still crushed". They're the only F2 Ultra UV cork photo numbers I found with every value visible, and they show the ceiling, not the target.
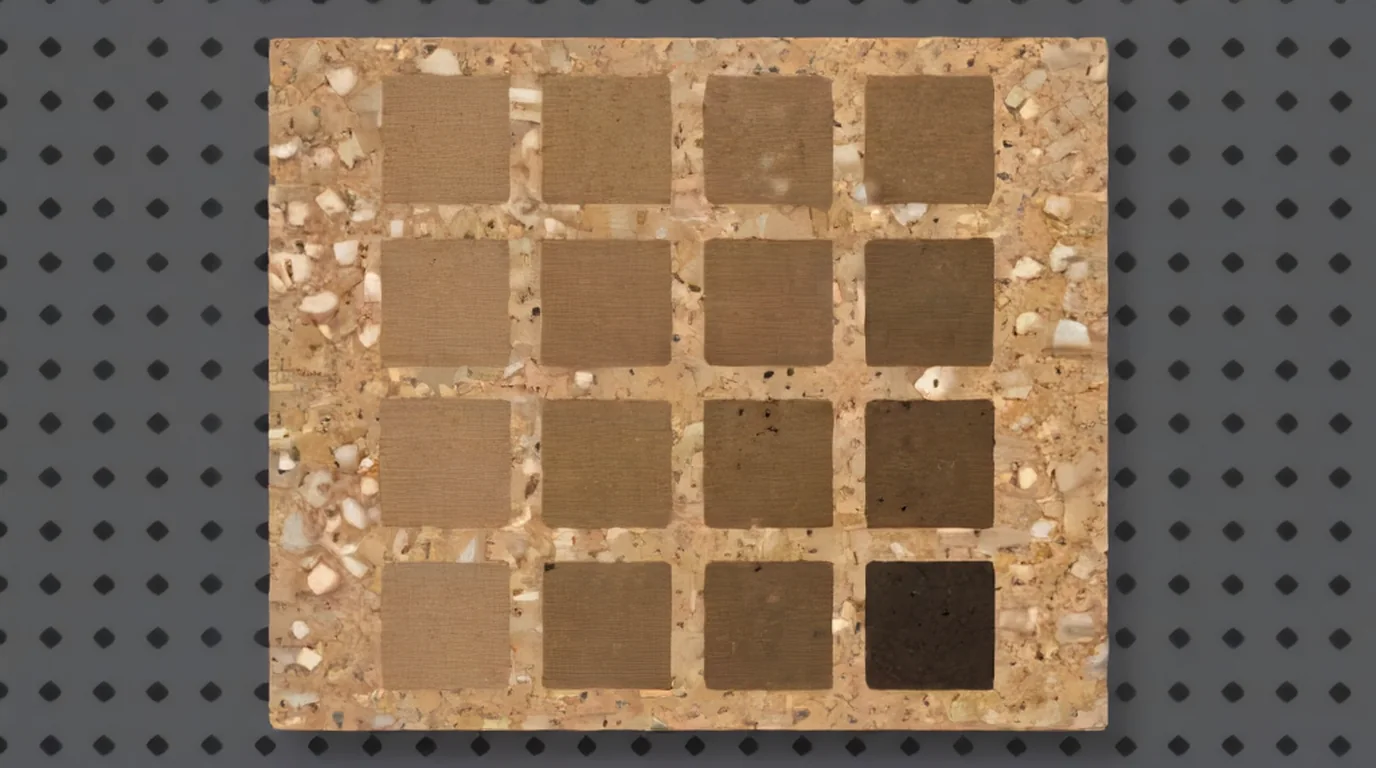 A small grid on a spare coaster tells you more than any chart. Pick the square with clean edges, not the darkest one. (AI-generated example.)
A test grid for any cork
This is my suggested grid, built around the community row above. It isn't a tested cork recipe.
| Setting | Value |
|---|---|
| Grid | 4 × 4, about 10 mm squares |
| Power (columns) | 25%, 35%, 50%, 70% |
| Speed (rows) | 1,000, 700, 500, 300 mm/s |
| Lines/cm | 150 |
| Frequency | 40 kHz |
| Passes | 1 |
| Mode | Process on flat surface, Engrave, bi-directional |
Use xTool Studio's Material test array to build it, as xTool describes in its parameter settings guide. Run it on a spare coaster from the same pack. Brush each square clean before you choose, because a dark square can be mostly soot sitting in the cork cells.
Other UV machines (cross-reference only, not F2 Ultra UV numbers)
| Machine | Power | Speed | Frequency | Other | Result | Source |
|---|---|---|---|---|---|---|
| ComMarker Omni X UV | 32% | 700 mm/s | not stated | 1 pass, no air assist | "Light UV engrave on cork" | Bonny Creations (community) |
| 5W UV galvo, 220 mm lens | not shown | 200 mm/s | 20 kHz | 0.05 mm interval, 15 ns pulse | Clean, fine detail, lighter than diode, about 5 min per coaster | Laser Everything video |
| 5W UV galvo, 150 mm lens | not shown | 300 mm/s | 20 kHz | 0.02 mm line interval, Q-pulse 1 | Dense, detailed brown illustration | Haotian Laser video |
| 5W UV galvo | not shown | 200 mm/s | 30 kHz | 1 ns, 0.05 mm interval | Brown photo with soft mid-tones | Haotian Laser video |
| 5W UV galvo | not shown | 200 mm/s | 30 kHz | 1 ns, 0.06 mm interval | Brown portrait | Haotian Laser video |
Different UV sources have different peak power, spot size and pulse controls, and these videos don't show their power. The rows tell you one useful thing: other 5W UV makers land in the 200-700 mm/s range on cork with a single pass.
Diode and CO2 numbers you should not copy
L3D's tested cork logo on the xTool F2's blue diode is 80% power at 1,750 mm/s. Epilog's cork coasters on a 60W CO2 ran at 100% speed and 40% power. Trotec suggests 250 DPI for broad cork designs and up to 500 DPI for fine detail on its CO2 machines. Those percentages mean nothing on a 5W UV galvo, so use them for ideas, not numbers.
What do the settings mean?
- Power (%): laser output. On cork, more power gives a darker brown until the fine lines start to merge and the surface chars.
- Speed (mm/s): slower puts more energy into each spot. On cork, slowing down darkens the mark quickly.
- Lines per cm: how tightly the fill lines are packed. 100 lines/cm equals 254 DPI, per xTool's parameter guide. Higher fills more evenly but adds heat and time.
- Frequency (kHz): pulse rate. The F2 Ultra UV runs 40-150 kHz, and 40 kHz is what the photo example used.
- Dot duration (µs): used for bitmap photos instead of speed. Longer dwell on each dot means a darker, wider dot.
- Passes: for engraving, one pass is the norm on cork. Extra passes darken it but blur detail.
Can the xTool F2 Ultra UV engrave cork?
Yes. xTool lists three cork products in its F2 Ultra UV material collection, each with an official preset. xTool files cork under wood, and its F2 Ultra UV FAQ says the UV engraves wood with "clean results without yellowing".
What you get is a fine, controlled surface mark. Cork is the bark of the cork oak, made mostly of suberin with some lignin and cellulose, per Wikipedia's cork entry. The UV darkens the top of those cells without much heat spreading sideways, so small text and hairline detail survive.
The trade-off is contrast:
- Line art and logos look sharp and clean. In Laser Everything's cork test, the UV coaster showed "all the tiny details in the design", but it wasn't the darkest mark of the lasers they tried.
- A diode gives a deeper, warmer brown. Laser Everything and Creative Ramblings both rate the diode as the best all-round cork laser. If you need a dark, rustic look, the UV isn't the obvious first choice.
- Photos are the hard part. Cork's speckled texture fights with fine shading, and too much energy fills the image in.
Which cork are you engraving?
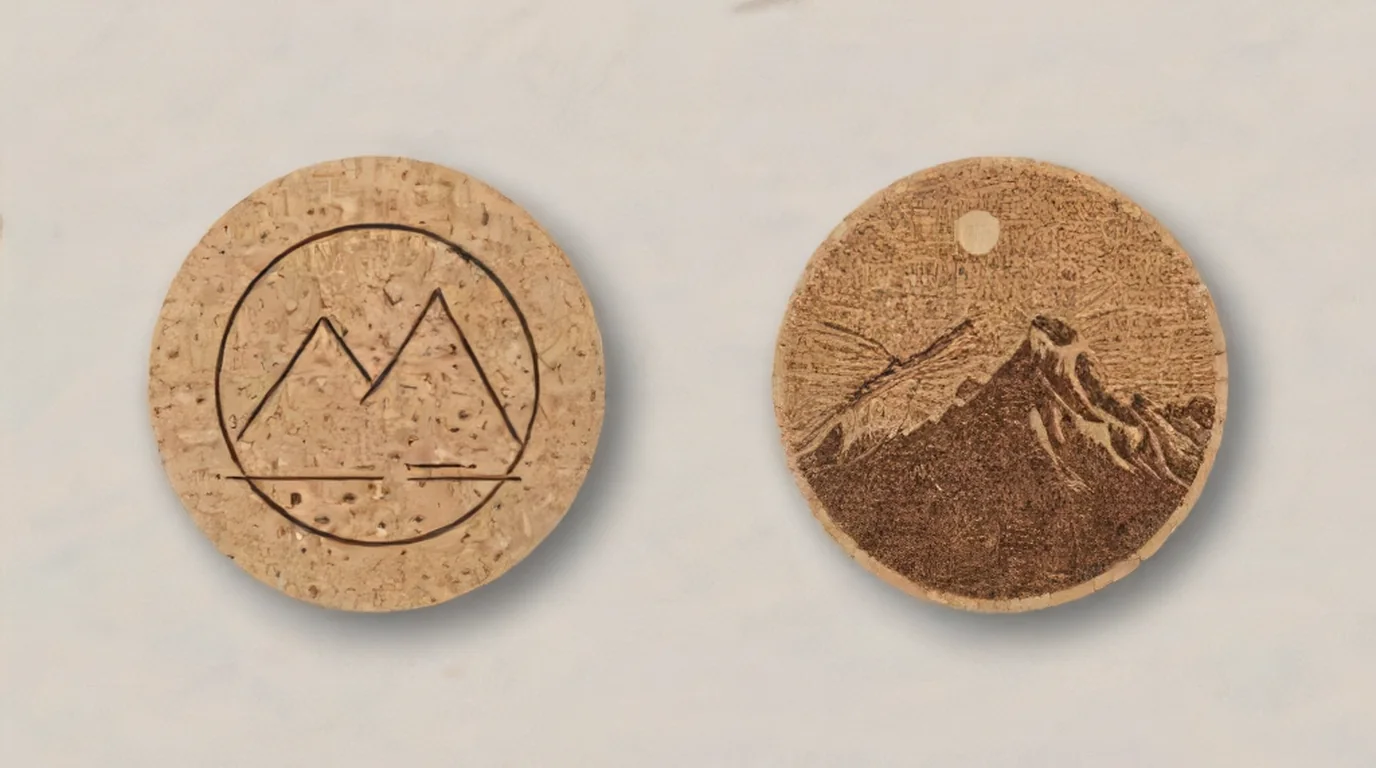 Line art is the easy win on cork. Photos need a lighter touch and a lower resolution to stay readable. (AI-generated example.)
Agglomerated cork coasters (the round, speckled kind) are what most people use. They're granules bound with glue, so the mark can vary slightly granule to granule. Bold line art reads best.
Thin cork sheet (like xTool's 0.53 mm sheet) is light and moves easily. Tape the edges or use magnets outside the design so the extraction airflow can't lift it out of focus.
Natural bark cork (like xTool's Portuguese oak bark eco cork) has real texture and color variation. Expect a more rustic, uneven mark.
Cork with backing is two materials. Bonny Creations notes felt-backed cork needs extra passes to cut through, and TwoTrees warns that adhesives, foams and coatings change fumes and results. Don't laser anything with a PVC or vinyl backing.
Sealed or painted cork marks differently from raw cork. Bonny Creations recommends sealing after engraving, not before, because sealers change the way cork engraves.
How do I get a darker mark on cork?
Try these one at a time, in this order:
- Slow down. Move from 500 to 300 mm/s before you add power.
- Raise power in small steps. Go from 35% toward 50% and then 70%, checking that small text stays open.
- Add lines per cm, not passes. A denser fill darkens evenly. A second pass mostly widens lines.
- Pick a design that suits a lighter mark. Bolder lines and filled shapes read better from across a table than hairline detail.
If you need a truly dark, burned look on every order, that's a job a diode does better. The UV's strength on cork is detail, not darkness.
How should I engrave photos on cork?
Photos are where most cork jobs go wrong, and the one F2 Ultra UV example on screen shows why. The maker ran a cat illustration on a 3 mm cork coaster at 95% power, 600 µs dot duration and 500 DPI. It "scorched black and the fine lines were crushed". At 500 µs and 400 DPI, the contrast improved, but it was still too dark.
So go the other way:
- Use less energy per dot. Start well below the 500 µs that was still too dark, and run a short dot-duration test.
- Lower the resolution. Trotec recommends lower DPI for broad designs on cork, and Macsa notes that photo-quality marks on cork need a lower resolution so the halftones don't burn together.
- Brighten the photo first. Lift the shadows and add contrast in the midtones. Cork's own speckle adds noise, so a busy background turns to mud.
- Pick photos with a clear subject. Pets, landmarks and simple portraits with plain backgrounds hold up best.
- Set the material in Studio. L3D points out that choosing cork as the material helps xTool Studio adjust photos for it.
How do I cut cork on the F2 Ultra UV?
The community row is 95% power at 50 mm/s and 1 pass, and it's best suited to thin cork sheet. A 5W UV isn't a fast cutter, and thick coasters or felt-backed cork may need several passes.
- Engrave first, then cut. Bonny Creations says cutting first lets the piece shift and spoils your alignment.
- Never leave it running alone. Boss Laser says thin, dry stock like cork is where most laser fires start, and Opt Lasers warns that slower isn't automatically safer on cork, because long dwell builds heat.
- Hold it flat. Light cork lifts in airflow. Tape or magnets outside the cut path keep it in focus and out of the beam.
How should I set up a cork job?
- Measure the thickness. Coasters vary from about 2 to 5 mm. Use auto-measure or set it by hand.
- Focus on the cork's surface. Line up the red and blue dots, as xTool shows in its flat-surface guide, or follow my focusing guide.
- Use a jig for batches. A coaster jig puts every blank in the same place. See my jig guide.
- Leave a margin. Keep the design a few millimeters inside the coaster's edge. It looks cleaner, and the edge is where loose granules come away most easily.
- Keep extraction on. Cork makes smoke and fine dust, and L3D says good extraction protects both the laser and your room.
What I saw in the videos
I watched the cork sections frame by frame instead of only reading transcripts. I didn't find a video of cork on the F2 Ultra UV with settings on screen, so these are other 5W UV machines plus a cleaning demo.
- Laser Everything, "The ULTIMATE Laser Marking Guide to Cork": The on-screen bar for the UV run reads "5w UV, 220mm F-Theta Lens, 0.05mm Interval, Pulse: 15ns, Speed 200mm/s, Freq 20kHz". The camping badge came out crisp, with every tree and tent line separate, in a light reddish brown. The presenter says it took about five minutes and gave the least contrast of the lasers tested.
- Haotian Laser, "UV Laser 5W Engraving on Cork": The overlay reads "Speed 300, Frequency 20, Q-pulse 1, Line interval 0.02". The tarantula illustration shows individual hairs resolved in brown on a speckled round coaster. Power isn't shown.
- Creative Ramblings, "Laser Engraved Cork Coasters You Can Sell": This one uses diode and CO2 lasers, so I didn't take settings from it. At about 8:52 she scrubs the coasters with a stiff brush under running water, lets them air-dry, and leaves them unsealed so they still soak up drink condensation.
Step-by-step: engraving a cork coaster on the F2 Ultra UV
1. Know your cork
Check whether it's agglomerated, natural bark or backed cork. If it's one of xTool's cork products, pick it from the material list so the preset loads.
2. Flatten and secure
Lay the coaster flat. Tape thin sheet at the edges, or load coasters into a jig.
3. Focus
Measure the thickness and focus on the top surface.
4. Prepare the art
Use bold vector line art for logos and text. For photos, brighten the image, simplify the background and plan a lower resolution.
5. Grid, then engrave
Run the grid above on a spare coaster, brush it, and pick the cleanest square. Engrave with the lid closed and extraction on.
6. Finish
Brush off the soot, or rinse and air-dry the coaster. Seal it only if you want a wipe-clean surface.
What should I do if the mark looks wrong?
| Problem | Likely cause | What to try |
|---|---|---|
| Mark is too light | Too fast or too little power | Slow down first, then raise power in small steps |
| Small text fills in | Too much energy | Speed up or drop power, and use bolder lettering |
| Photo is dark and muddy | Dot duration or DPI too high | Shorten the dot time, lower the DPI, brighten the photo |
| Mark looks dirty or grey | Soot in the cork cells | Brush or rinse it, then judge the color |
| Patchy mark across the coaster | Granules or binder vary, or the coaster isn't flat | Try another coaster from the pack and check focus |
| Edges of the coaster crumble | Design too close to the edge | Leave a margin of a few millimeters |
| Cut doesn't go through | Thick or backed cork | Add passes and watch closely, or cut thinner sheet |
| Flame follows the beam on a cut | Too slow for that cork | Stop if the flame stays, then speed up and add passes |
Safety and aftercare
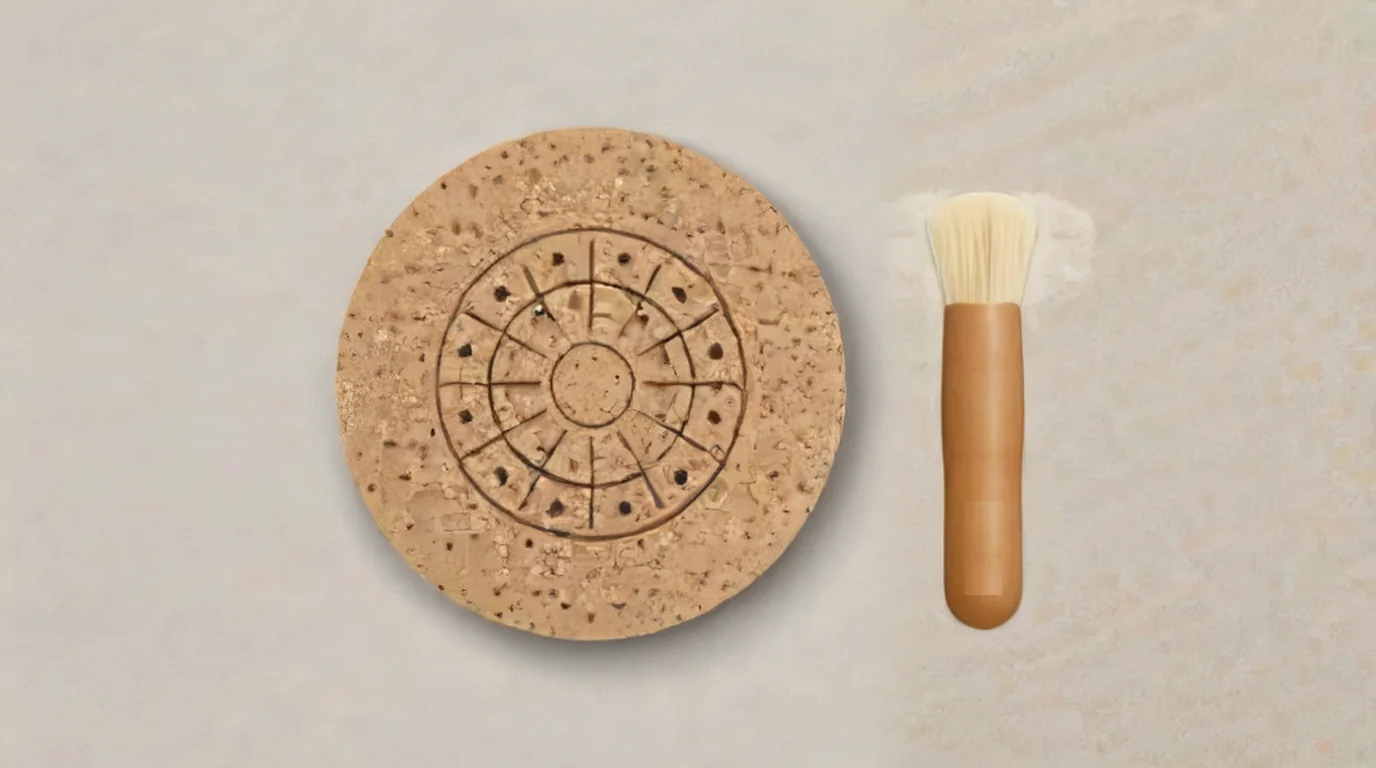 Brush the soot out of the cork cells before you judge the color. A mark that looks dark straight off the bed can lighten once it's clean. (AI-generated example.)
- Engrave and cut with the lid closed and extraction running. If you open the lid for any reason, wear goggles rated for 355 nm, per xTool's safety guidance.
- Cork is combustible. Stay with the machine, keep the bed clear of cork dust and offcuts, and have a fire blanket or extinguisher nearby.
- Don't laser cork with PVC or vinyl backing or unknown coatings.
- Clean with a soft dry brush, or rinse and let it air-dry fully. Bonny Creations advises against wet wipes and cleaning products on unfinished cork.
- To seal, use a thin coat of water-based polyurethane after engraving. Many sellers leave drink coasters unsealed so the cork can still absorb condensation.
What I couldn't confirm
- The numbers inside xTool's official cork presets. They load in xTool Studio only.
- A full F2 Ultra UV recipe for line art on cork with every value visible, including lines per cm and frequency.
- An F2 Ultra UV photo setting on cork that the maker called a success. The one example I found was still too dark.
- How well the F2 Ultra UV cuts cork thicker than about 2 mm.
FAQ
Can the xTool F2 Ultra UV engrave cork?
Yes. xTool publishes official F2 Ultra UV presets for its Round Cork Coasters, 0.53 mm cork sheet and Portuguese Oak Bark Eco Cork, and makers use it on cork coasters.
What are the best F2 Ultra UV settings for cork?
For xTool's own cork, load the official preset in xTool Studio. For other cork, a community starting point is 35% power, 500 mm/s and 1 pass. Grid toward 70% and 300 mm/s on a spare coaster if you want it darker.
Why is my UV engraving on cork lighter than a diode's?
The UV makes a fine surface mark without much heat spreading sideways, so you get detail rather than a deep burn. Slow down and add a little power, or use a diode if you need a dark, rustic look.
What settings should I use for photos on cork?
The one F2 Ultra UV example on screen used 95% power, 500-600 µs dot duration and 400-500 DPI, and the maker said both were too dark. Start with less energy per dot and a lower resolution, and brighten the photo first.
Can the F2 Ultra UV cut cork?
It can cut thin cork. A community starting point is 95% power at 50 mm/s and 1 pass. Thick or backed cork may need several passes, and you should never leave a cork cut running unattended.
Should I seal engraved cork coasters?
It's up to you. A thin water-based polyurethane makes them wipe-clean. Many sellers leave them unsealed so the cork still absorbs drink condensation.
How do I clean soot off engraved cork?
Use a soft dry brush first. For heavier soot, scrub gently under running water and let the coaster air-dry fully before you pack it.
Is it safe to laser cork?
Natural and agglomerated cork are common laser blanks, but cork is combustible. Run extraction, stay with the machine, and avoid cork with PVC, vinyl or unknown backings.
Related guides
- xTool F2 Ultra UV bamboo settings
- xTool F2 Ultra UV wood settings
- xTool F2 Ultra UV leather settings
- xTool F2 Ultra UV paper settings
- xTool F2 Ultra UV slate settings
- xTool F2 Ultra UV marble settings
- How to focus a UV laser
- Best self-centering jigs for the F2 Ultra UV
- Best UV laser blanks to buy and sell
- UV laser project ideas
Final thoughts
Cork on the F2 Ultra UV is about detail, not darkness. Load xTool's preset when you're using xTool's cork. Otherwise, start at 35% and 500 mm/s, slow down before you add power, and keep photos light and low-resolution. Brush every test clean before you decide, and never walk away from a cork cut.
Sources and further watching
- xTool Support - Safety First for xTool F2 Ultra UV (article 2751): https://support.xtool.com/article/2751
- xTool Support - FAQs on xTool F2 Ultra UV (article 2870): https://support.xtool.com/article/2870
- xTool Support - Processing Parameter Settings / Material test array (article 2698): https://support.xtool.com/article/2698
- xTool Support - Processing Parameters for xTool F2 Ultra UV (article 2699): https://support.xtool.com/article/2699
- xTool Support - Process on Flat Surface with xTool F2 Ultra UV (article 3840): https://support.xtool.com/article/3840
- xTool Material Lab (Atomm) - Round Cork Coasters, official settings: https://www.atomm.com/materials-lab/official/145-round-cork-coasters
- xTool Material Lab (Atomm) - 1/48" (0.53 mm) Cork, official settings: https://www.atomm.com/en/materiallab/materials/2389?deviceType=GS009-CLASS-4
- xTool Material Lab (Atomm) - Portuguese Oak Bark Eco Cork, official settings: https://www.atomm.com/en/materiallab/materials/4047?deviceType=GS009-CLASS-4
- Atomm - Rena's UV Laser Engraved Cork Coaster (okuykuni, F2 Ultra UV): https://www.atomm.com/project/102921-renanouvrezadiao-ke-korukukosuta
- Bonny Creations - xTool F2 Ultra UV cork settings: https://www.bonnycreations.com/settings/machines/xtool-f2-ultra-uv/cork
- Bonny Creations - ComMarker Omni X UV cork settings: https://www.bonnycreations.com/settings/machines/commarker-omni-x-uv/cork
- Bonny Creations - Laser settings for cork coasters, trivets and stamps: https://www.bonnycreations.com/blog/laser-settings-cork-coasters-trivets
- L3D Accessories - Cork coaster engraving with the xTool F2: https://www.l3daccessories.com/blogs/learn/xtool-f2-cork-coasters
- Opt Lasers - Laser engraving and cutting cork: https://optlasers.com/laser-engraving-and-cutting-cork
- Trotec - Tips for smoke-free processing of cork: https://www.troteclaser.com/en/helpcenter/materials/material-usage-hints/tips-for-smoke-free-processing-of-cork
- Boss Laser - Kapton, Mylar, cork and paper: https://team.bosslaser.com/learn/materials/niche-materials/
- TwoTrees - Engrave cork without crumbling the surface or trapping smoke residue: https://twotrees3d.com/blogs/knowledge/engrave-cork-without-crumbling-the-surface-or-trapping-smoke-residue
- Macsa ID - Laser marking of cork bottle stoppers: https://www.macsa.com/laser-marking-of-cork-bottle-stoppers/
- Epilog Laser - Laser engraving cork coasters: https://www.epiloglaser.com/resources/sample-club/laser-engraving-cork-coasters/
- Wikipedia - Cork (material): https://en.wikipedia.org/wiki/Cork_(material)
Further watching (embeds)
- Laser Everything - "The ULTIMATE Laser Marking Guide to Cork | It's FIRE! (literally)": https://www.youtube.com/watch?v=Jqouse5oYuc
- Haotian Laser - "UV Laser 5W Engraving on Cork Clean & Detailed Cork Marking Tutorial": https://www.youtube.com/watch?v=mT19dSxU21k
- Creative Ramblings - "Laser Engraved Cork Coasters You Can Sell": https://www.youtube.com/watch?v=xbC5lrXLtEw
Cork coasters marked on a 5W UV galvo, fiber, CO2 galvo, diode and CO2 gantry lasers, with the UV run settings shown on screen and a side-by-side comparison of the results. (Video: Laser Everything on YouTube.)
A 5W UV galvo engraving a detailed illustration on a round cork coaster, with speed, frequency, pulse and line interval shown on screen. (Video: Haotian Laser on YouTube.)
Cork coasters engraved on diode and CO2 lasers, with design tips, cleaning with a brush under water, and ideas for selling them to local businesses. (Video: Creative Ramblings on YouTube.)
Related settings
- xTool F2 Ultra UV Bamboo Settings: Cutting Boards, Coasters & Plywood (2026)
- xTool F2 Ultra UV Granite Settings: Black Granite, Memorials & Rocks (2026)
- xTool F2 Ultra UV Polycarbonate Settings: PC Sheet, Cases & Cards (2026)
- xTool F2 Ultra UV Marble Settings: Black, White & Green Marble Chart (2026)
- xTool F2 Ultra UV Gold Settings: Solid, Gold-Filled & Gold-Plated Jewelry (2026)
- xTool F2 Ultra UV Silver Settings: Sterling Silver Jewelry, Tags & Pendants (2026)
- xTool F2 Ultra UV Copper Settings: Sheet, Tags & Copper-Clad PCB Blanks (2026)
- xTool F2 Ultra UV Aluminum Settings: Bare Sheet, Cards, Tags & ID Plates (2026)
- xTool F2 Ultra UV Silicone Settings: Wristbands, Watch Bands & Phone Cases (2026)
- xTool F2 Ultra UV Titanium Settings: Color Mark, Dark Mark & Jewelry Chart (2026)
- xTool F2 Ultra UV Paper & Cardstock Settings (2026 Guide)
- xTool F2 Ultra UV ABS Settings: Presets, Test Grid & Safety Guide (2026)
- xTool F2 Ultra UV Brass Settings: Tags, Sheet & Coin Emboss Chart (2026)
- xTool F2 Ultra UV Crystal Settings: 3D Inner Engraving Guide (2026)
- xTool F2 Ultra UV Anodized Aluminum Settings: Business Cards & More (2026)
- xTool F2 Ultra UV Leather Settings: Genuine, Faux & Leatherette Chart (2026)
- xTool F2 Ultra UV Stainless Steel Settings: Dark, White, Color & Photo Chart (2026)
- xTool F2 Ultra UV Wood Settings: Basswood, Plywood, Pine & MDF Chart (2026)
- xTool F2 Ultra UV Acrylic Settings: Clear, Black & White Chart (2026)
- xTool F2 Ultra UV Ceramic Settings: Tiles & Mugs Chart (2026)
- xTool F2 Ultra UV Glass Settings: Flat Glass & Rotary Chart (2026)
- xTool F2 Ultra UV PLA Settings: 3D Print Colour Chart (2026)
- xTool F2 Ultra UV Slate Settings: Power, Speed & Frequency Chart (2026)
- xTool F2 Ultra UV Tumbler Settings: Powder-Coated & Stainless (2026)
- Can a UV Laser Engrave Slate?
- Can a UV Laser Engrave Glass?
Keep reading
xTool F2 Ultra UV Bamboo Settings: Cutting Boards, Coasters & Plywood (2026)
Sourced xTool F2 Ultra UV bamboo settings for cutting boards, coasters and plywood, with a starting test grid, glue-line tips and food-safe finishing.
Read more19 min read
xTool F2 Ultra UV Granite Settings: Black Granite, Memorials & Rocks (2026)
Sourced xTool F2 Ultra UV granite settings for polished black and light granite, with a starting test grid, deep relief, paint fill and silica safety.
Read more20 min read
xTool F2 Ultra UV Polycarbonate Settings: PC Sheet, Cases & Cards (2026)
Sourced xTool F2 Ultra UV polycarbonate settings for clear, white and black PC, with a starting test grid, mark colors, fume safety and fixes.
Read more18 min read