xTool F2 Ultra UV Polycarbonate Settings: PC Sheet, Cases & Cards (2026)
Sourced xTool F2 Ultra UV polycarbonate settings for clear, white and black PC, with a starting test grid, mark colors, fume safety and fixes.
18 min read
On this page
- Short answer
- Quick answer: the best starting settings
- xTool F2 Ultra UV polycarbonate settings chart
- Other UV machines (cross-reference only, not F2 Ultra UV numbers)
- Diode and CO2 numbers you should not copy
- What do the settings mean?
- Can the xTool F2 Ultra UV engrave polycarbonate?
- Which polycarbonate are you marking?
- What kind of mark will you get?
- How do I avoid yellowing and cracks?
- How should I set up a polycarbonate job?
- What I saw in the videos
- Step-by-step: marking polycarbonate on the F2 Ultra UV
- 1. Know your plastic
- 2. Flatten and secure
- 3. Focus
- 4. Prepare the art
- 5. Grid, then mark
- 6. Finish
- What should I do if the mark looks wrong?
- Safety and aftercare
- What I couldn't confirm
- FAQ
- Can the xTool F2 Ultra UV engrave polycarbonate?
- What are the best F2 Ultra UV settings for polycarbonate?
- Why does a UV laser work better on polycarbonate than a diode or CO2?
- Will the mark be dark or light?
- How do I stop polycarbonate from yellowing?
- Can I engrave a polycarbonate phone case on the F2 Ultra UV?
- Can the F2 Ultra UV cut polycarbonate?
- Is it safe to laser polycarbonate?
- Related guides
- Final thoughts
- Sources and further watching
Last updated: November 16, 2026
 Polycarbonate is where a 355 nm UV shines. It gives a fine, clean mark with no melted edge. (AI-generated example.)
Polycarbonate (PC) is the tough, see-through plastic behind sensor housings, ID cards, safety shields and a lot of phone cases. It's also the plastic that makes other lasers look bad. A CO2 laser yellows and melts it, and a blue diode can't mark clear PC at all.
That's exactly why people buy a UV laser. xTool lists polycarbonate among the plastics the F2 Ultra UV can engrave, and the 355 nm beam is absorbed right at the surface, so the heat stays small.
Here's the catch, and I'd rather say it up front: I couldn't find a published F2 Ultra UV polycarbonate recipe with every value visible. There's no PC preset shown on xTool's public pages, and no F2 Ultra UV video I found shows PC settings on screen. So this guide gives you what is sourced, what other 5W UV machines were shown running, and a test grid to find your own numbers. The grid is an untested starting point, not a result.
Quick facts
- Machine: xTool F2 Ultra UV, enclosed 5W, 355 nm UV galvo
- Is PC supported? Yes. Retailer and review spec lists name "ABS, PC and silicone" as engravable plastics
- Official PC preset: none found on public pages. Pick the closest plastic in xTool Studio, then run a material test array
- Grid range used in CNC Kitchen's F2 Ultra UV plastic tests: 10-100% power, 250-4,500 mm/s (PC was one of the plastics tested)
- Mark color: depends on the PC. Dark PC tends to mark lighter, light PC can mark darker, and clear PC gives a grey or frosted mark
- Frequency window: 40-150 kHz on the F2 Ultra UV
- Fumes: PC gives off phenols and carbon monoxide when lasered. Run extraction with the lid closed
Short answer
The xTool F2 Ultra UV can mark polycarbonate cleanly, and it's the kind of plastic a UV laser handles better than CO2 or a blue diode. There's no public PC recipe to copy, so run a material test array on a scrap of your own PC. CNC Kitchen's F2 Ultra UV plastic grids covered 10-100% power and 250-4,500 mm/s at 40 kHz, and a sensible first grid for PC is 20-100% power and 300-3,000 mm/s, narrower than their sweep, because industrial guides keep PC gentle. Pick the square with sharp edges and no yellow halo, not the darkest one. Keep the lid closed, run extraction, and test every new batch, because color and additives change the result more than the plastic itself.
Quick answer: the best starting settings
There's no verified number to copy, so build a grid. In xTool Studio, choose Applications, then Material test array, and set a power range and a speed range. xTool's own guide to the material test array describes exactly this, and it takes a few minutes on a scrap piece.
Suggested first grid (untested starting point):
- Power: 20% to 100%
- Speed: 300 to 3,000 mm/s
- Lines per cm: 300, which is what CNC Kitchen's F2 Ultra UV test plate on screen was set to
- Frequency: 40 kHz, the bottom of the F2 Ultra UV's range, and the value that same plate used
- Passes: 1
Why start lower than the plastics charts? Reviewers publish 100% power at 1,000 mm/s for ABS and PET sheet, but those are reviewer figures and PC is not on that list. Industrial UV guides keep PC gentle, with low power and short pulses, because too much energy yellows, bubbles or cracks it. Use the grid to find the edge instead of guessing.
Which square to pick: the one with crisp edges, readable small text and no yellow tint around the lines.
xTool F2 Ultra UV polycarbonate settings chart
Every number in this chart comes from a source. Nothing here is my own test. Only the first two rows are about an F2 Ultra UV, and neither is a PC recipe.
| Item / goal | Power | Speed | Lines/cm | Passes | Frequency | Source |
|---|---|---|---|---|---|---|
| Plastic test grid range, F2 Ultra UV (PC among the plastics tested) | 10-100% | 250-4,500 mm/s | 300 (plate on screen) | 1 | 40 kHz (plate on screen) | CNC Kitchen video |
| xTool material test array | your range | your range | your choice | your choice | your choice | xTool Support article 2698 |
| Polycarbonate, no F2 Ultra UV recipe published | not found | not found | not found | not found | not found | searched xTool Support, Atomm, EngraveSettings, L3D |
Why the PC row says "not found": xTool Studio has a material library with presets, but the public pages don't show a polycarbonate entry or its numbers. If you find one in Studio, use it as your base and save a copy.
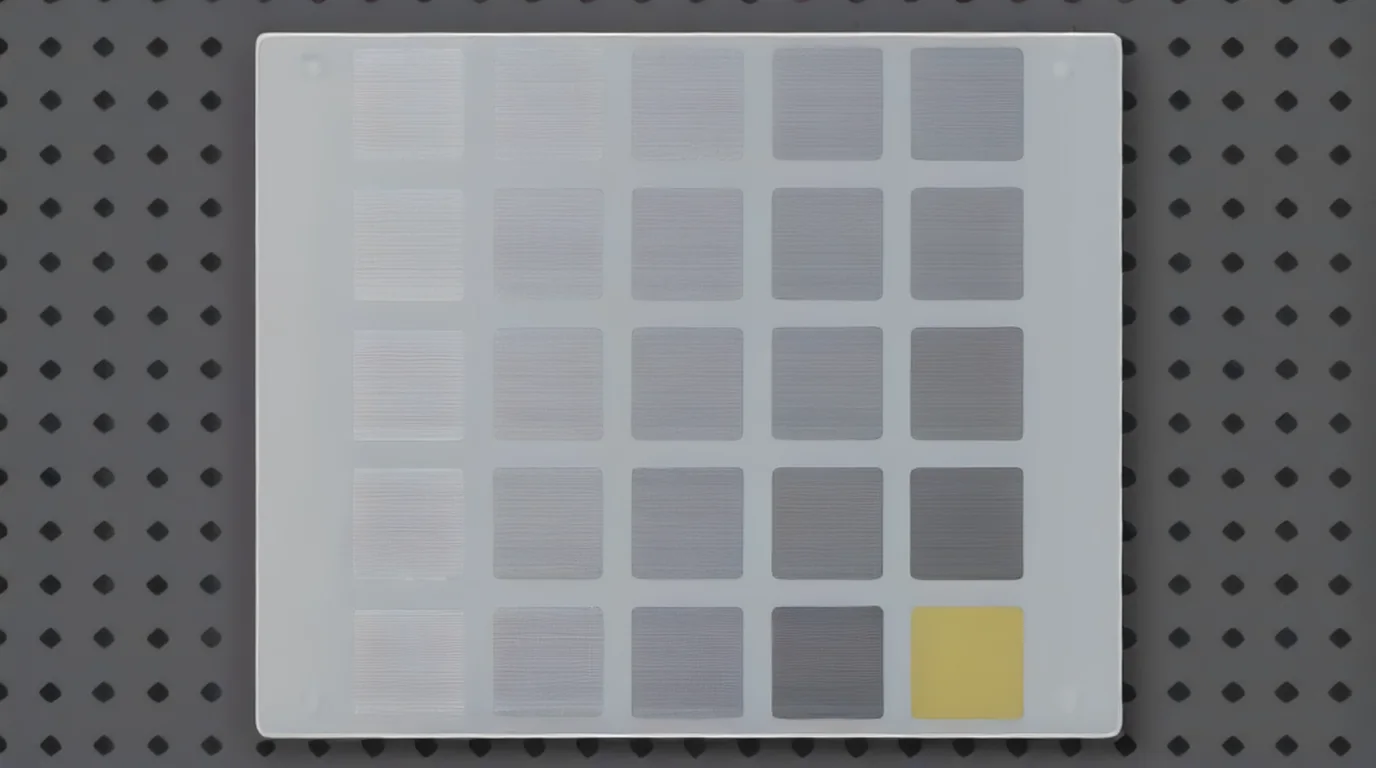 A small grid on scrap PC tells you more than any chart. Choose the square with sharp edges, not the boldest one. (AI-generated example.)
Other UV machines (cross-reference only, not F2 Ultra UV numbers)
These rows show where other 5W UV machines were set on PC or PC-type plastic. Different optics and different control software mean you can't paste them into xTool Studio, but they show the shape of a safe starting window.
| Machine / source | Power | Speed | Frequency | Pulse / hatch | What it was marking |
|---|---|---|---|---|---|
| Mactron MT-UV5 (video overlay) | 5W (laser rating) | 800 mm/s | 30 kHz | hatch 0.02 mm | White polycarbonate sensor housings, dark logo marks |
| BWM 5W UV, 110 lens (video overlay) | 5W (laser rating) | 2,000 mm/s | 60 kHz | pulse 5, hatch 0.03 | White marking on black plastic (ABS/PC) |
| ComMarker Omni X UV (EngraveSettings guide) | 20% | 200 mm/s | 20 kHz | not stated | Polycarbonate baseline, "may need multiple passes" |
| Generic 3-5W UV guides (Kinmaje, LaserCNC) | 3-4 W, or 10-20% | 300-600 mm/s | 20-50 kHz | 10-20 ns | Polycarbonate, white mark |
Notice the spread. One machine marks PC at 800 mm/s and another at 2,000, and the settings are only comparable inside the same machine. The one thing they agree on is a modest amount of energy per pulse, which is why the grid above starts lower than the ABS and PET numbers you may have seen.
Diode and CO2 numbers you should not copy
Voxelase notes a blue diode can't mark clear PC because it passes blue light. CO2 can engrave and cut PC, but Universal Laser Systems' PC guide describes a yellow to light-brown mark and a wide heat-affected zone, and says edge discoloration when cutting can be reduced but not removed. If you see a CO2 or diode PC recipe, skip it.
What do the settings mean?
- Power (%): laser output. On PC, more power gives a stronger mark, then yellowing or a rough, foamed surface.
- Speed (mm/s): faster puts less energy into each spot. On plastics, the interesting changes happen in the lower part of the speed range, per CNC Kitchen.
- Lines per cm: how tightly the fill lines are packed. 100 lines/cm equals 254 DPI, per xTool's parameter guide. Higher fills more evenly but adds heat.
- Frequency (kHz): pulse rate, 40-150 kHz on the F2 Ultra UV. At the same power, a higher frequency spreads the energy over more, weaker pulses.
- Dot duration (µs): used for bitmap photos instead of speed. Excessive dot duration can cause a whitening effect, per xTool.
- Passes: one is the norm on plastic. Extra passes add heat.
Can the xTool F2 Ultra UV engrave polycarbonate?
Yes. xTool's own plastics article for the machine focuses on 3D-printed PLA, ABS and acrylic, but retailer and review spec sheets list the engravable plastics as "ABS, PC and silicone". CNC Kitchen's test plates included polycarbonate and found marking quality was driven more by color and additives than by the base polymer.
Why UV suits PC so well, according to the industrial sources:
- Grossmann Lasertechnik explains that PC absorbs strongly in the UV, partly because most grades carry UV absorbers against yellowing. That's why a UV marks clear PC where a fiber laser barely leaves a trace.
- MCW Laser says UV lasers can give a deep charcoal or black mark inside the surface of a transparent PC layer, which is why ID cards and automotive sensors use it.
- Zhuorui Laser calls UV a practical first route for clear, fine-detail or appearance-sensitive PC.
The honest limit is that the F2 Ultra UV is a 5W machine built for marking, not cutting PC. For cutting, use something else.
Which polycarbonate are you marking?
 White PC often gives a dark, high-contrast mark. Clear PC gives a quieter grey or frosted one. (AI-generated example.)
White or light PC (cards, housings) usually gives the best contrast. In the Mactron video, a white PC enclosure takes a clean dark logo, and the UPGOAL and Perfectlaser ID card videos show dark photo and text marks on white PC cards.
Black or dark PC tends to mark lighter. The BWM Laser video shows a white mark on a black plastic dish with the overlay "5W UV, 110 lens, Speed 2000, Frequency 60, Pulse 5, Hatch 0.03". CNC Kitchen explains the mechanism: tiny bubbles on a dark surface scatter light, so it looks lighter.
Clear PC is the lowest-contrast case. CNC Kitchen got visible results even on transparent samples because a material that looks clear can still absorb at 355 nm, though the contrast wasn't as strong as on opaque ones.
Colored PC is the wild card. CNC Kitchen had trouble with red samples. Blue turned almost white.
PC/ABS blends and flame-retardant grades: gweike's industrial guide says to treat PC/ABS as its own material, because it won't behave like either one alone.
Not sure it's PC? Polycarbonate and acrylic look alike on a shelf. Lexan and Makrolon are polycarbonate, and Plexiglas and Perspex are acrylic. If you can't identify it, don't laser it.
What kind of mark will you get?
A UV mark on plastic usually forms one of two ways, per CNC Kitchen and the industrial sources:
- Foaming: tiny bubbles scatter light, so the mark looks lighter. This is the usual result on dark PC.
- Carbonizing or pigment change: the surface darkens. This is how white or light PC gets a dark mark.
You steer between them with energy. Less energy per pulse and a gentler pass tends toward a light mark. More energy tends toward dark, but too much brings yellowing, bubbling or cracks. Kinmaje's guide, written for industrial UV, makes the same point: with power fixed, frequency is the main dial for the shade.
How do I avoid yellowing and cracks?
- Use the least energy that gives you contrast. Yellowing, haze, bubbling and microcracking are the failure modes Zhuorui lists for PC.
- Watch stressed areas. Zhuorui notes gates, thin walls, sharp corners and bent regions of molded PC are the most sensitive to whitening or cracking.
- Skip hairline fills on thin sheet. Thin material tolerates less local heat.
- Don't re-mark the same spot. Extra passes add heat.
- Clean off residue. Amtek's analysis found the yellow film sometimes left on lasered PC was phenol, which is water soluble, so wipe it off before judging the color.
How should I set up a polycarbonate job?
- Keep it flat and in place. Use the L-shaped jig or tape the edges so extraction airflow can't lift thin PC.
- Check the surface. Dust, oil and any protective film change how the beam is absorbed, so clean it first. Industrial UV guides say the same.
- Focus on the top surface. Measure the thickness and focus on the face, as the F2 Ultra UV's camera does for flat work.
- Use the right file. Bold vector line art and solid fills are easiest. For a photo, use a bitmap mode and test for dark halos first.
- Match your material to Studio. Pick the closest plastic in the library as a base and save a copy before editing.
What I saw in the videos
I pulled frames from the videos instead of only reading transcripts. I didn't find a video of PC on the F2 Ultra UV with settings on screen, so these show the closest evidence.
- CNC Kitchen, "Is This Laser the 3D Printing Solution We Needed?": The F2 Ultra UV test plate on screen reads "Engrave Test - xTool F2 Ultra UV, Pass: 1, Frequency: 40, Lines per cm: 300", with power 10 to 100% across and speed 250 to 4,500 mm/s down. He lists polycarbonate among PLA, PETG, ASA and TPU that gave very similar results, and says pigment and additives matter more than the polymer.
- Mactron Laser, "Polycarbonate (PC) Plastic Marking with UV Laser Marking Machine": The overlay reads "Model: MT-UV5, Power: 5W, Frequency: 30KHz, Speed: 800mm/s, Hatch: 0.02mm". A logo and a small line pattern are marked in dark grey on white PC enclosures, with clean edges.
- BWM Laser, "White marking on black plastic ABS Polycarbonate UV laser engraving": The overlay shows 5W UV, 110 lens, Speed 2000, Frequency 60, Pulse 5, Hatch 0.03. A detailed butterfly and a short word mark appear light grey on a black dish.
- UPGOAL and Perfectlaser: Both show white PC cards marked with text and a photo in grey-black. No usable settings are visible, so I took none.
Step-by-step: marking polycarbonate on the F2 Ultra UV
1. Know your plastic
Confirm it's polycarbonate, not acrylic, PVC or an unknown blend. Note the color and whether it's clear.
2. Flatten and secure
Lay it flat. Use the jig or tape the edges.
3. Focus
Measure the thickness and focus on the top surface.
4. Prepare the art
Use bold vector lines or solid shapes. Avoid hairlines on thin sheet.
5. Grid, then mark
Run a 5 x 5 material test array on scrap from 20-100% power and 300-3,000 mm/s, at 300 lines/cm, 40 kHz and 1 pass. Wipe it, pick the cleanest square, then run the job with the lid closed and extraction on.
6. Finish
Wipe off residue with a damp cloth and dry it. Check for yellowing and cracks under good light before you pack the piece.
 Wipe the residue off with a damp cloth before you judge the mark. A film can hide the real contrast. (AI-generated example.)
What should I do if the mark looks wrong?
| Problem | Likely cause | What to try |
|---|---|---|
| Mark is too faint | Too fast or too little power | Slow down or raise power in small steps |
| Yellow tint around the lines | Too much energy | Speed up or lower power, and don't add passes |
| Surface looks rough or bubbled | Foaming from too much energy | Cut energy, and check focus |
| Fine text fills in | Too much heat or lines too dense | Speed up, lower lines per cm, use bolder text |
| Hairline cracks near the mark | Molded stress or thin wall | Lower energy, avoid stressed zones, try another sample |
| Clear PC barely marks | Low contrast on clear material | Try a bolder design, or use white or frosted PC |
| Dark PC marks patchy | Pigment and additive variation | Run a fresh grid for that batch |
| Mark looks different batch to batch | Additives vary | Retest each batch |
Safety and aftercare
- Fumes are real. Industrial testing on laser-processed PC found phenol, benzene, toluene and carbon monoxide in the effluent, with marking producing much less than cutting. Run extraction and keep the lid closed until the smoke clears.
- Check your plastic. GravingX's F2 Ultra UV page says plastics containing PVC, ABS or polycarbonate give off harmful fumes, so it recommends good ventilation and an air purifier. Never laser PVC or an unidentified plastic.
- UV is invisible. CNC Kitchen warns that with a UV laser the beam is outside the visible spectrum and the radiation can still be dangerous, so use the enclosure and correct laser safety glasses.
- Stay with the machine. Some plastics melt and can ignite.
- Do your own food-contact check. I didn't find a source on whether marked PC is food safe, so don't promise it.
What I couldn't confirm
- A verified F2 Ultra UV polycarbonate recipe with every value visible.
- Whether xTool Studio has a polycarbonate preset, and what its numbers are.
- How the mark changes on clear PC at different frequencies on this machine.
- How the F2 Ultra UV handles PC/ABS blends, flame-retardant PC or UV-stabilized sheet.
- Whether a marked PC phone case or card keeps its mark through long-term abrasion. Industrial pages claim it does, but those are vendor claims for their own machines.
FAQ
Can the xTool F2 Ultra UV engrave polycarbonate?
Yes. Spec lists for the machine name ABS, PC and silicone as engravable plastics, and CNC Kitchen's plastic tests on it included polycarbonate. xTool doesn't publish a PC recipe on its public pages.
What are the best F2 Ultra UV settings for polycarbonate?
There isn't a verified number to copy. Run xTool Studio's material test array on scrap PC, starting around 20-100% power and 300-3,000 mm/s at 300 lines/cm, 40 kHz and 1 pass, and pick the cleanest square. That grid is an untested starting point.
Why does a UV laser work better on polycarbonate than a diode or CO2?
PC absorbs strongly at 355 nm, so the energy goes into the surface with little heat. A blue diode passes through clear PC, and CO2 tends to yellow and melt it.
Will the mark be dark or light?
It depends on the plastic. Dark PC tends to mark lighter through tiny bubbles, white PC can mark dark, and clear PC gives a grey or frosted mark. Color and additives matter more than the base polymer.
How do I stop polycarbonate from yellowing?
Use the least energy that gives contrast, avoid extra passes, and wipe off the residue before judging the color. If it yellows at the edges, speed up or drop power.
Can I engrave a polycarbonate phone case on the F2 Ultra UV?
It's a reasonable job, but test on a spare. Phone cases are often PC/ABS blends, TPU or silicone, and each marks differently. Treat a blend as its own material and keep art on the flat back.
Can the F2 Ultra UV cut polycarbonate?
I wouldn't count on it. It's a 5W marking laser, and industrial sources describe UV as a marking tool, not a cutting tool for PC.
Is it safe to laser polycarbonate?
Only with care. PC releases phenols and carbon monoxide when lasered. Use an enclosed machine, run extraction, keep the lid closed until the smoke clears, and never laser PVC or unknown plastic.
Related guides
- xTool F2 Ultra UV ABS settings
- xTool F2 Ultra UV PLA settings
- xTool F2 Ultra UV acrylic settings
- xTool F2 Ultra UV silicone settings
- How to focus a UV laser
- How to calibrate the xTool F2 Ultra UV
- Best self-centering jigs for the F2 Ultra UV
- Best inline fans
- UV laser project ideas
Final thoughts
Polycarbonate is a good fit for the F2 Ultra UV, but there's no public recipe to copy. Build a material test array on scrap, start with modest energy at 300 lines/cm and 40 kHz, and choose the square with clean edges and no yellow tint. Expect dark PC to mark light and white PC to mark dark, wipe the residue before you judge, and keep the lid closed with extraction running.
Sources and further watching
- xTool Support - Processing Parameter Settings / Material test array (article 2698): https://support.xtool.com/article/2698
- xTool Support - Processing Parameters for xTool F2 Ultra UV (article 2699): https://support.xtool.com/article/2699
- xTool Support - xTool F2 Ultra UV Plastic Engraving (article 3269): https://support.xtool.com/article/3269
- xTool Material Library overview (Atomm): https://www.atomm.com/blog/2811-xtool-materials
- GravingX - xTool F2 Ultra UV product page (materials and safety): https://gravingx.com/en/product/xtool-f2-ultra-uv-5w-uv-laserski-gravirnik/
- 3CM - xTool F2 Ultra UV product page: https://wejust3cm.com/products/xtool-f2-ultra-uv/
- Tom's Hardware - xTool F2 Ultra UV review: https://www.tomshardware.com/maker-stem/xtool-f2-ultra-uv-dual-laser-engraver-review
- LaserEngraverExpert - xTool F2 Ultra UV review (plastics table, unverified): https://laserengraverexpert.com/xtool-f2-ultra-uv-review/
- EngraveSettings - xTool F2 Ultra UV settings: https://engravesettings.com/machine/xtool-f2-ultra-uv/
- EngraveSettings - Polycarbonate on ComMarker Omni X UV: https://engravesettings.com/setting/1031/
- L3D Accessories - xTool F2 Ultra UV laser settings: https://www.l3daccessories.com/pages/xtool-f2-ultra-uv-laser-settings
- Voxelase - Laser engrave plastic: safe vs unsafe list: https://voxelase.com/blog/laser-engraving-plastic/
- Zhuorui Laser - Polycarbonate laser marking: https://zhuoruilaser.com/materials/plastics/polycarbonate/
- Grossmann Lasertechnik - Polycarbonat lasern: https://grossmann-lasertechnik.de/polycarbonat-lasern/
- MCW Laser - UV laser marking on clear plastics: https://www.mcwlaser.net/blogs/solutions/uv-laser-marking-on-clear-plastics-can-you-achieve-a-black-mark
- gweike - UV laser engraving plastic: ABS, PC, PE and PP guide: https://www.gweikecloud.com/blogs/news/uv-laser-engraving-plastic
- IDEEDA Tech - Laser marking on plastic, CO2 vs UV: https://www.ideedatech.com/laser-marking-plastic-co2-vs-uv/
- LaserCNC - Marking parameters for different materials on a UV marking machine: https://www.lasercnc.com/blog/how-to-set-the-marking-parameters-for-different-materials-on-a-uv-marking-machin-622799.html
- Kinmaje - UV laser plastic marking parameters (Chinese): https://www.kinmaje.com/faq/755.html
- ComMarker - Omni X material guide: https://blog.commarker.com/archives/55305
- Universal Laser Systems - Polycarbonate processing guide: https://hltlasers.com/wp-content/uploads/2020/03/Processing-Guide-Polycarbonate-Processing-Guide.pdf
- Universal Laser Systems - Multiwave hybrid processing of polycarbonate: https://cdn.ulsinc.com/assets/pdf/materials_subordinate/583606d997d4dd54515de941/multiwave_hybrid_processing_for_polycarbonate.pdf
- Amtek - Cutting polycarbonate (effluent notes): https://support.amtekcompany.com/portal/en/kb/articles/cutting-polycarbonate
- Wikipedia - Polycarbonate: https://en.wikipedia.org/wiki/Polycarbonate
Further watching (embeds)
- CNC Kitchen - "Is This Laser the 3D Printing Solution We Needed?": https://www.youtube.com/watch?v=jA-E5CGcBxI
- Mactron Laser - "Polycarbonate (PC) Plastic Marking with UV Laser Marking Machine": https://www.youtube.com/watch?v=LYxURZQkX04
- BWM LASER - "White marking on black plastic ABS Polycarbonate UV laser engraving 3W 5W": https://www.youtube.com/watch?v=0AXEy5C_GcQ
CNC Kitchen tests laser marking on 3D-printed plastics, including polycarbonate, with the xTool F2 Ultra UV and its material test grid on screen. (Video: CNC Kitchen on YouTube.)
A 5W UV marker engraves logos and line art on white polycarbonate enclosures, with frequency, speed and hatch shown on screen. (Video: Mactron Laser on YouTube.)
A 5W UV laser marks a light butterfly and word mark on black plastic, with speed, frequency, pulse and hatch shown on screen. (Video: BWM LASER on YouTube.)
Related settings
- xTool F2 Ultra UV Bamboo Settings: Cutting Boards, Coasters & Plywood (2026)
- xTool F2 Ultra UV Granite Settings: Black Granite, Memorials & Rocks (2026)
- xTool F2 Ultra UV Cork Settings: Coasters, Sheets & Photo Chart (2026)
- xTool F2 Ultra UV Marble Settings: Black, White & Green Marble Chart (2026)
- xTool F2 Ultra UV Gold Settings: Solid, Gold-Filled & Gold-Plated Jewelry (2026)
- xTool F2 Ultra UV Silver Settings: Sterling Silver Jewelry, Tags & Pendants (2026)
- xTool F2 Ultra UV Copper Settings: Sheet, Tags & Copper-Clad PCB Blanks (2026)
- xTool F2 Ultra UV Aluminum Settings: Bare Sheet, Cards, Tags & ID Plates (2026)
- xTool F2 Ultra UV Silicone Settings: Wristbands, Watch Bands & Phone Cases (2026)
- xTool F2 Ultra UV Titanium Settings: Color Mark, Dark Mark & Jewelry Chart (2026)
- xTool F2 Ultra UV Paper & Cardstock Settings (2026 Guide)
- xTool F2 Ultra UV ABS Settings: Presets, Test Grid & Safety Guide (2026)
- xTool F2 Ultra UV Brass Settings: Tags, Sheet & Coin Emboss Chart (2026)
- xTool F2 Ultra UV Crystal Settings: 3D Inner Engraving Guide (2026)
- xTool F2 Ultra UV Anodized Aluminum Settings: Business Cards & More (2026)
- xTool F2 Ultra UV Leather Settings: Genuine, Faux & Leatherette Chart (2026)
- xTool F2 Ultra UV Stainless Steel Settings: Dark, White, Color & Photo Chart (2026)
- xTool F2 Ultra UV Wood Settings: Basswood, Plywood, Pine & MDF Chart (2026)
- xTool F2 Ultra UV Acrylic Settings: Clear, Black & White Chart (2026)
- xTool F2 Ultra UV Ceramic Settings: Tiles & Mugs Chart (2026)
- xTool F2 Ultra UV Glass Settings: Flat Glass & Rotary Chart (2026)
- xTool F2 Ultra UV PLA Settings: 3D Print Colour Chart (2026)
- xTool F2 Ultra UV Slate Settings: Power, Speed & Frequency Chart (2026)
- xTool F2 Ultra UV Tumbler Settings: Powder-Coated & Stainless (2026)
- Can a UV Laser Engrave Slate?
- Can a UV Laser Engrave Glass?
Keep reading
xTool F2 Ultra UV Bamboo Settings: Cutting Boards, Coasters & Plywood (2026)
Sourced xTool F2 Ultra UV bamboo settings for cutting boards, coasters and plywood, with a starting test grid, glue-line tips and food-safe finishing.
Read more19 min read
xTool F2 Ultra UV Granite Settings: Black Granite, Memorials & Rocks (2026)
Sourced xTool F2 Ultra UV granite settings for polished black and light granite, with a starting test grid, deep relief, paint fill and silica safety.
Read more20 min read

xTool F2 Ultra UV Cork Settings: Coasters, Sheets & Photo Chart (2026)
Sourced xTool F2 Ultra UV cork settings for coasters, thin sheet and photos, with xTool's presets, a test grid, cutting notes and cleanup tips.
Read more20 min read