xTool F2 Ultra UV Silicone Settings: Wristbands, Watch Bands & Phone Cases (2026)
Sourced xTool F2 Ultra UV silicone settings for wristbands, watch bands and phone cases, plus rainbow silicone tips, a test-grid method, cleanup and fixes.
Last updated 18 min read
On this page
- Short answer
- Quick answer: the best starting settings
- xTool F2 Ultra UV silicone settings chart
- A test grid built from the two sourced rows
- Other UV machines (cross-reference only, not F2 Ultra UV numbers)
- Diode and CO2 silicone numbers you should NOT use on the UV
- A warning about Atomm community pages
- What do these settings mean?
- Can a UV laser engrave silicone?
- Types of silicone and what to expect
- What do the source videos show?
- Step-by-step: engraving a silicone band or case
- 1. Prep
- 2. Hold it flat
- 3. Focus
- 4. Design
- 5. Run a grid, then the real piece
- 6. Clean
- Wristbands, watch bands, phone cases and more
- Is this job safe to run?
- What should I do if the mark looks wrong?
- What could I not confirm?
- FAQ
- Can the xTool F2 Ultra UV engrave silicone?
- What are the best F2 Ultra UV settings for silicone?
- What color does silicone turn under a UV laser?
- How do I clean silicone after UV engraving?
- Why isn't the rainbow layer showing on my band?
- Can I engrave a silicone phone case on the F2 Ultra UV?
- Should I use diode or CO2 silicone settings on the UV?
- Is a UV-engraved silicone item food-safe or baby-safe?
- Related guides
- Final thoughts
- Sources and further watching
Last updated: November 10, 2026
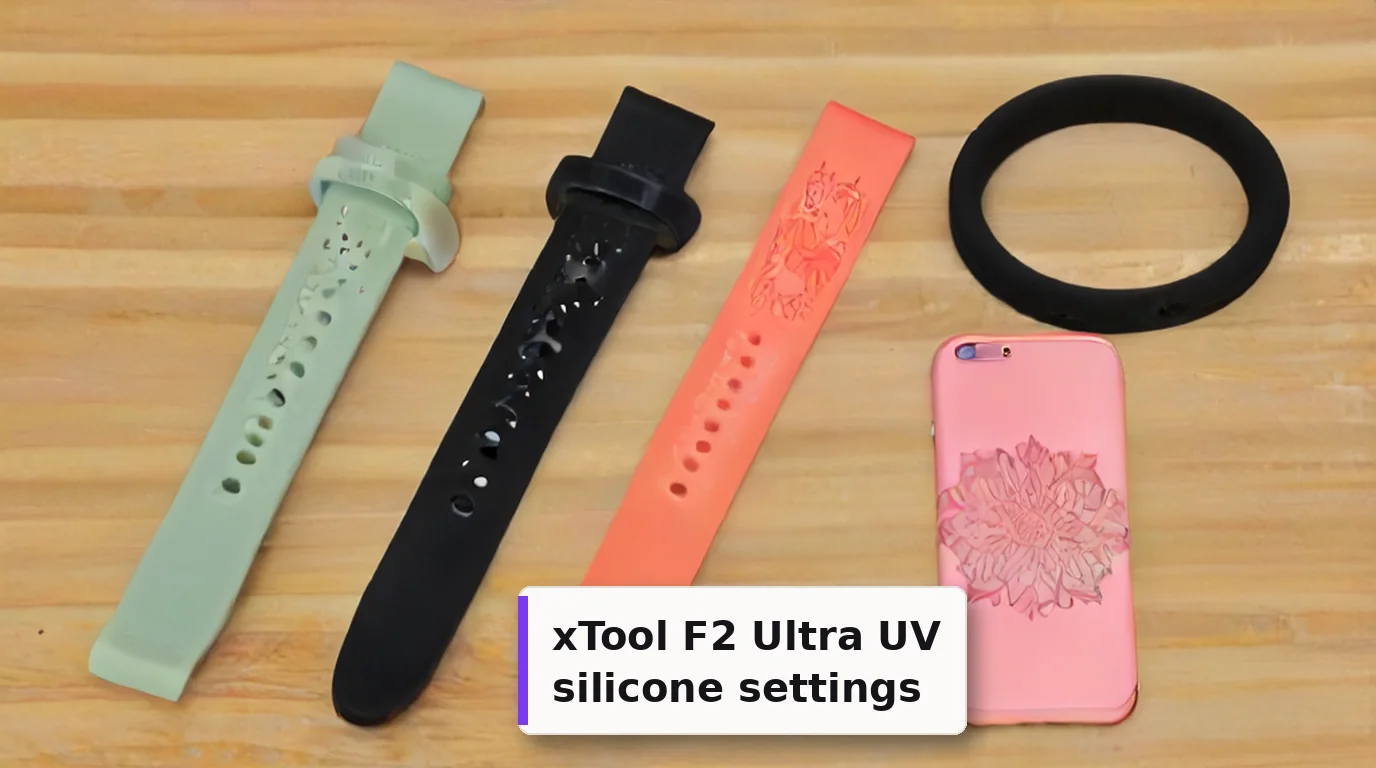 Silicone is one of the materials the F2 Ultra UV handles well, with crisp marks and no melted edges once the settings are right. (AI-generated example.)
Silicone is a tricky material for heat-based lasers, especially diodes. It's soft, it barely conducts heat, and too much energy leaves you with soot, gummy edges or a black stain that won't scrub off. xTool calls silicone part of the "restricted zone" for traditional lasers, and it's one of the main reasons people buy a UV machine in the first place.
The good news is that the xTool F2 Ultra UV marks silicone cleanly. The bad news is that there are very few published F2 Ultra UV silicone numbers, and some of the "settings" you'll find online aren't real values at all. This guide collects every UV-specific number I could trace to a named public source and keeps the diode and CO2 numbers in their own table, so you know which ones to leave alone. Use every row as a starting point and run a test grid on your own blank first.
Quick facts
- Machine: xTool F2 Ultra UV, enclosed 5W, 355 nm UV galvo
- Starting point (plain silicone sheet): 50% power, 200 mm/s, 1 pass, 300 lines/cm, 40 kHz, bi-directional
- Light mark (xTool white silicone watch band preset): 90% power, 3000 mm/s, 1 pass, 200 lines/cm
- Mode: Process on flat surface, auto-measure for focus
- What the mark looks like: a matte grey-white mark, usually lighter than the base color
- Rainbow (two-layer) silicone: the engrave has to clear the top layer to reveal the color
- Cleanup: fine white powder; wipe with a damp cloth, or a soft brush and water
- Safety: lid closed, extraction on, 355 nm goggles if the lid can't close
Short answer
The xTool F2 Ultra UV is a 5 W, 355 nm galvo, and xTool lists silicone for engraving and embossing. For plain silicone with no preset, a published on-screen start is 50 percent power, 200 mm/s, one pass, 300 lines per centimetre, 40 kHz, and bi-directional, on 1.2 mm orange-red sheet. For xTool's white silicone watch bands, the Studio reference is 90 percent power, 3000 mm/s, one pass, and 200 lines per centimetre. Those two rows are far apart in energy, so grid between them on your own blank. The mark is usually a matte grey-white, lighter than the base color. Solid silicone does not turn a new color. Rainbow silicone shows its hidden layer only after the top coat is cleared, so raise power if no color appears. Wipe the white powder before you judge the mark. Do not copy diode or CO2 recipes such as 80 percent, 200 mm/s, and 3 passes. Tape floppy pieces flat, keep the lid closed, and run extraction.
Quick answer: the best starting settings
For a plain silicone sheet, band or case with no preset, the clearest F2 Ultra UV example I found is from DAYGONE LASERCRAFT on YouTube: 50% power, 200 mm/s, 1 pass, 300 lines/cm, 40 kHz, bi-directional, on a 1.2 mm scrap of orange-red silicone. The values are shown on screen in xTool Studio, and the mark didn't wipe off.
For xTool's own white silicone watch bands, an Atomm maker used the Studio reference settings of 90% power, 3000 mm/s, 1 pass, 200 lines/cm. That's a much lighter energy dose, made for xTool's material.
For rainbow silicone (a colored top layer over a rainbow layer), start with xTool's preset for that exact product in Studio. If no color shows through, xTool says to raise the power so the beam cuts through the surface layer (xTool Support).
Those two numeric rows are about 12 times apart in energy per area. That gap is the main lesson here: silicone formulas vary so much that you should build a small grid between them rather than trust any one row.
xTool F2 Ultra UV silicone settings chart
These rows come from F2 Ultra UV sources only. Keep each row's numbers together.
| Item / goal | Power | Speed | Lines/cm | Passes / mode | Frequency | Source |
|---|---|---|---|---|---|---|
| Plain silicone sheet (1.2 mm), grey mark | 50% | 200 mm/s | 300 | 1, bi-directional | 40 kHz | DAYGONE LASERCRAFT video (values on screen in xTool Studio) |
| xTool White Silicone Watch Band, light mark | 90% | 3000 mm/s | 200 | 1 | not stated | Atomm project by Wendy - Making It (Studio reference settings) |
| Silicone phone case (orange), mandala line art | "Pink Silicone" preset in Studio | in Studio | in Studio | in Studio | in Studio | Atomm project "Will it Melt?" |
| xTool rainbow silicone watch bands and sheets (light blue, black-to-rainbow, pink-to-rainbow) | in Studio | in Studio | in Studio | bitmap engrave, vector fill engrave, score; conveyor engrave | in Studio | xTool Material Lab on Atomm (F2 Ultra UV listed, updated 2026-11-04) |
| Legal frequency window | — | — | — | — | 40–150 kHz | xTool Support 2699 |
Tip: The phone-case maker used a preset made for a pink case on an orange one and still got clean lines. Their point was that the UV doesn't rely on heat the way a diode does, so case color mattered less than expected. That's one result, not a rule. Test a hidden spot on each new color.
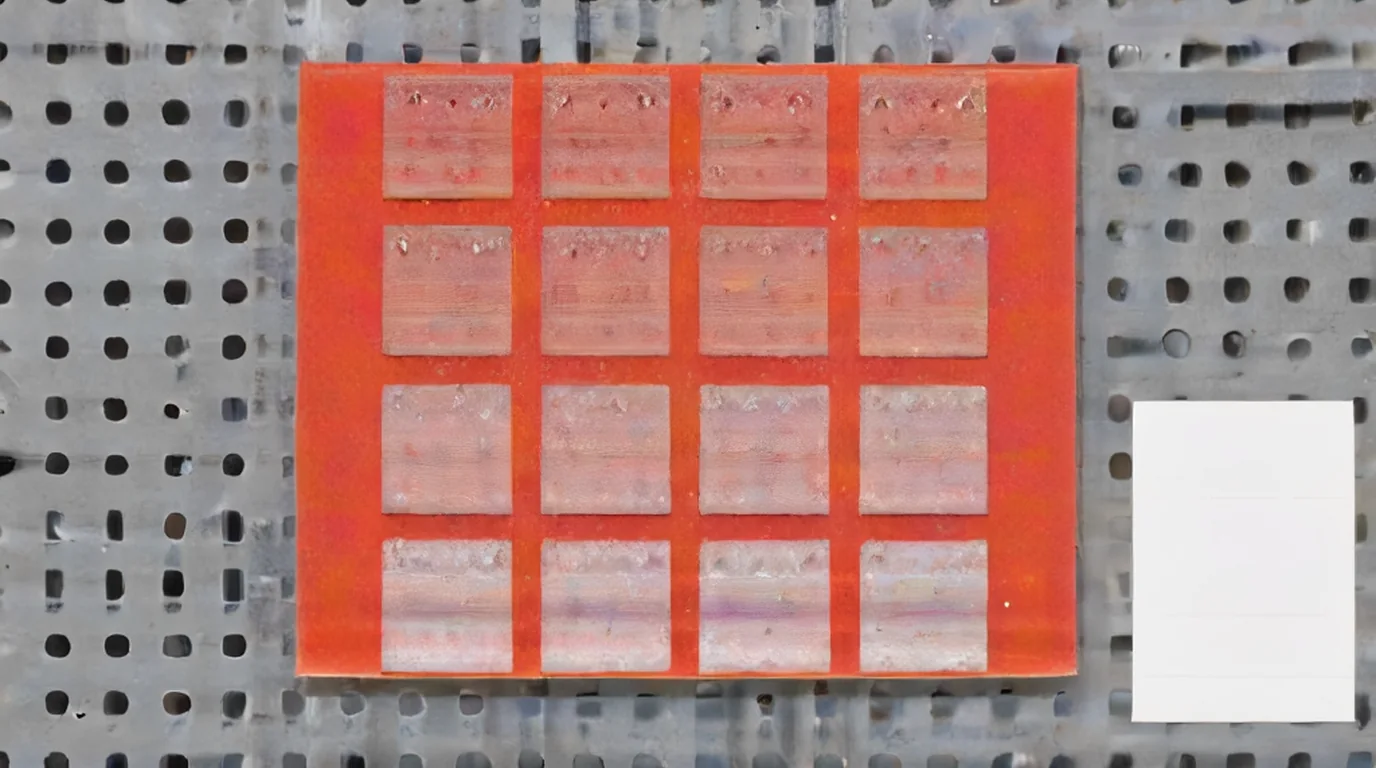 A small grid on a scrap of the same silicone tells you more than any chart. Wipe it before you judge it. (AI-generated example.)
A test grid built from the two sourced rows
This is my suggested grid, not a tested recipe. It brackets the two published F2 Ultra UV rows:
- Power: 50%, 70%, 90%
- Speed: 200, 600, 1500, 3000 mm/s
- Fixed: 1 pass, 40 kHz, 200–300 lines/cm, bi-directional
- Cells: small squares or one short word each, on a scrap or the inside of a band
Pick the lightest cell that gives an even, readable mark after wiping. Silicone gets rough and gummy as energy climbs, so the strongest cell is rarely the best one.
Other UV machines (cross-reference only, not F2 Ultra UV numbers)
| Machine | Result | Published settings | Source | Why it doesn't transfer |
|---|---|---|---|---|
| ComMarker 5W UV | Grey mark on white silicone | 40 kHz, 5000 mm/s, 0.03 mm line interval (about 333 lines/cm), crosshatch, bi-directional, 1 pass; power not stated | ComMarker silicone guide | Different source, lens and software; no power value |
| Generic 5–20W UV (industrial) | Silicone cold mark | 25–45% power, 30–50 kHz, 600–1200 mm/s, 1–2 passes | JPT Laser UV guide | Spans 5–20W sources; 30 kHz is below the F2 Ultra UV's 40 kHz floor |
Diode and CO2 silicone numbers you should NOT use on the UV
These show up near the top of search results. They're for different laser types.
| Machine | Published silicone settings | Source |
|---|---|---|
| xTool F1 (10W diode), watch band | 80% power, 200 mm/s, 3 passes, 120 lines/cm | xTool blog, laser engraving silicone |
| xTool P2 (55W CO2), baby spoon | 40% power, 150 mm/s, 1 pass, 70 lines | Silhouette School |
| xTool M1/S1 (10W diode) | 15% power, 150 mm/s, 2 passes, 70 lines | Silhouette School |
These lasers burn silicone away with heat, which is why their guides talk about black soot. The F2 Ultra UV's results leave fine white powder instead.
A warning about Atomm community pages
When I looked up community silicone entries on Atomm while logged out, many of them showed exactly the same numbers: 1 pass, 1000 mm/s, 70% power, 200 spacing, 500 DPI, "Blue light". Those values repeated across F2 Ultra UV, M2 and S1 entries, next to a "Log in to view settings" lock. That looks like placeholder text, not the maker's real recipe. Don't copy community numbers unless you can see them inside xTool Studio.
What do these settings mean?
Power, speed, passes, line density, and frequency decide how much energy reaches the surface. Use these notes with the one row you already chose.
- Power (%): laser output. Silicone sources range from 50% to 90% on this machine.
- Speed (mm/s): faster means less energy per spot. The watch-band preset runs at 3000 mm/s for a light mark.
- Lines per cm: fill density. 200–300 lines/cm is the published range. 100 lines/cm equals 254 DPI (xTool 2699).
- Frequency (kHz): pulse rate, 40–150 kHz on the F2 Ultra UV. The only published silicone frequency is 40 kHz.
- Bi-directional: fills in both directions, which is faster. Uni-directional is cleaner on small text but slower (xTool 2699).
- Passes: one pass is standard in every F2 Ultra UV source. Add passes for depth only after the single-pass grid looks clean.
Can a UV laser engrave silicone?
Yes. xTool's F2 Ultra UV FAQ lists silicone among the plastics it can engrave, and also lists silicone for embossing (xTool FAQ).
How it works is the part most guides skip. A 355 nm UV photon carries more energy than infrared light, so it can break bonds at the surface instead of just heating them. Industry sources call this "cold marking". The upshot on silicone is a small heat-affected zone, no melted rim, and a mark that sits in the surface.
There's an honest debate, though:
- CO2 still wins for depth. ComMarker rates CO2 as the best overall laser for silicone production and says UV engraving is typically shallow. Silicone doesn't always absorb UV efficiently.
- UV wins for fine detail. Small logos, thin text and dense line art stay crisp. Industrial makers like Monport and ZhuoRui call UV a good first test for heat-sensitive silicone.
- Contrast is the real limit. The mark usually reads as a lighter, matte version of the base color. XLaserLab notes it looks intentional on mid-tone colors and almost invisible on very pale ones.
My read: if you sell personalized bands, cases and tags with fine detail, the F2 Ultra UV is a strong fit. If you need deep, tactile engraving on thick silicone all day, CO2 is the better tool.
Types of silicone and what to expect
| Silicone type | Typical UV result | Notes |
|---|---|---|
| Solid-color bands and sheets | Matte grey-white mark, lighter than the base | xTool says solid silicone only takes depth, not a new color |
| Rainbow / dual-layer bands and cases | The top color is cleared to reveal a rainbow layer | Needs enough power to clear the top layer evenly |
| White or very pale silicone | Low contrast; can read grey | ComMarker lists a separate grey-mark row for white silicone |
| Black and dark silicone | Usually the best contrast (pale on dark) | Industrial sources say dark silicone often marks boldly |
| Translucent silicone | Variable, may look hazy | ZhuoRui suggests checking it against the final background |
| Soft-touch or coated cases | The coating lifts to show the base | Coating thickness varies by batch (XLaserLab) |
TPU (the clear, flexible case material) isn't silicone. XLaserLab says it marks with a frosted look on UV, but treat it as a separate material with its own grid.
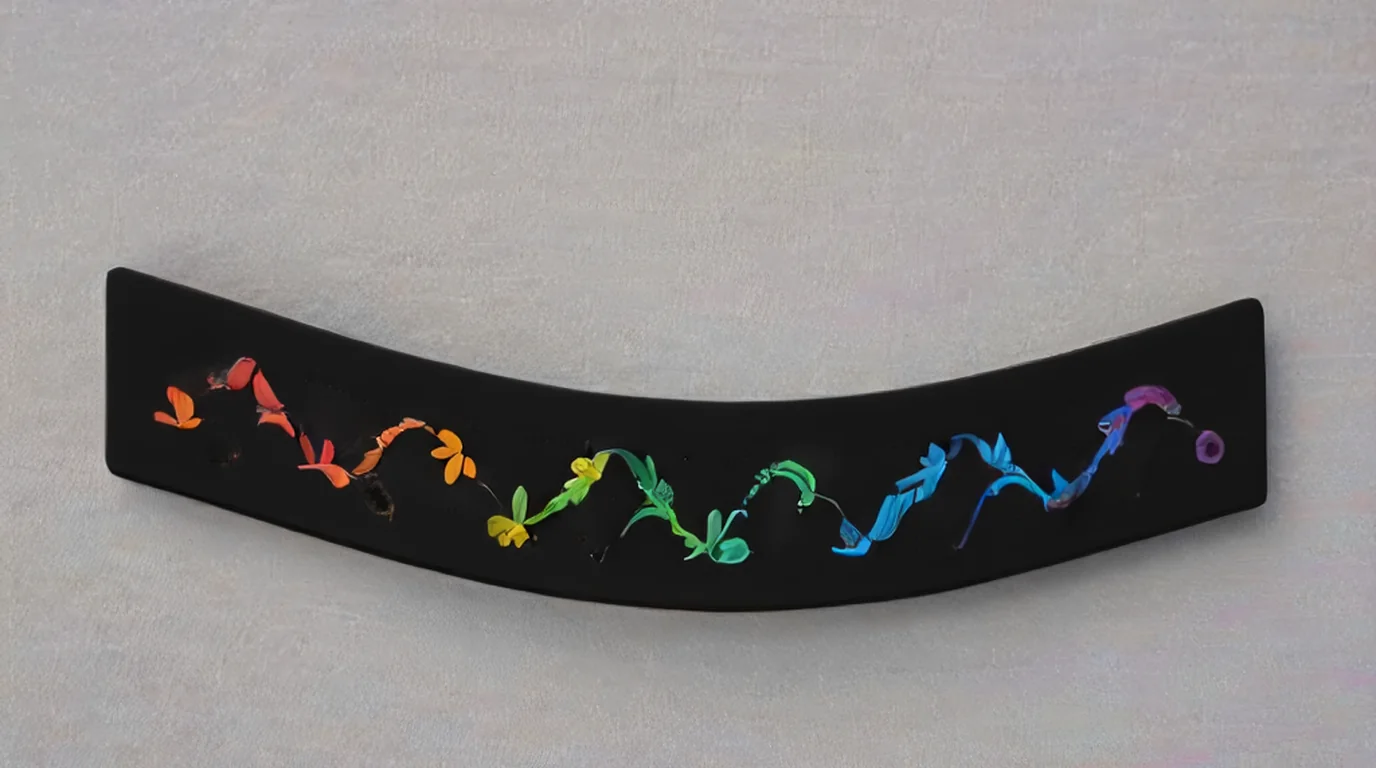 Rainbow silicone hides a colored layer under the top coat. The engrave just needs to clear the top evenly. (AI-generated example.)
What do the source videos show?
I watched the silicone videos frame by frame instead of only reading transcripts.
- DAYGONE LASERCRAFT (F2 Ultra UV): The Studio panel shows Process on flat surface, Unknown Material, a 1.2 mm auto-measured thickness, the Engrave tab set to User-defined, then 50 power, 200 mm/s, 1 pass, 300 lines per cm, 40 kHz and Bi-directional. He says "lines per inch" out loud, but the screen reads lines per cm. The result is a grey "HELLO" on an orange-red sheet with clean letter edges. He rubs it afterward and it stays. His intro also shows earlier diode attempts on a pink silicone cup, and they look patchy next to the UV result.
- Mactron Laser (UV vs CO2): Side by side on bracelets, watch bands, spoons and a baby bib. The CO2 passes show bright flame-like flashes on the surface. The UV passes show only a small point of light. The UV marks read as light, matte text on the colored bracelets.
- Haotian (5W UV, different machine): Floral patterns on orange, yellow, blue and sage watch straps. Every result is a lighter tone of the strap color, which matches what the written sources describe.
Step-by-step: engraving a silicone band or case
1. Prep
- Wash off mold-release residue and finger oils with mild soap and water. Let it dry fully.
- XLaserLab warns that solvent-heavy cleaners right before marking can leave a film that marks unevenly.
2. Hold it flat
- Silicone is floppy and light. xTool's flat-surface guide says to tape small or light items so the exhaust airflow doesn't shift them (xTool 3840).
- For bands, pull them flat without stretching. A stretched band springs back and distorts the design.
- Repeat jobs go faster with a fixture. See self-centering jigs for the F2 Ultra UV.
3. Focus
- Use Process on flat surface and run auto-measure, as in the DAYGONE video.
- Soft silicone can compress under a probe or sag on a curve. If the mark looks fuzzy at one end, check focus with my UV laser focus guide.
4. Design
- Keep phone-case art inside the flat back panel. XLaserLab suggests a margin of at least 5 mm from camera cutouts, buttons and the lip.
- Avoid hairline fonts on textured silicone.
5. Run a grid, then the real piece
- Use Material test array in Studio, or the small grid above.
- Close the lid, start, and keep the extraction running.
6. Clean
- Expect fine white powder over the mark. It can make the job look grey and dusty until you wipe it.
- xTool recommends a brush and water. The Atomm phone-case maker wiped it with a damp cloth and got crisp lines.
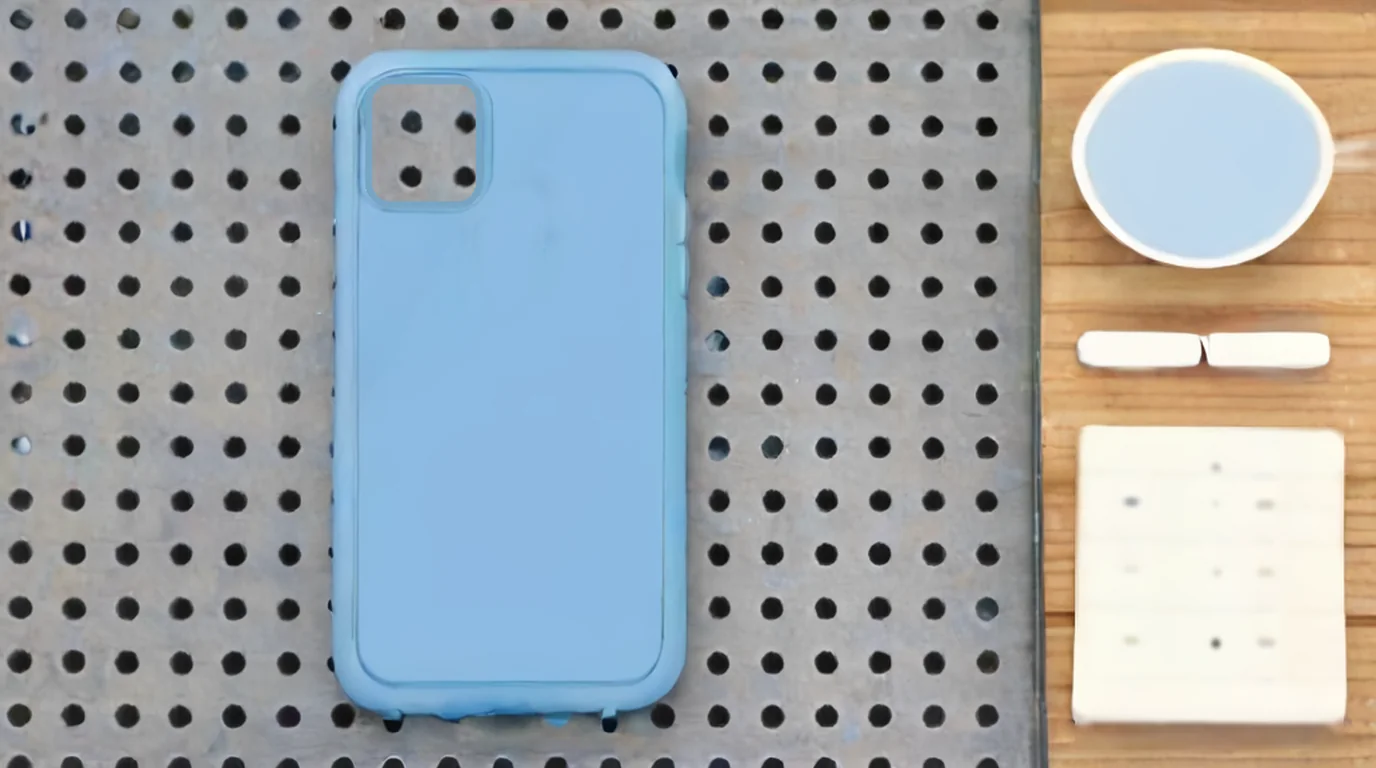 Flat, centered and clean, with the cleanup kit ready outside the machine. (AI-generated example.)
Wristbands, watch bands, phone cases and more
Silicone blanks that sell well with a UV laser:
- Smartwatch straps: floral, initials and pattern wraps. Rainbow straps make the most eye-catching results.
- Wristbands: event, team and memorial bands with short text.
- Phone cases and phone straps: the Atomm phone-strap maker added her name so it would come back if lost.
- Pet tags, keychains and pens: small, fast jobs.
- Kitchen and baby items: possible, but read the note below.
A few honest notes:
- Food contact and baby products. UV marking doesn't add ink or coating, but that doesn't make a product compliant. Items for infants, teethers or food contact need their own safety check before you sell them (XLaserLab).
- Durability. The DAYGONE mark survived a rub test. I haven't seen a published long-term wear or wash test for UV marks on silicone.
More blank ideas: best UV laser blanks to buy and sell and UV laser project ideas.
Is this job safe to run?
Keep the lid closed when the machine allows it, extract the fumes, and stop if the blank chars, cracks, or overheats.
- Keep the enclosure closed. If it can't close, wear goggles rated for 355 ± 5 nm, as xTool's F2 Ultra UV safety page requires.
- Run extraction to outdoors or through a proper purifier. Laser-processed silicone releases fumes and fine dust, and ComMarker points out the fumes can contain VOCs.
- xTool's silicone guide recommends a dust mask and air assist for its other machines. The F2 Ultra UV isn't on that guide's machine list, so use extraction and keep the lid shut.
- The Atomm phone-case maker kept the lid open to film and warns others not to copy that.
What should I do if the mark looks wrong?
Match the symptom to one cause in the table, change only that fix, and test it on scrap first.
| Problem | Likely cause | Fix |
|---|---|---|
| Mark looks grey and dusty | White powder residue | Wipe with a damp cloth or brush with water, then judge it |
| Faint or no mark | Too little energy for this formula | Slow down or raise power one grid step |
| Rough, gummy or sticky edges | Too much energy | Speed up or drop power; stay at 1 pass |
| Rainbow layer doesn't show | Top layer not fully cleared | Raise power slightly (xTool 2448) |
| Patchy rainbow reveal | Top layer thickness varies, or the band isn't flat | Flatten the band; test the same batch |
| Design is distorted | Band stretched or moved | Tape it flat without stretching; use a jig |
| One end blurry on a case | Curvature or sag changes focus | Keep art on the flat panel; re-measure |
| Very low contrast on pale silicone | Normal for light colors | Choose mid-tone, dark or rainbow blanks |
| Uneven mark across a batch | Pigment or coating changed between lots | Re-run a small grid per supplier batch |
What could I not confirm?
The items below were not stated in the public sources for this page, so this chart does not fill them in.
- Official F2 Ultra UV silicone numbers. xTool's Material Lab lists F2 Ultra UV presets for its rainbow silicone watch bands and sheets, but the values only appear inside xTool Studio. I didn't publish numbers I couldn't see.
- Frequency for the watch-band preset. The Atomm maker listed power, speed, passes and lines/cm, but not frequency.
- Embossing settings. xTool lists silicone for embossing on the F2 Ultra UV, but I found no public silicone emboss recipe.
- Long-term wear. No published wash or abrasion test for UV-marked silicone turned up.
FAQ
Can the xTool F2 Ultra UV engrave silicone?
Yes. xTool lists silicone among the plastics the F2 Ultra UV can engrave, and also lists it for embossing. It leaves a clean matte mark with no melted edges when the energy is right.
What are the best F2 Ultra UV settings for silicone?
A published starting point on plain silicone is 50% power, 200 mm/s, 1 pass, 300 lines/cm and 40 kHz. For xTool's white silicone watch bands, the Studio reference is 90% power, 3000 mm/s, 1 pass and 200 lines/cm. Run a grid between them on your own blank.
What color does silicone turn under a UV laser?
Usually a matte grey-white that's lighter than the base color. Solid silicone won't change to a new color. Rainbow silicone shows its hidden color layer once the top layer is cleared.
How do I clean silicone after UV engraving?
Wipe off the fine white powder with a damp cloth, or use a soft brush and water. Judge the mark only after cleaning.
Why isn't the rainbow layer showing on my band?
The beam hasn't cleared the top layer. xTool suggests raising the power so the laser cuts through the surface coating.
Can I engrave a silicone phone case on the F2 Ultra UV?
Yes. An Atomm maker engraved a dense mandala on an orange silicone case using Studio's pink silicone preset, with no melting. Keep the design on the flat back panel and away from the camera cutout.
Should I use diode or CO2 silicone settings on the UV?
No. Diode and CO2 recipes like 80% power, 200 mm/s and 3 passes are made for heat-based lasers. Use the UV rows only.
Is a UV-engraved silicone item food-safe or baby-safe?
UV marking adds no ink or coating, but that alone doesn't make a product safe or compliant. Food-contact and baby products need their own safety check before you sell them.
Related guides
- xTool F2 Ultra UV polycarbonate settings
- xTool F2 Ultra UV ABS settings
- xTool F2 Ultra UV PLA settings
- xTool F2 Ultra UV leather settings
- xTool F2 Ultra UV acrylic settings
- How to focus a UV laser
- Best self-centering jigs for the F2 Ultra UV
- Best UV laser blanks to buy and sell
Final thoughts
Silicone is where a UV laser earns its keep. Start a plain band or sheet at 50% power, 200 mm/s, 1 pass, 300 lines/cm and 40 kHz, or use xTool's preset if it's xTool's own band. Then grid toward the lighter 90% / 3000 mm/s end until you find the cleanest mark. Tape it flat, wipe off the white powder before you judge, and keep diode and CO2 numbers out of your UV library.
Sources and further watching
- xTool Support – FAQs on xTool F2 Ultra UV (article 2870): https://support.xtool.com/article/2870
- xTool Support – Beginner's Guide to Silicone Laser Processing (article 2448): https://support.xtool.com/article/2448
- xTool Support – Processing Parameters for xTool F2 Ultra UV (article 2699): https://support.xtool.com/article/2699
- xTool Support – Process on Flat Surface with xTool F2 Ultra UV (article 3840): https://support.xtool.com/article/3840
- xTool Support – Safety First for xTool F2 Ultra UV (article 2751): https://support.xtool.com/article/2751
- xTool Material Lab (Atomm) – Rainbow Silicone Watch Bands Light Blue: https://www.atomm.com/materials-lab/official/395-rainbow-silicone-watch-bands-light-blue
- xTool Material Lab (Atomm) – Black to Rainbow Silicone: https://www.atomm.com/materials-lab/official/862-black-to-rainbow-silicone
- Atomm – "Lavender heart shaped Phone wrist strap" (Wendy - Making It, F2 Ultra UV): https://www.atomm.com/project/110210-lavender-heart-shaped-phone-wrist-strap
- Atomm – "Will it Melt?" Stress-Testing a Silicone Case on the F2 Ultra UV: https://www.atomm.com/project/90941-will-it-melt-stress-testing-a-silicone-case-on-the-f2-ultra
- xTool – Laser Engraving Silicone: Step-By-Step Guide (diode – contrast only): https://www.xtool.com/blogs/xtool-academy/laser-engraving-silicone
- ComMarker – Laser Engrave Silicone Guide: https://blog.commarker.com/archives/26894
- JPT Laser – 3D UV Laser Engraving Guide: https://jpt-laser.com/learn/3d-uv-laser-engraving-curved-objects/
- XLaserLab – UV Laser Engraving Phone Cases & Silicone: https://www.xlaserlab.com/blogs/academy/uv-laser-engrave-phone-cases-silicone-guide
- ZhuoRui Laser – Silicone and Rubber Laser Marking: https://zhuoruilaser.com/materials/plastics/silicone-rubber/
- Monport – Laser Engraving Silicone for Medical Parts: https://monportlaser.com/blogs/laser-engraving-cutting-materials/laser-engraving-silicone-how-to-choose-the-right-process-for-medical-parts
- Silhouette School – Beginners Guide to Laser Engraving Silicone Rubber (CO2/diode – contrast only): https://www.silhouetteschoolblog.com/2025/08/beginners-guide-to-laser-engraving.html
Further watching (embeds)
- DAYGONE LASERCRAFT – "xTooL F2 Ultra UV | Silicone Marking": https://www.youtube.com/watch?v=pPbW3itOj94
- Mactron Laser – "Laser Marking on Silicone Products with UV Laser VS CO2 Laser": https://www.youtube.com/watch?v=4bblN44La5g
- Haotian Laser – "Silicone Wristband Laser Marking with Haotian 5W UV Laser" (different UV machine): https://www.youtube.com/watch?v=T9Y219hRsXY
- Cornelius Creations – "xTool F2 Ultra UV Laser - The New Business Market Beast (Hands on)": https://www.youtube.com/watch?v=cm_WpLwXIRc
Studio settings for a grey mark on orange-red silicone. (Video: DAYGONE LASERCRAFT on YouTube.)
UV and CO2 marks on silicone products side by side. (Video: Mactron Laser on YouTube.)
Floral marks on colored watch straps with a different 5W UV. (Video: Haotian Laser on YouTube.)
Hands-on look at the F2 Ultra UV. (Video: Cornelius Creations on YouTube.)
Related settings
- xTool F2 Ultra UV Bamboo Settings: Cutting Boards, Coasters & Plywood (2026)
- xTool F2 Ultra UV Granite Settings: Black Granite, Memorials & Rocks (2026)
- xTool F2 Ultra UV Polycarbonate Settings: PC Sheet, Cases & Cards (2026)
- xTool F2 Ultra UV Cork Settings: Coasters, Sheets & Photo Chart (2026)
- xTool F2 Ultra UV Marble Settings: Black, White & Green Marble Chart (2026)
- xTool F2 Ultra UV Gold Settings: Solid, Gold-Filled & Gold-Plated Jewelry (2026)
- xTool F2 Ultra UV Silver Settings: Sterling Silver Jewelry, Tags & Pendants (2026)
- xTool F2 Ultra UV Copper Settings: Sheet, Tags & Copper-Clad PCB Blanks (2026)
- xTool F2 Ultra UV Aluminum Settings: Bare Sheet, Cards, Tags & ID Plates (2026)
- xTool F2 Ultra UV Titanium Settings: Color Mark, Dark Mark & Jewelry Chart (2026)
- xTool F2 Ultra UV Paper & Cardstock Settings (2026 Guide)
- xTool F2 Ultra UV ABS Settings: Presets, Test Grid & Safety Guide (2026)
- xTool F2 Ultra UV Brass Settings: Tags, Sheet & Coin Emboss Chart (2026)
- xTool F2 Ultra UV Crystal Settings: 3D Inner Engraving Guide (2026)
- xTool F2 Ultra UV Anodized Aluminum Settings: Business Cards & More (2026)
- xTool F2 Ultra UV Leather Settings: Genuine, Faux & Leatherette Chart (2026)
- xTool F2 Ultra UV Stainless Steel Settings: Dark, White, Color & Photo Chart (2026)
- xTool F2 Ultra UV Wood Settings: Basswood, Plywood, Pine & MDF Chart (2026)
- xTool F2 Ultra UV Acrylic Settings: Clear, Black & White Chart (2026)
- xTool F2 Ultra UV Ceramic Settings: Tiles & Mugs Chart (2026)
- xTool F2 Ultra UV Glass Settings: Flat Glass & Rotary Chart (2026)
- xTool F2 Ultra UV PLA Settings: 3D Print Colour Chart (2026)
- xTool F2 Ultra UV Slate Settings: Power, Speed & Frequency Chart (2026)
- xTool F2 Ultra UV Tumbler Settings: Powder-Coated & Stainless (2026)
- Can a UV Laser Engrave Slate?
- Can a UV Laser Engrave Glass?
Keep reading
xTool F2 Ultra UV Bamboo Settings: Cutting Boards, Coasters & Plywood (2026)
Sourced xTool F2 Ultra UV bamboo settings for cutting boards, coasters and plywood, with a starting test grid, glue-line tips and food-safe finishing.
Read more19 min read
xTool F2 Ultra UV Granite Settings: Black Granite, Memorials & Rocks (2026)
Sourced xTool F2 Ultra UV granite settings for polished black and light granite, with a starting test grid, deep relief, paint fill and silica safety.
Read more20 min read
xTool F2 Ultra UV Polycarbonate Settings: PC Sheet, Cases & Cards (2026)
Sourced xTool F2 Ultra UV polycarbonate settings for clear, white and black PC, with a starting test grid, mark colors, fume safety and fixes.
Read more18 min read