xTool F2 Ultra UV Granite Settings: Black Granite, Memorials & Rocks (2026)
Sourced xTool F2 Ultra UV granite settings for polished black and light granite, with a starting test grid, deep relief, paint fill and silica safety.
20 min read
On this page
- Short answer
- Quick answer: the best starting settings
- xTool F2 Ultra UV granite settings chart
- Other UV machines (cross-reference only, not F2 Ultra UV numbers)
- CO2 and diode numbers you should not copy
- What do the settings mean?
- Can the xTool F2 Ultra UV engrave granite?
- Which granite are you engraving?
- What kind of mark will you get?
- How do I get a bolder mark on light granite?
- Can the F2 Ultra UV deep-engrave or emboss granite?
- How should I set up a granite job?
- What I saw in the videos
- Step-by-step: engraving granite on the F2 Ultra UV
- 1. Know your stone
- 2. Clean and level
- 3. Focus
- 4. Prepare the art
- 5. Grid, then engrave
- 6. Finish
- What should I do if the mark looks wrong?
- Safety and aftercare
- What I couldn't confirm
- FAQ
- Can the xTool F2 Ultra UV engrave granite?
- What are the best F2 Ultra UV settings for granite?
- Why is my granite engraving grey instead of white?
- Does light granite work on the F2 Ultra UV?
- Can the F2 Ultra UV do deep engraving on granite?
- Can the F2 Ultra UV cut granite?
- Is UV or fiber better for granite?
- Is it safe to laser granite?
- Related guides
- Final thoughts
- Sources and further watching
Last updated: November 17, 2026
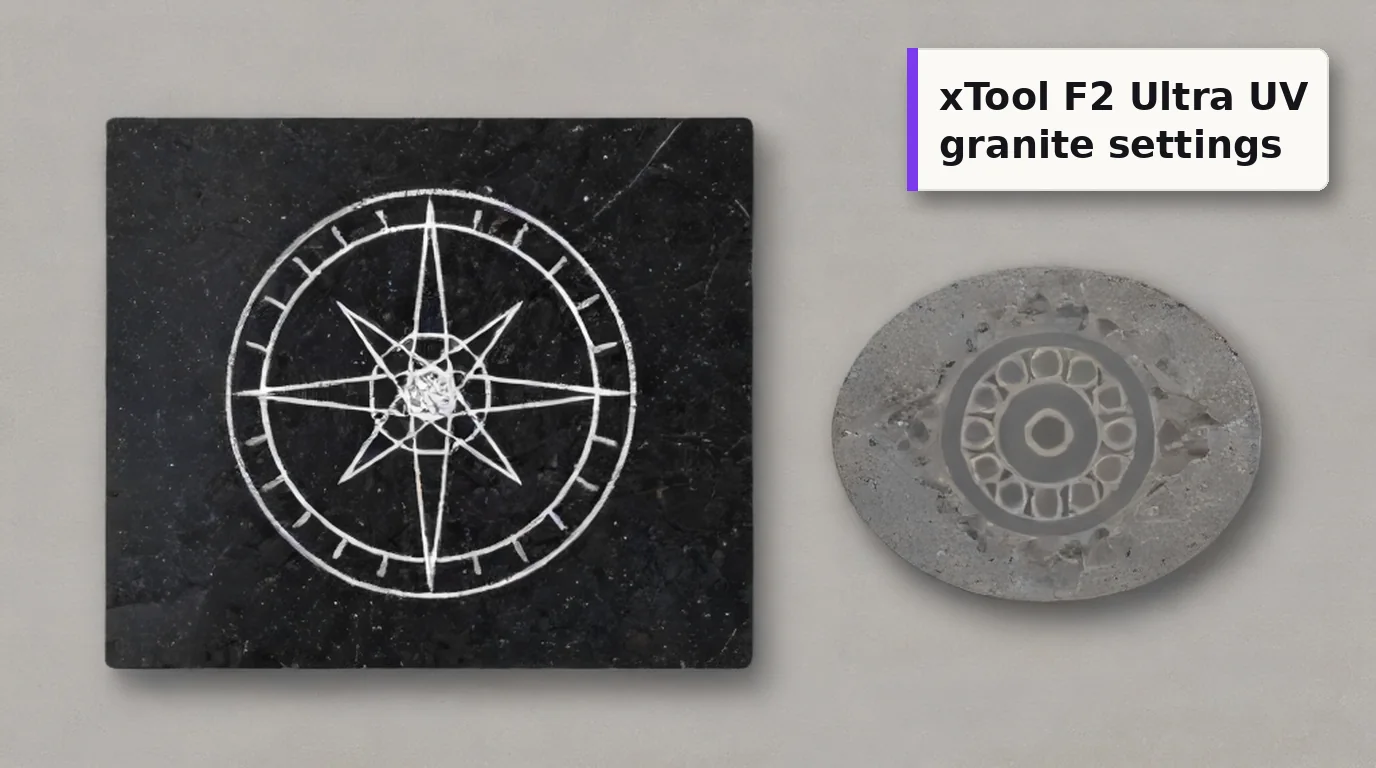 Polished black granite gives the boldest UV mark, because the frosted white cuts against the gloss. (AI-generated example.)
Granite is the stone behind memorial plaques, house numbers, garden stones and those heavy little awards that last forever. It's a coarse-grained igneous rock made mostly of quartz, feldspar and mica, which is exactly why it's hard, speckled and a bit unpredictable under a laser.
xTool lists stone among the materials the F2 Ultra UV is designed to process, and the 5W, 355 nm beam clears the polished skin of granite without much heat. That's the good news.
Here's the honest part, up front: I couldn't find a published F2 Ultra UV granite recipe with every value visible. The closest F2 Ultra UV numbers are a rock coaster and a river rock relief, not granite. So this guide gives you what is sourced, what another 5W UV marker was shown running on real granite, and a test grid to find your own numbers. The grid is an untested starting point, not a result.
Quick facts
- Machine: xTool F2 Ultra UV, enclosed 5W, 355 nm UV galvo
- Is stone supported? Yes. xTool's safety page lists stone among the materials the UV laser can process
- Official granite preset: none found on public pages. xTool's stone records cover a rock coaster, marble and soapstone
- Closest F2 Ultra UV stone record: 4.5 mm round rock coaster, 100% power, 400 mm/s, 1 pass (Atomm stone hub)
- Real granite on a 5W UV marker (not an F2): 95% power, 800 mm/s, 22 kHz, 0.08 mm hatch, 1 pass (AM.CO.ZA video, values on screen)
- Frequency window: 40-150 kHz on the F2 Ultra UV
- Best contrast: polished black granite. Light granite usually needs a paint fill
- Dust: granite is 20-45% crystalline silica (HSE). Keep the lid closed and run extraction
Short answer
The xTool F2 Ultra UV can engrave granite, and polished black granite is where it looks best: the beam frosts the polish and leaves a light grey to white mark. There's no public granite recipe for this machine, so run a material test array on an offcut from the same slab. Bracket it with the sourced numbers: xTool's own rock coaster record ran 100% power at 400 mm/s, and a 5W UV marker on real granite ran 95% at 800 mm/s. A sensible first grid is 60-100% power and 200-1,000 mm/s at 40 kHz, 300 lines/cm and 1 pass. That grid is untested. Pick the square that's bright and clean, not grey and dusty. On light granite, expect low contrast and plan a paint fill. Keep the lid closed and extraction on, because granite dust carries crystalline silica.
Quick answer: the best starting settings
There's no verified granite number to copy, so build a grid. In xTool Studio, choose Applications, then Material test array, and set a power range and a speed range. xTool's guide to the material test array describes exactly this, and it notes that even xTool's lab-tested settings are for reference only.
Suggested first grid (untested starting point):
- Power: 60% to 100%
- Speed: 200 to 1,000 mm/s
- Lines per cm: 300, the value on the F2 Ultra UV's Studio panel in both relief videos I watched, before any changes
- Frequency: 40 kHz, the bottom of the F2 Ultra UV's range
- Passes: 1
Why this window? Every sourced number for stone on a 5W UV sits inside it. xTool's rock coaster record is 100% at 400 mm/s. The granite video on a 5W UV marker used 95% at 800 mm/s. ComMarker's granite guide for its own UV machine sits at 95-100% power and 150-300 mm/s. Granite is harder than slate, so I wouldn't start the grid below 60%.
Why 40 kHz? The 5W granite job ran at 22 kHz because, the presenter said, harder stone wants a lower frequency. The F2 Ultra UV can't go below 40, so that's the closest you can get.
Which square to pick: the brightest one with crisp edges and no grey, powdery haze. On granite, more energy isn't always better.
xTool F2 Ultra UV granite settings chart
Every number in this chart comes from a source. Nothing here is my own test. Only the first two rows are F2 Ultra UV numbers, and neither is granite.
| Item / goal | Power | Speed | Lines/cm | Passes | Frequency | Source |
|---|---|---|---|---|---|---|
| 4.5 mm round rock coaster, flat surface engrave (stone, not granite) | 100% | 400 mm/s | not stated | 1 | not stated | Atomm stone hub, F2 Ultra UV record |
| River rock, deep relief, Embossment mode, about 1 h 5 min | 100% | 300 mm/s | 450 | 100 layers, Z down 0.01 mm every 10 layers | 40 kHz | Stephen Micalizzi video, xTool Studio panel on screen |
| xTool material test array | your range | your range | your choice | your choice | your choice | xTool Support article 2698 |
| Granite, no F2 Ultra UV recipe published | not found | not found | not found | not found | not found | searched xTool Support, Atomm, L3D, Bonny Creations |
About the river rock row: the text overlay in that video says "450 dpi" and the narration says the head drops "one tenth of a millimeter". The Studio panel on screen shows 450 in the Lines per cm field and 0.01 mm in the descend field. I've used the panel values, because that's what the machine actually ran.
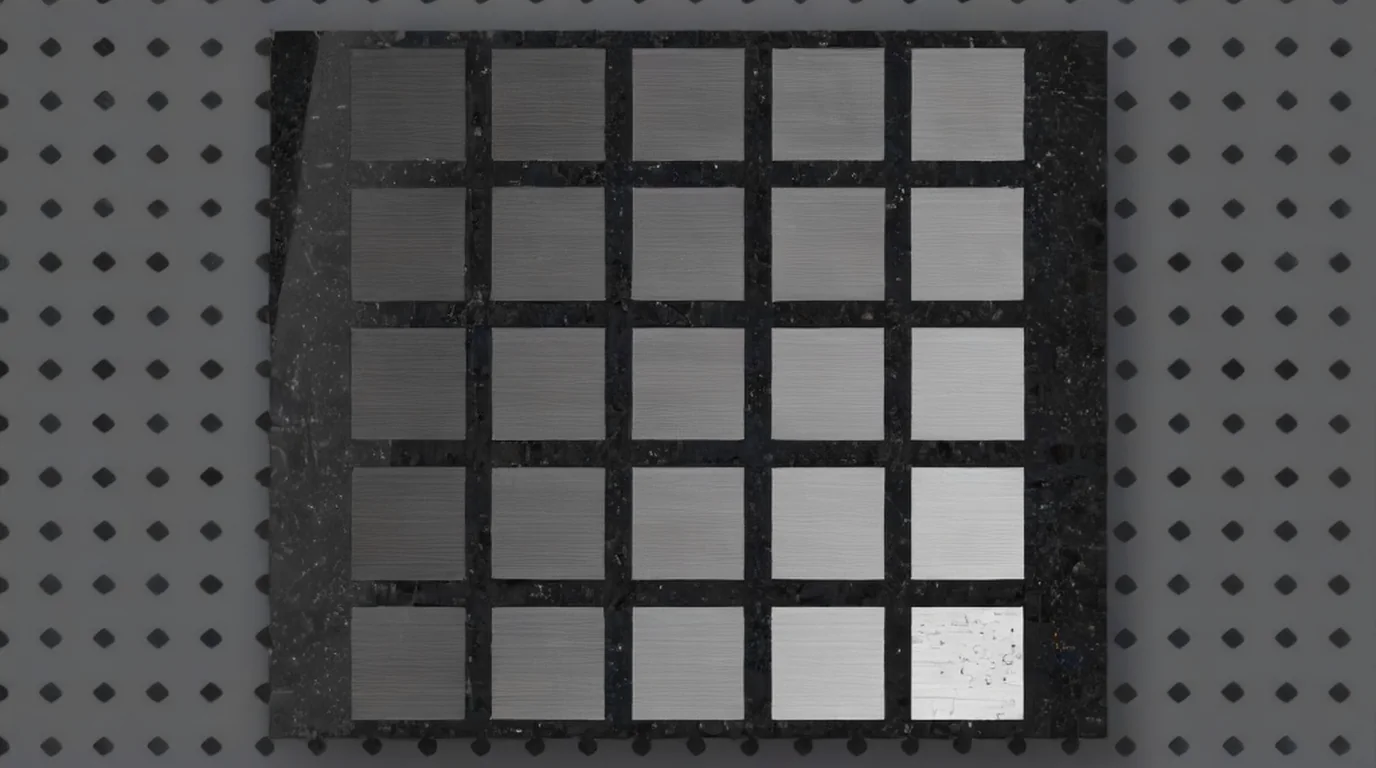 A small grid on an offcut from the same slab tells you more than any chart. Choose the brightest clean square, not the most burned one. (AI-generated example.)
Other UV machines (cross-reference only, not F2 Ultra UV numbers)
These rows show where other UV machines were set on granite or general stone. Different optics and software mean you can't paste them into xTool Studio, but they show the shape of a working window.
| Machine / source | Power | Speed | Frequency | Hatch / pulse | Passes | What it was marking |
|---|---|---|---|---|---|---|
| LabelMark-UV 5W (AM.CO.ZA video, values on screen) | 95% | 800 mm/s | 22 kHz | hatch 0.08 mm | 1 | Light pink-grey granite offcut, table number |
| ComMarker Omni X UV (ComMarker stone guide) | 95-100% | 150-300 mm/s | 35-40 kHz | pulse 5-6 ns | 2-3 | Granite |
| ComMarker Omni X UV (ComMarker material guide) | 90-100% | 200-400 mm/s | 30-40 kHz | pulse 4-6 ns | not stated | General stone: marble, slate, granite, river stones |
| ComMarker Omni X UV 6W, 70 mm lens (ComMarker stone and quartz guide) | not stated | 1,000 mm/s | 40 kHz | interval 0.02 mm, pulse width 1 | 256 | Deep stone engraving, 4 mm depth |
On stone, UV machines run near full power and use speed and passes to control the result. In the granite video, the presenter also widened the hatch from his usual 0.01 mm to 0.08 mm, because it wasn't a fine-detail job.
CO2 and diode numbers you should not copy
Most granite charts online are for CO2 lasers. Redsail's guide, for example, lists 80-100% power at 100-200 mm/s for polished black granite, and an Atomm maker's black granite grid on an xTool P2 found anything above 80% "bubbled" the stone. Those are CO2 watts on a gantry, not a 5W galvo. Skip them.
What do the settings mean?
- Power (%): laser output. On granite, more power gives a brighter mark up to a point, then the surface powders and turns grey.
- Speed (mm/s): faster puts less energy into each spot. Steve Makes Everything says speed is the main dial between materials in relief work.
- Lines per cm: how tightly the fill lines are packed. 100 lines/cm equals 254 DPI, per xTool's parameter guide. Higher fills more evenly but takes longer.
- Frequency (kHz): pulse rate, 40-150 kHz on the F2 Ultra UV. At the same power, a lower frequency gives fewer, stronger pulses, which suits hard stone.
- Layers and Z descent: used in Embossment mode for deep relief. The head steps down as it cuts so the beam stays in focus.
Can the xTool F2 Ultra UV engrave granite?
Yes. xTool's F2 Ultra UV safety page lists stone among the materials the UV laser can process, and Atomm counts 15 stone records on the F2 Ultra UV. The mark forms the way it does on slate and marble: the beam clears a thin surface layer, and the paler, rougher stone underneath shows through.
What the sources warn about:
- UV gives a lighter, shallower mark than fiber. JT Makes It compared a UV and a fiber laser on stone and found the UV mark shallower with less contrast. He also said some stones may not engrave well on UV at all.
- Granite is hard and speckled. Atomm's stone guide says the speckle competes with fine detail, so bold artwork wins.
- Light granite is the hard case. Trotec says bright granite won't always engrave well and usually needs a color inlay for contrast.
The F2 Ultra UV won't cut granite. Atomm's stone guide is blunt about it: stone engraves, it doesn't cut.
Which granite are you engraving?
Polished black granite (often sold as "Absolute Black") is the best case. LaserSettings explains that on dark polished stone, the engraved area turns a bright, durable white, which is the technique memorial plaques use. Laseracc calls Absolute Black the industry standard for photo engraving on stone.
Honed or raw granite gives less contrast. LaserSettings notes that polished stone gives far more contrast than raw or honed stone, because the engraved white cuts against the gloss.
Light, pink or grey granite is where people get disappointed. In the AM.CO.ZA video, the 5W UV mark on a light pink-grey offcut was barely visible until it was stained with black ink and wiped back.
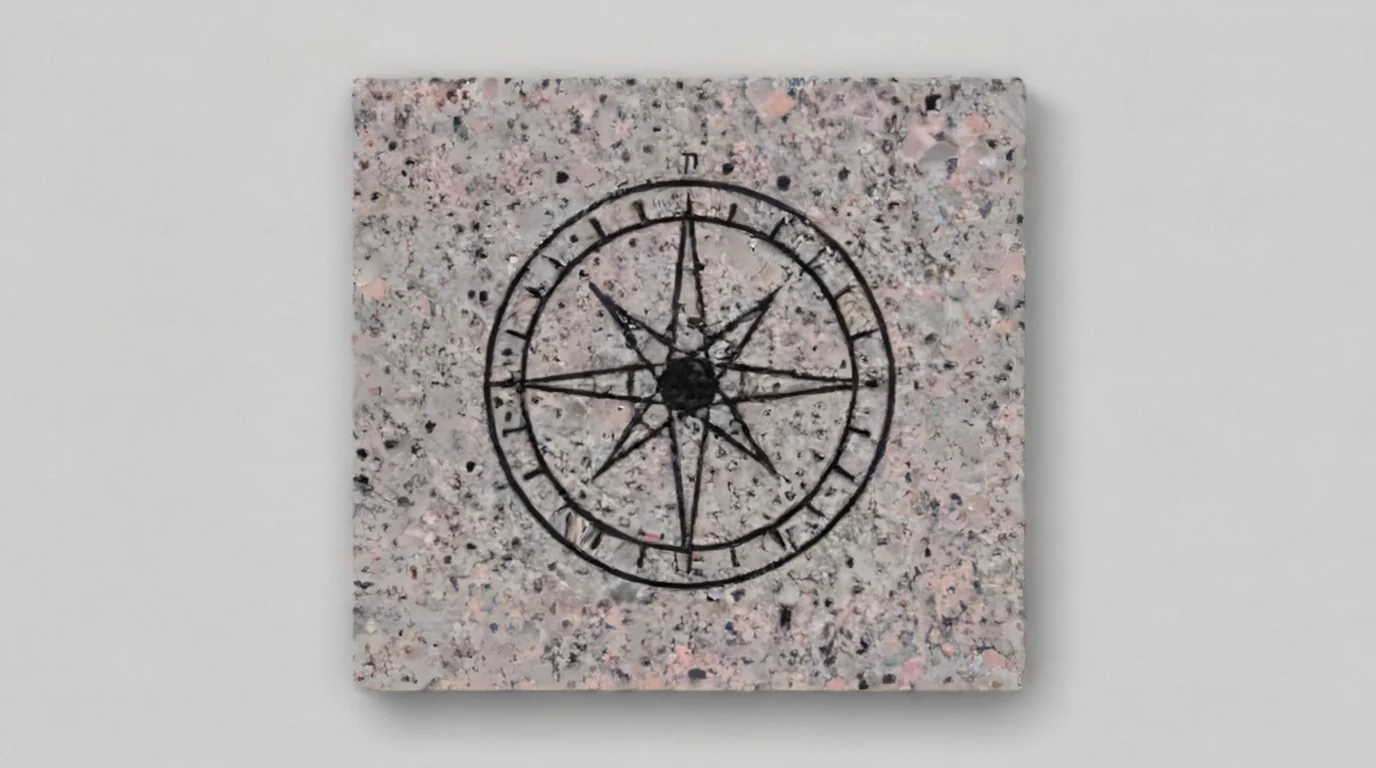 On light granite, a paint fill turns a faint frosted mark into a bold one. Flood it, then wipe the surface clean. (AI-generated example.)
River rocks and pebbles aren't always granite. Stephen Micalizzi's advice in his F2 Ultra UV rock video is that "all rocks are different".
Engineered "quartz" countertop offcuts aren't granite. HSE says engineered stone is typically about 95% crushed stone bound with about 5% resin, usually polyester. I found no UV source for it, so don't treat it as granite.
What kind of mark will you get?
On polished dark granite, the frosted area scatters light, so it reads light grey to white. On light granite, it's close to the base color, so contrast is low. Watch the energy: Atomm's stone guide says that past a certain power the surface powders and the mark goes grey and dusty, and LaserSettings adds that a second pass greys the white you already achieved.
How do I get a bolder mark on light granite?
- Paint fill. Trotec recommends filling the engraving with acrylic paint on bright stones. LaserBeamForge's method is to flood the recess, let it settle but not cure, then wipe the surface with a lightly dampened cloth.
- Mask first if you can. Trotec suggests putting application tape on before engraving, engraving through it, painting, then peeling the tape so the paint only stays in the design.
- Use the right fill for the stone. LaserBeamForge suggests white or gold on dark granite and black or a deep color on light stone. OMTech mentions Rub 'n Buff wax for shallow stone marks, since it buffs off a flat surface but stays in the etch.
Can the F2 Ultra UV deep-engrave or emboss granite?
It can do relief on stone, but expect long run times. The closest example is Stephen Micalizzi's river rock on the F2 Ultra UV. The Studio panel on screen shows Embossment mode, 100 layers, 100% power, 300 mm/s, 40 kHz, 450 lines/cm, an engraving angle of 15, and the Z-axis descending 0.01 mm every 10 layers. It took about an hour and five minutes for one small rock.
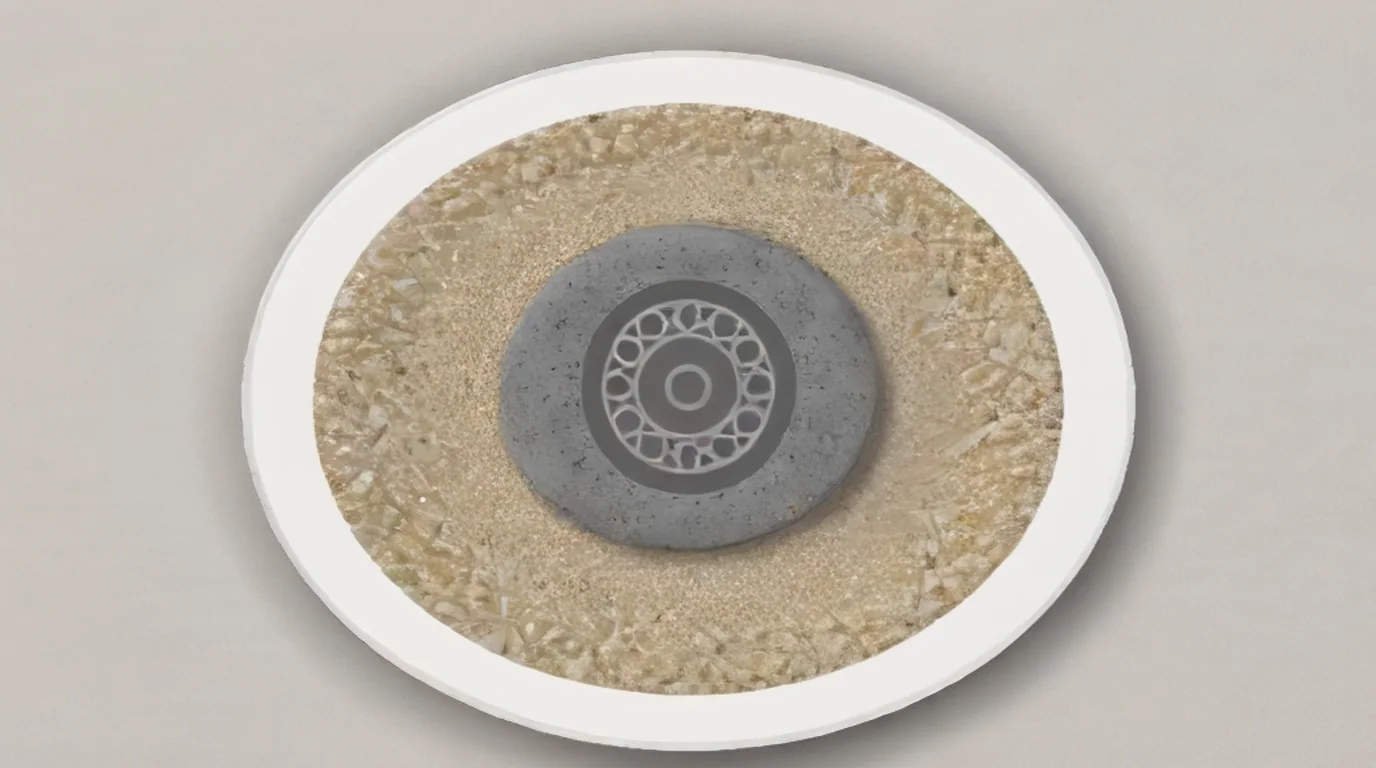 A bowl of sand holds a round rock level, which matters more than anything else for relief work. (AI-generated example.)
Steve Makes Everything shows a relief mandala on a river stone with the F2 Ultra UV and says relief settings "don't really change a whole lot except for the speed" between materials. His relief test on slate compared 1,000, 2,000 and 4,000 mm/s, and the slower squares came out visibly deeper.
ComMarker's 6W Omni X needed 256 passes for 4 mm of depth in stone, so real depth takes time. Neither relief example is granite, which is harder than slate, so test a small relief on an offcut first.
How should I set up a granite job?
- Clean it first. Trotec recommends cleaning stone before and after engraving for the best contrast. Remove dust, oil and any sealer.
- Check for a coating. Atomm warns that coated or sealed stone is a different material, because the coating burns before the stone marks.
- Keep it level. Atomm says flatness matters more than thickness, and a bowed blank is what causes most patchy engraves. For a round rock, Stephen Micalizzi sets it in a bowl of sand and levels it.
- Focus on the top surface. Stephen notes that the camera gets you close, but manual framing is better. Trotec suggests trying a negative focus offset on extremely hard stones.
- Prepare the art for stone. Hopestech says stone is effectively binary, so invert photos for black granite (the laser should fire on the light parts) and dither them. Use bold vector shapes for text.
What I saw in the videos
I pulled frames from the videos instead of only reading transcripts. I didn't find an F2 Ultra UV video on granite itself, so these are the closest evidence.
- AM.CO.ZA, "Laser Engraving Granite on LabelMark-UV 5W Laser Marking Machine": The marking panel on screen shows Velocity 800 mm/s, Power 95%, Frequency 22 kHz and 1 process, and the fill panel shows a line spacing of 0.08 mm. The frequency was first 25 kHz on screen, then he typed 22. The engraved table number on a light pink-grey offcut was barely visible until he stained it with black ink and wiped it.
- Stephen Micalizzi, "Deep Rock Engraving using xTool F2 Ultra UV Engraver": The xTool Studio panel shows Embossment, Unknown Material, 100 layers, 100% power, 300 mm/s, 1 pass, 40 kHz, 450 lines/cm, engraving angle 15, and Z descent of 0.01 mm every 10 layers. The rock sits in a bowl of sand. The close-ups show a deep, crisp relief, and he notes the first rock's grain made it less smooth than the second.
- JT Makes It, "UV Laser vs. Fiber Laser – Which One Should You Choose?": On stone, the UV marks on a river rock and a dark stone tile are light and fine, and he says the fiber laser went deeper with more contrast.
- Full Spectrum Laser, Muse UV on granite: A memorial photo is marked in light grey on polished black granite. No settings are readable, so I took none.
Step-by-step: engraving granite on the F2 Ultra UV
1. Know your stone
Confirm it's natural granite, not engineered quartz or sealed stone. Note whether it's polished, honed or raw, and dark or light.
2. Clean and level
Wipe off dust and oil and let it dry. Lay a slab flat, or set a rock in a bowl of sand and level it.
3. Focus
Focus on the top surface. Frame it manually rather than trusting the camera alone.
4. Prepare the art
Use bold vector text and solid shapes. For photos, invert and dither them for dark granite.
5. Grid, then engrave
Run a 5 x 5 material test array on an offcut from 60-100% power and 200-1,000 mm/s, at 300 lines/cm, 40 kHz and 1 pass. Wipe it, pick the brightest clean square, then run the job with the lid closed and extraction on.
6. Finish
Wipe the dust off with a damp cloth, not an air gun. On light granite, paint fill the design and wipe the surface clean before it cures.
What should I do if the mark looks wrong?
| Problem | Likely cause | What to try |
|---|---|---|
| Mark is too faint | Too fast, too little power, or out of focus | Slow down or raise power in small steps, then refocus |
| Mark is grey and powdery | Too much energy, or a second pass | Speed up or lower power, and stick to 1 pass |
| Fine lines look broken | Granite speckle | Use bolder lines and larger text |
| Contrast varies across the slab | Slab not flat | Level it, or refocus for the high side |
| Mark barely shows on light granite | Frosted mark close to base color | Paint fill, or switch to polished black granite |
| Surface chips or cracks | Too slow or too much power | Increase speed or lower power, per ComMarker |
| Coating burns or bubbles | Sealed or coated stone | Strip the sealer or test it as its own material |
| Relief looks shallow | Too fast for the stone | Lower speed, then add layers |
Safety and aftercare
- Silica dust is the real hazard. HSE's stone dust guidance puts granite at 20-45% crystalline silica, typically 30%. OSHA's crystalline silica overview says breathing respirable silica can cause silicosis, lung cancer, COPD and kidney disease. Keep the lid closed until the dust settles, and run extraction.
- Clean up wet, not with air. LaserSettings recommends wiping with a damp cloth rather than an air gun. Graniteart's monument guide recommends HEPA-filtered dust extraction and an N95 or better respirator.
- UV light is invisible. L3D's slate guide says to close the lid or wear UV-rated glasses, and to run extraction because stone makes fine particles.
- Keep the lens clean. ComMarker notes that stone dust can scatter UV light, so clean the lens regularly.
- Do your own outdoor check. I didn't find a source on how a UV mark on granite holds up outdoors for years, so don't promise it.
What I couldn't confirm
- A verified F2 Ultra UV granite recipe with every value visible.
- Whether xTool Studio has a granite preset, and what its numbers are.
- How frequency changes the granite mark on this machine, since the granite video ran at 22 kHz, below the F2 Ultra UV's range.
- How long an F2 Ultra UV relief takes on granite rather than river rock or slate.
- Whether the river rocks in the relief videos were granite.
FAQ
Can the xTool F2 Ultra UV engrave granite?
Yes. xTool lists stone among the materials the F2 Ultra UV can process, and it marks granite by frosting the surface. Polished black granite gives the best contrast. There's no public granite recipe for it.
What are the best F2 Ultra UV settings for granite?
There isn't a verified number to copy. Run a material test array on an offcut from 60-100% power and 200-1,000 mm/s at 300 lines/cm, 40 kHz and 1 pass, and pick the brightest clean square. That grid is an untested starting point.
Why is my granite engraving grey instead of white?
Usually too much energy. Atomm notes that past a certain power, stone powders and goes grey, and LaserSettings says a second pass greys the white. Speed up, lower power, and stick to one pass.
Does light granite work on the F2 Ultra UV?
It marks, but the contrast is low. In a 5W UV demo on light granite, the mark was barely visible until it was stained with ink. Plan a paint fill, or use black granite.
Can the F2 Ultra UV do deep engraving on granite?
It can do relief on stone in Embossment mode, but slowly. The closest example, a river rock at 100 layers, took about an hour and five minutes. I found no granite relief example on this machine.
Can the F2 Ultra UV cut granite?
No. Atomm's stone guide says stone engraves but doesn't cut, and this is a 5W marking laser.
Is UV or fiber better for granite?
JT Makes It found fiber engraved stone deeper with more contrast, while UV gave a lighter, shallower mark. UV suits fine surface marks on polished black granite.
Is it safe to laser granite?
Only with dust control. Granite contains 20-45% crystalline silica, according to HSE. Keep the lid closed, run extraction, clean with a damp cloth, and consider an N95 or better respirator.
Related guides
- xTool F2 Ultra UV slate settings
- Can a UV laser engrave slate?
- xTool F2 Ultra UV ceramic settings
- xTool F2 Ultra UV glass settings
- How to focus a UV laser
- How to calibrate the xTool F2 Ultra UV
- Best self-centering jigs for the F2 Ultra UV
- Best inline fans for the F2 Ultra UV
- Best UV laser blanks to buy and sell
- UV laser project ideas
Final thoughts
Granite works on the F2 Ultra UV, but there's no public recipe to copy. Start with polished black granite, run a material test array on an offcut near full power, and pick the brightest square, not the most burned one. Stick to one pass, plan a paint fill for light stone, and treat relief as an hour-long job. Above all, take the dust seriously: keep the lid closed and the extraction running.
Sources and further watching
- xTool Support - Processing Parameter Settings / Material test array (article 2698): https://support.xtool.com/article/2698
- xTool Support - Processing Parameters for xTool F2 Ultra UV (article 2699): https://support.xtool.com/article/2699
- xTool Support - Safety First for xTool F2 Ultra UV (article 2753): https://support.xtool.com/article/2753
- Atomm - Slate and stone for laser engraving (stone hub): https://www.atomm.com/c/laser-stone
- Atomm Materials Lab - Round Rock Coaster: https://www.atomm.com/materials-lab/official/3838-round-rock-coaster
- Atomm - P2 Black Granite Test Grid (CO2 maker project): https://www.atomm.com/project/51199-p2-black-granite-test-grid
- xTool - Stone Engraving with a Laser: The Complete Guide: https://www.xtool.com/blogs/xtool-academy/laser-stone-engraving
- xTool - How to Engrave Stone, step-by-step: https://www.xtool.com/blogs/how-to/engrave-stone
- L3D Accessories - xTool F2 Ultra UV laser settings: https://www.l3daccessories.com/pages/xtool-f2-ultra-uv-laser-settings
- L3D Accessories - Slate coaster engraving on the F2 and F2 Ultra UV: https://www.l3daccessories.com/blogs/learn/slate-coaster-engraving-xtool-f2-f2-ultra-uv
- Bonny Creations - xTool F2 Ultra UV laser settings: https://www.bonnycreations.com/settings/machines/xtool-f2-ultra-uv
- ComMarker - How to engrave stone with the Omni X UV: https://blog.commarker.com/archives/55299
- ComMarker - Omni X material guide: https://blog.commarker.com/archives/55305
- ComMarker - How to laser engrave stone and quartz: https://blog.commarker.com/archives/56235
- Trotec - Laser engraving of stones: https://www.troteclaser.com/en-us/helpcenter/materials/material-usage-hints/stone-laser-engraving
- LaserSettings - Marble and granite laser engraving: https://lasersettings.fr/en/material/marbre
- Laser Delta (laseracc) - Laser engraving stone, a beginner guide: https://laseracc.com/laser-engraving-stone-a-beginner-guide.html
- Hopes Tech - Laser engraving stone guide: https://hopestech.co.uk/laser-engraving-stone-the-ultimate-guide-to-materials-machines/
- Redsail Laser - Laser engraving granite guide (CO2): https://www.redsaillaser.com/archives/4999.html
- LaserBeamForge - Stone engraving paint-fill technique: https://laserbeamforge.com/stone-engraving-paint-fill-technique/
- OMTech - How to add color to laser engraving: https://omtech.com/blogs/knowledge/how-to-add-color-to-laser-engraving
- HSE - Controlling exposure to stone dust (HSG201): https://www.hse.gov.uk/pubns/priced/hsg201.pdf
- OSHA - Crystalline silica overview: https://www.osha.gov/silica-crystalline
- Graniteart - Laser safety essentials for monument engraving: https://www.graniteart.com/blog/what-s-happening-at-graniteart-23/laser-safety-essentials-for-monument-engraving-161
- Wikipedia - Granite: https://en.wikipedia.org/wiki/Granite
Further watching (embeds)
- AM.CO.ZA - Achievement Matters - "Laser Engraving Granite on LabelMark-UV 5W Laser Marking Machine": https://www.youtube.com/watch?v=oINq-kCy-54
- Stephen Micalizzi - "Deep Rock Engraving using xTool F2 Ultra UV Engraver": https://www.youtube.com/watch?v=5L5p241WHAs
- JT Makes It - "UV Laser vs. Fiber Laser – Which One Should You Choose? [ALL MATERIALS TESTED]": https://www.youtube.com/watch?v=TEGiheuk6SM
Also referenced: Steve Makes Everything - "INSANE Relief Engravings with the xTool F2 Ultra UV" (https://www.youtube.com/watch?v=9itiSeds1S4) and Full Spectrum Laser - "Engraving Granite With The Muse UV Laser" (https://www.youtube.com/watch?v=qJ1pGTRXfL4).
A 5W UV marker engraves a table number on a light granite offcut at 95% power, 800 mm/s and 22 kHz with a 0.08 mm hatch, then the mark is stained with ink for contrast. (Video: AM.CO. ZA - Achievement Matters on YouTube.)
Deep relief on river rocks with the xTool F2 Ultra UV in Embossment mode, with the xTool Studio settings on screen and the rock levelled in a bowl of sand. (Video: Stephen Micalizzi on YouTube.)
A UV laser and a fiber laser are compared across materials, including stone, where the UV mark is lighter and shallower than the fiber mark. (Video: JT Makes It on YouTube.)
Related settings
- xTool F2 Ultra UV Bamboo Settings: Cutting Boards, Coasters & Plywood (2026)
- xTool F2 Ultra UV Polycarbonate Settings: PC Sheet, Cases & Cards (2026)
- xTool F2 Ultra UV Cork Settings: Coasters, Sheets & Photo Chart (2026)
- xTool F2 Ultra UV Marble Settings: Black, White & Green Marble Chart (2026)
- xTool F2 Ultra UV Gold Settings: Solid, Gold-Filled & Gold-Plated Jewelry (2026)
- xTool F2 Ultra UV Silver Settings: Sterling Silver Jewelry, Tags & Pendants (2026)
- xTool F2 Ultra UV Copper Settings: Sheet, Tags & Copper-Clad PCB Blanks (2026)
- xTool F2 Ultra UV Aluminum Settings: Bare Sheet, Cards, Tags & ID Plates (2026)
- xTool F2 Ultra UV Silicone Settings: Wristbands, Watch Bands & Phone Cases (2026)
- xTool F2 Ultra UV Titanium Settings: Color Mark, Dark Mark & Jewelry Chart (2026)
- xTool F2 Ultra UV Paper & Cardstock Settings (2026 Guide)
- xTool F2 Ultra UV ABS Settings: Presets, Test Grid & Safety Guide (2026)
- xTool F2 Ultra UV Brass Settings: Tags, Sheet & Coin Emboss Chart (2026)
- xTool F2 Ultra UV Crystal Settings: 3D Inner Engraving Guide (2026)
- xTool F2 Ultra UV Anodized Aluminum Settings: Business Cards & More (2026)
- xTool F2 Ultra UV Leather Settings: Genuine, Faux & Leatherette Chart (2026)
- xTool F2 Ultra UV Stainless Steel Settings: Dark, White, Color & Photo Chart (2026)
- xTool F2 Ultra UV Wood Settings: Basswood, Plywood, Pine & MDF Chart (2026)
- xTool F2 Ultra UV Acrylic Settings: Clear, Black & White Chart (2026)
- xTool F2 Ultra UV Ceramic Settings: Tiles & Mugs Chart (2026)
- xTool F2 Ultra UV Glass Settings: Flat Glass & Rotary Chart (2026)
- xTool F2 Ultra UV PLA Settings: 3D Print Colour Chart (2026)
- xTool F2 Ultra UV Slate Settings: Power, Speed & Frequency Chart (2026)
- xTool F2 Ultra UV Tumbler Settings: Powder-Coated & Stainless (2026)
- Can a UV Laser Engrave Slate?
- Can a UV Laser Engrave Glass?
Keep reading
xTool F2 Ultra UV Bamboo Settings: Cutting Boards, Coasters & Plywood (2026)
Sourced xTool F2 Ultra UV bamboo settings for cutting boards, coasters and plywood, with a starting test grid, glue-line tips and food-safe finishing.
Read more19 min read
xTool F2 Ultra UV Polycarbonate Settings: PC Sheet, Cases & Cards (2026)
Sourced xTool F2 Ultra UV polycarbonate settings for clear, white and black PC, with a starting test grid, mark colors, fume safety and fixes.
Read more18 min read

xTool F2 Ultra UV Cork Settings: Coasters, Sheets & Photo Chart (2026)
Sourced xTool F2 Ultra UV cork settings for coasters, thin sheet and photos, with xTool's presets, a test grid, cutting notes and cleanup tips.
Read more20 min read